
Installing Customerly’s live chat widget on your website is a powerful way to engage with visitors in real time, offer instant support, and increase conversions. Whether you're using a CMS like WordPress or adding code manually, Customerly makes it easy with several flexible options.
🔧 Step 1: Open your installation settings
To access your installation options:
Log into your Customerly account.
Go to your project.
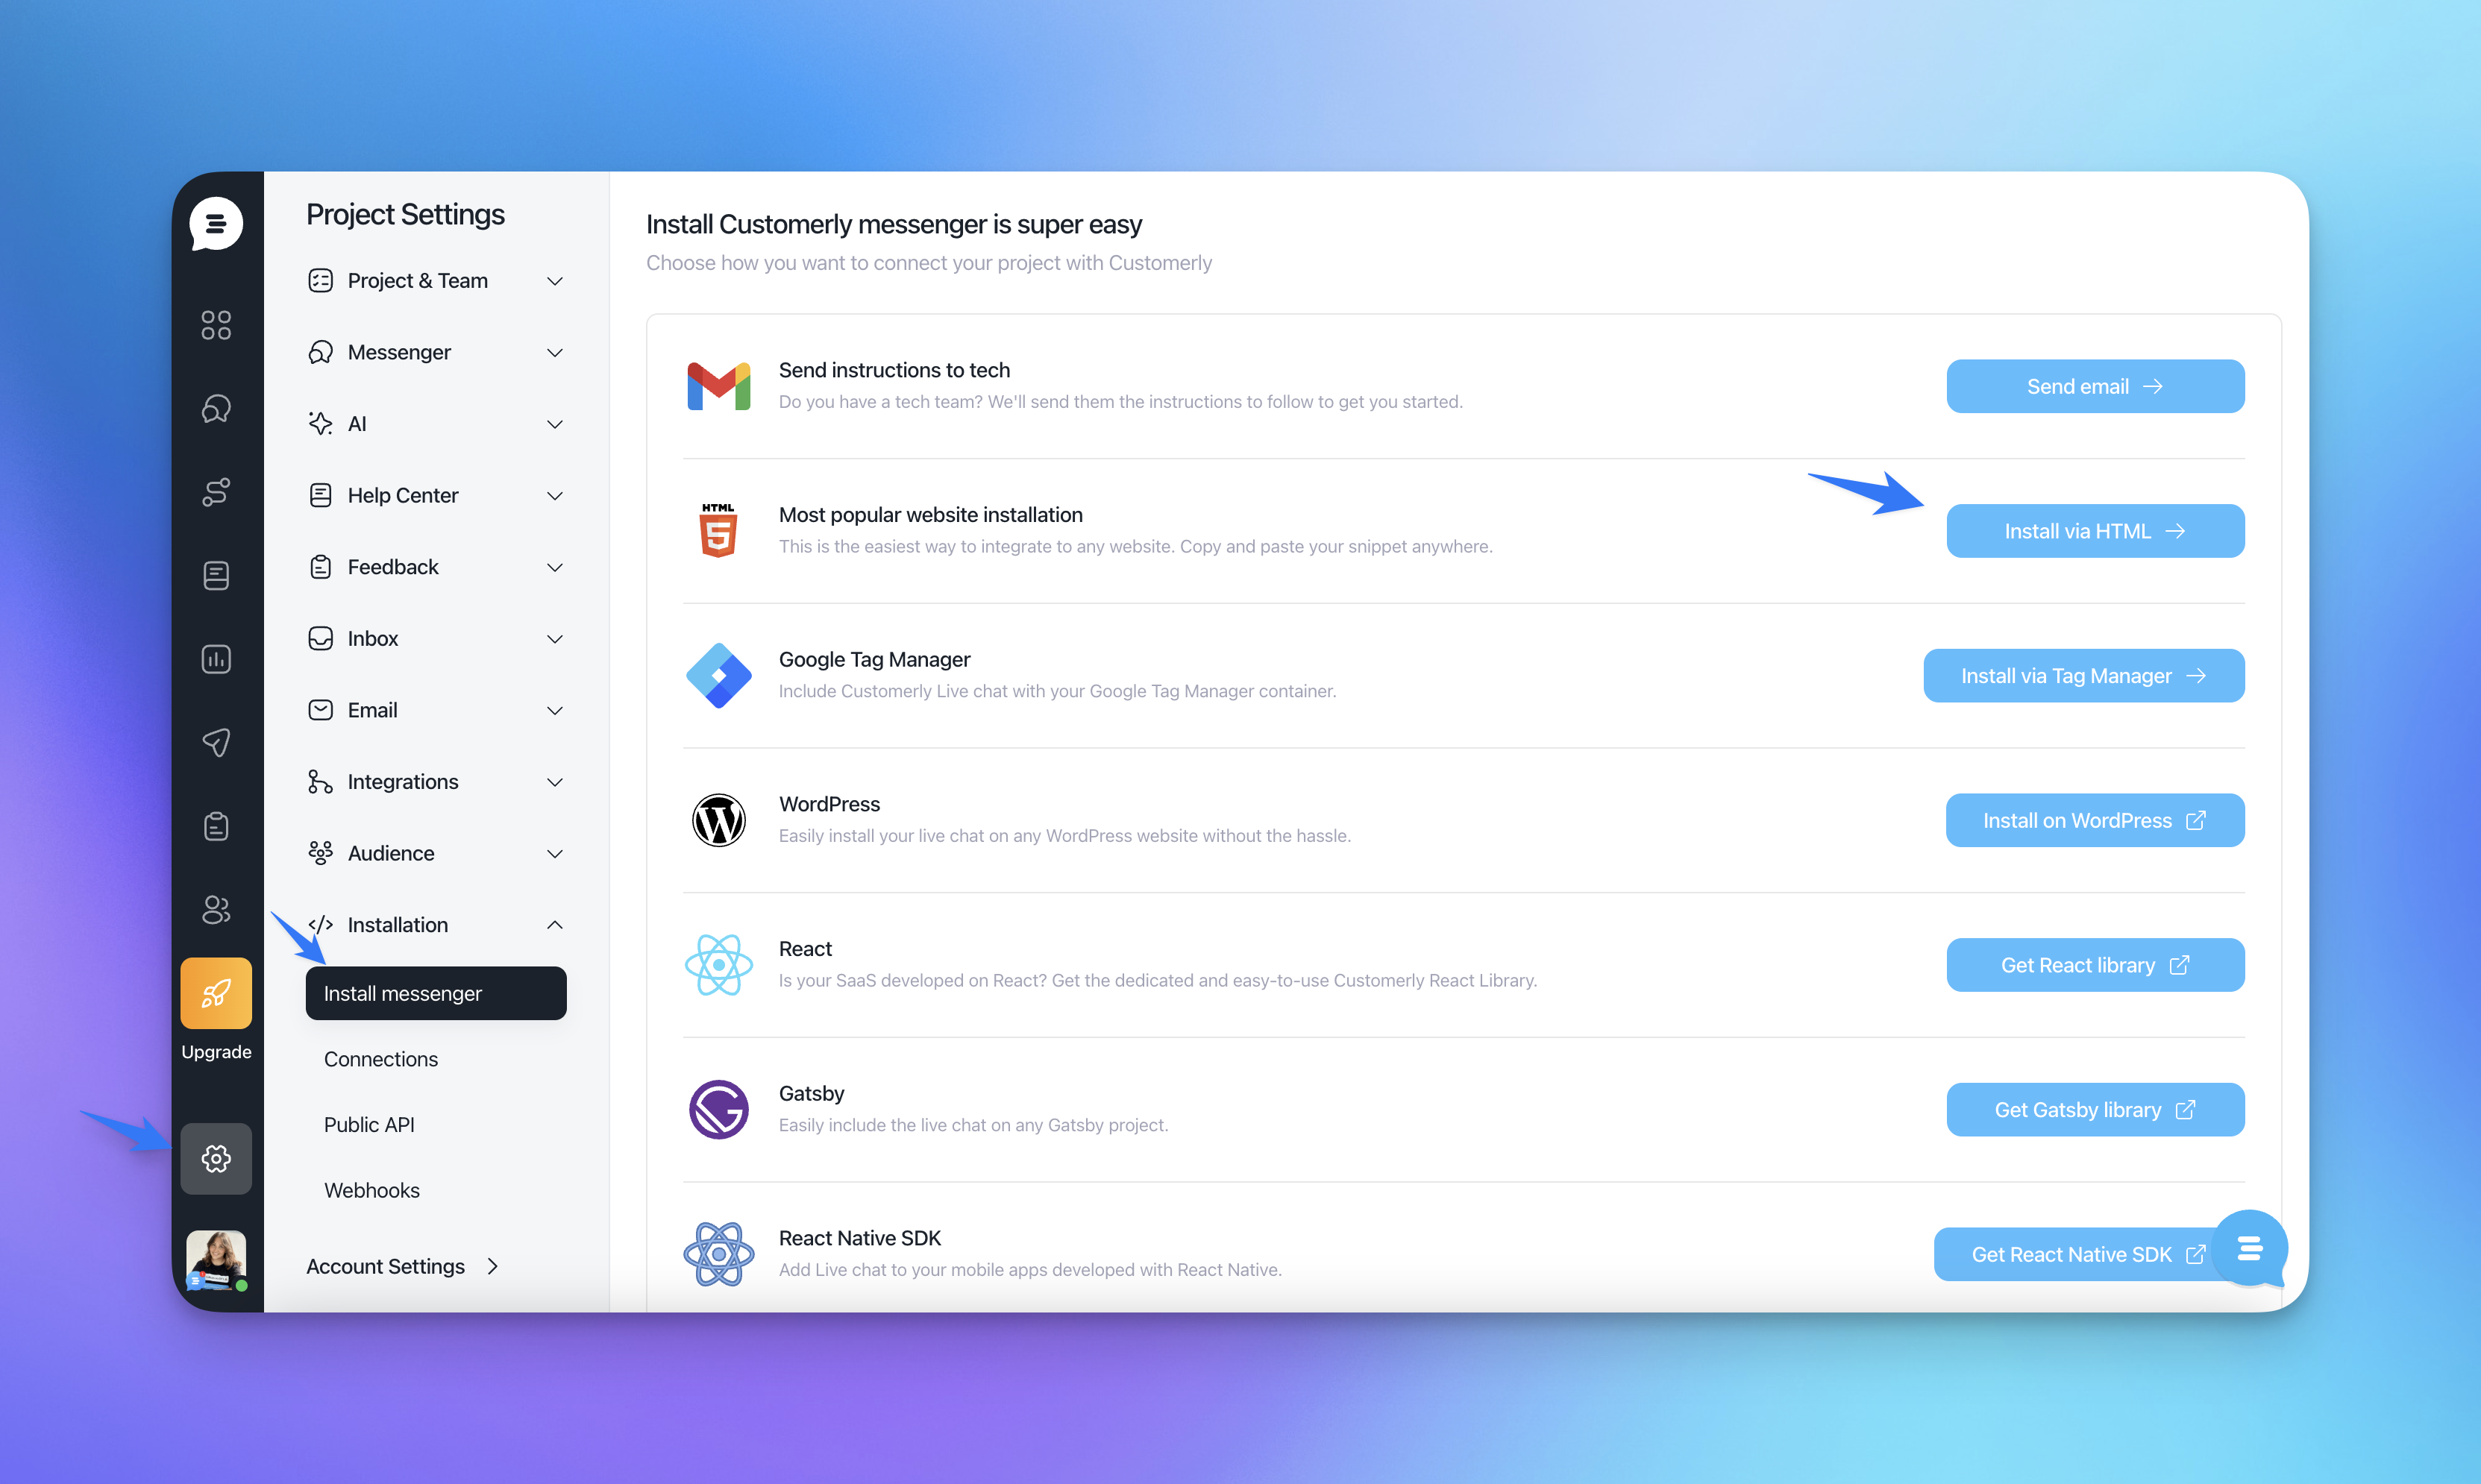
Click on Settings from the left sidebar.
Select Installation > Install Messenger.
Or go directly to:
👉 Customerly Messenger Installation Page
⚙️ Step 2: Choose your installation method
Customerly offers multiple installation methods depending on your platform and technical preference:
🔹 Option A: Add JavaScript manually (for developers)
This is the most flexible option. To manually add Customerly to your website:
Go to the Install Messenger section.
Click Most popular website installation
Copy the JavaScript snippet provided.
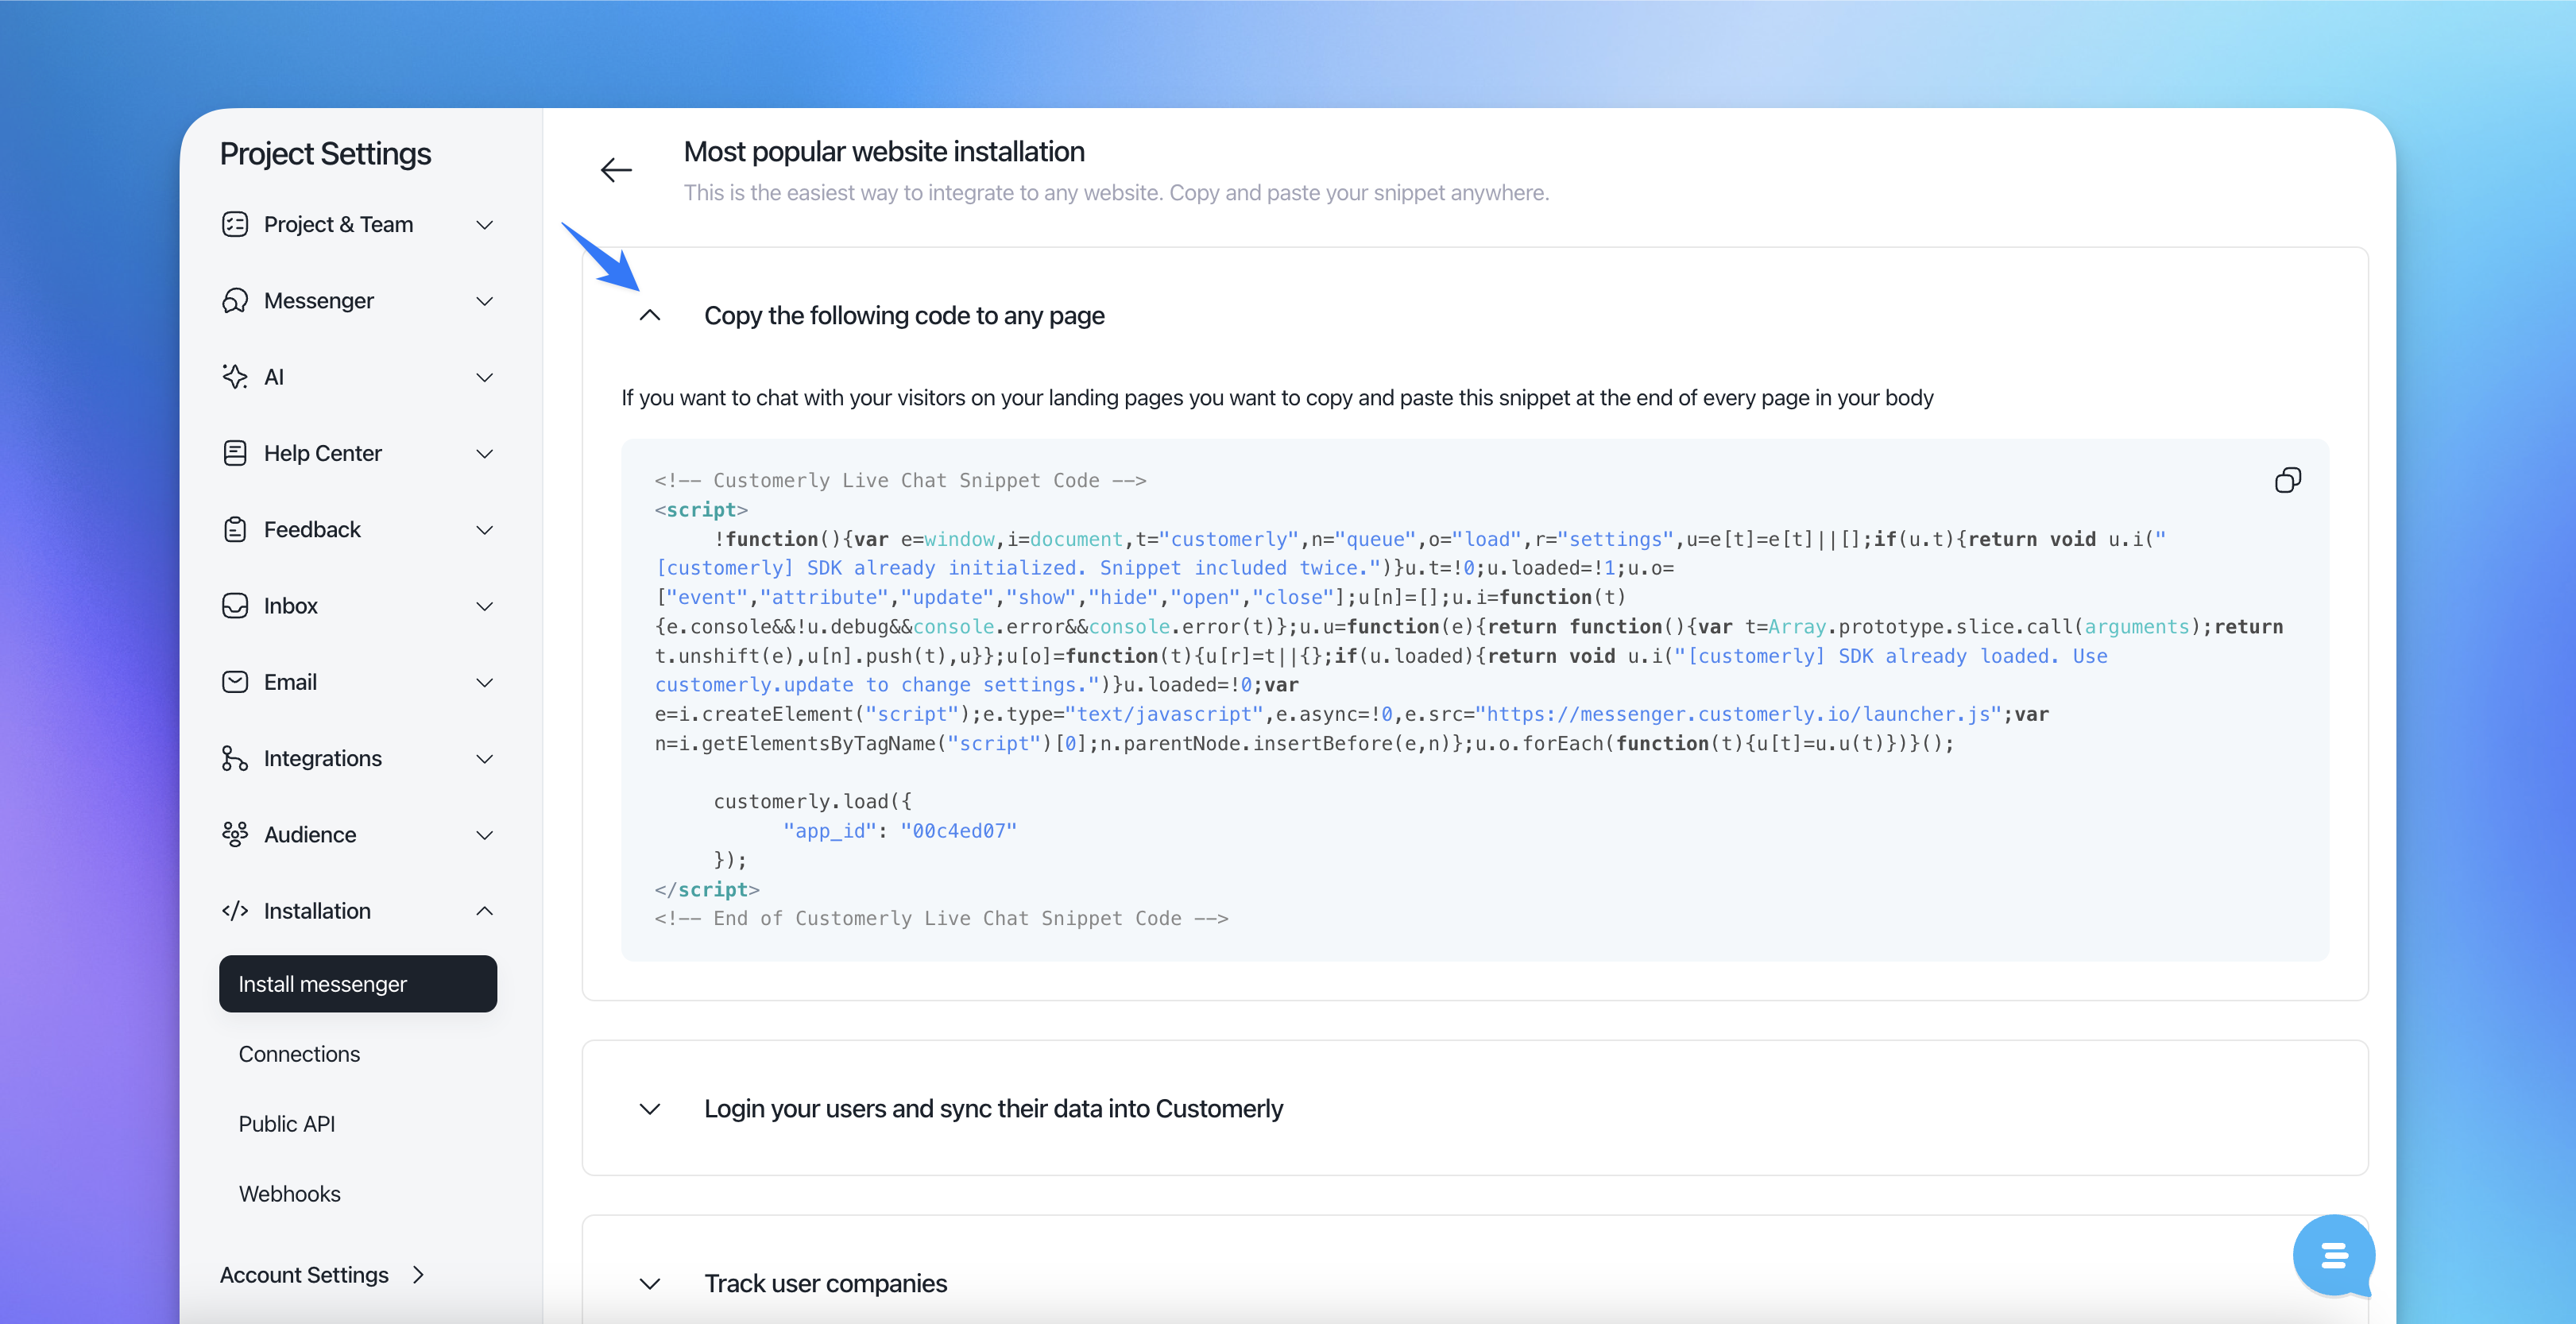
Paste the script right before the closing
</body>tag of your website’s HTML.
Here’s the full documentation on JavaScript installation if you need additional help.
🔹 Option B: Install via CMS plugin (e.g. WordPress, Shopify, Webflow, etc.)
If you use a website builder or CMS, you’ll find specific instructions available:
Look for your platform under the “Install Messenger” section.
Follow the step-by-step guide tailored to that system.
Most integrations involve simply pasting your Customerly Project ID into a plugin or script block.
🔹 Option C: Email the instructions to your developer
Not sure how to do it yourself? No worries.
From the same Install Messenger screen, click Send installation instructions via email.
Enter your developer’s email address, and we’ll send them everything they need to get set up.
✅ Step 3: Confirm installation
After installation:
Visit your website where the script was added.
Refresh the page.
You should now see the live chat widget appear in the bottom corner of your website.
You can always customize its appearance, position, and language later under Messenger Settings.
💬 Need help?
If you run into issues or want a guided setup, don’t hesitate to reach out to Customerly support via the chat or check out the full installation documentation here.
Getting started with live chat has never been easier. With a few clicks, you can start talking to your website visitors and converting them into loyal customers today!