This is the only way to initiate a WhatsApp conversation with a contact without them messaging you first.
Before you start
Your WhatsApp Business number must be connected to Customerly. If you haven't done this yet, follow the guide here: How to Connect WhatsApp to Customerly.
You need at least one approved WhatsApp message template in your Meta Business account.
Your Meta (Facebook) business account must have a valid payment method configured. Meta charges per template/conversation, without a payment method, sending will fail.
Your audience must include contacts with a valid
whatsapp_numberproperty. The WhatsApp Template flow action will only deliver messages to contacts who have this property filled in with a valid WhatsApp number. If you use a broad audience without filtering forwhatsapp_number, the message won't reach contacts who don't have one, so make sure to include this condition in your audience definition
How the WhatsApp template flow action works
The WhatsApp template flow action allows you to send a pre-approved WhatsApp template message to contacts who match a specific audience. Unlike sending templates manually from the inbox, this flow action lets you automate proactive outreach at scale: for example, re-engaging inactive users, sending onboarding follow-ups, or notifying a segment about important updates.
Important: The WhatsApp Template action only supports text-only templates. Templates with interactive buttons or special components are not supported yet and won't appear in the template picker.
Set up a workflow with WhatsApp template flow action
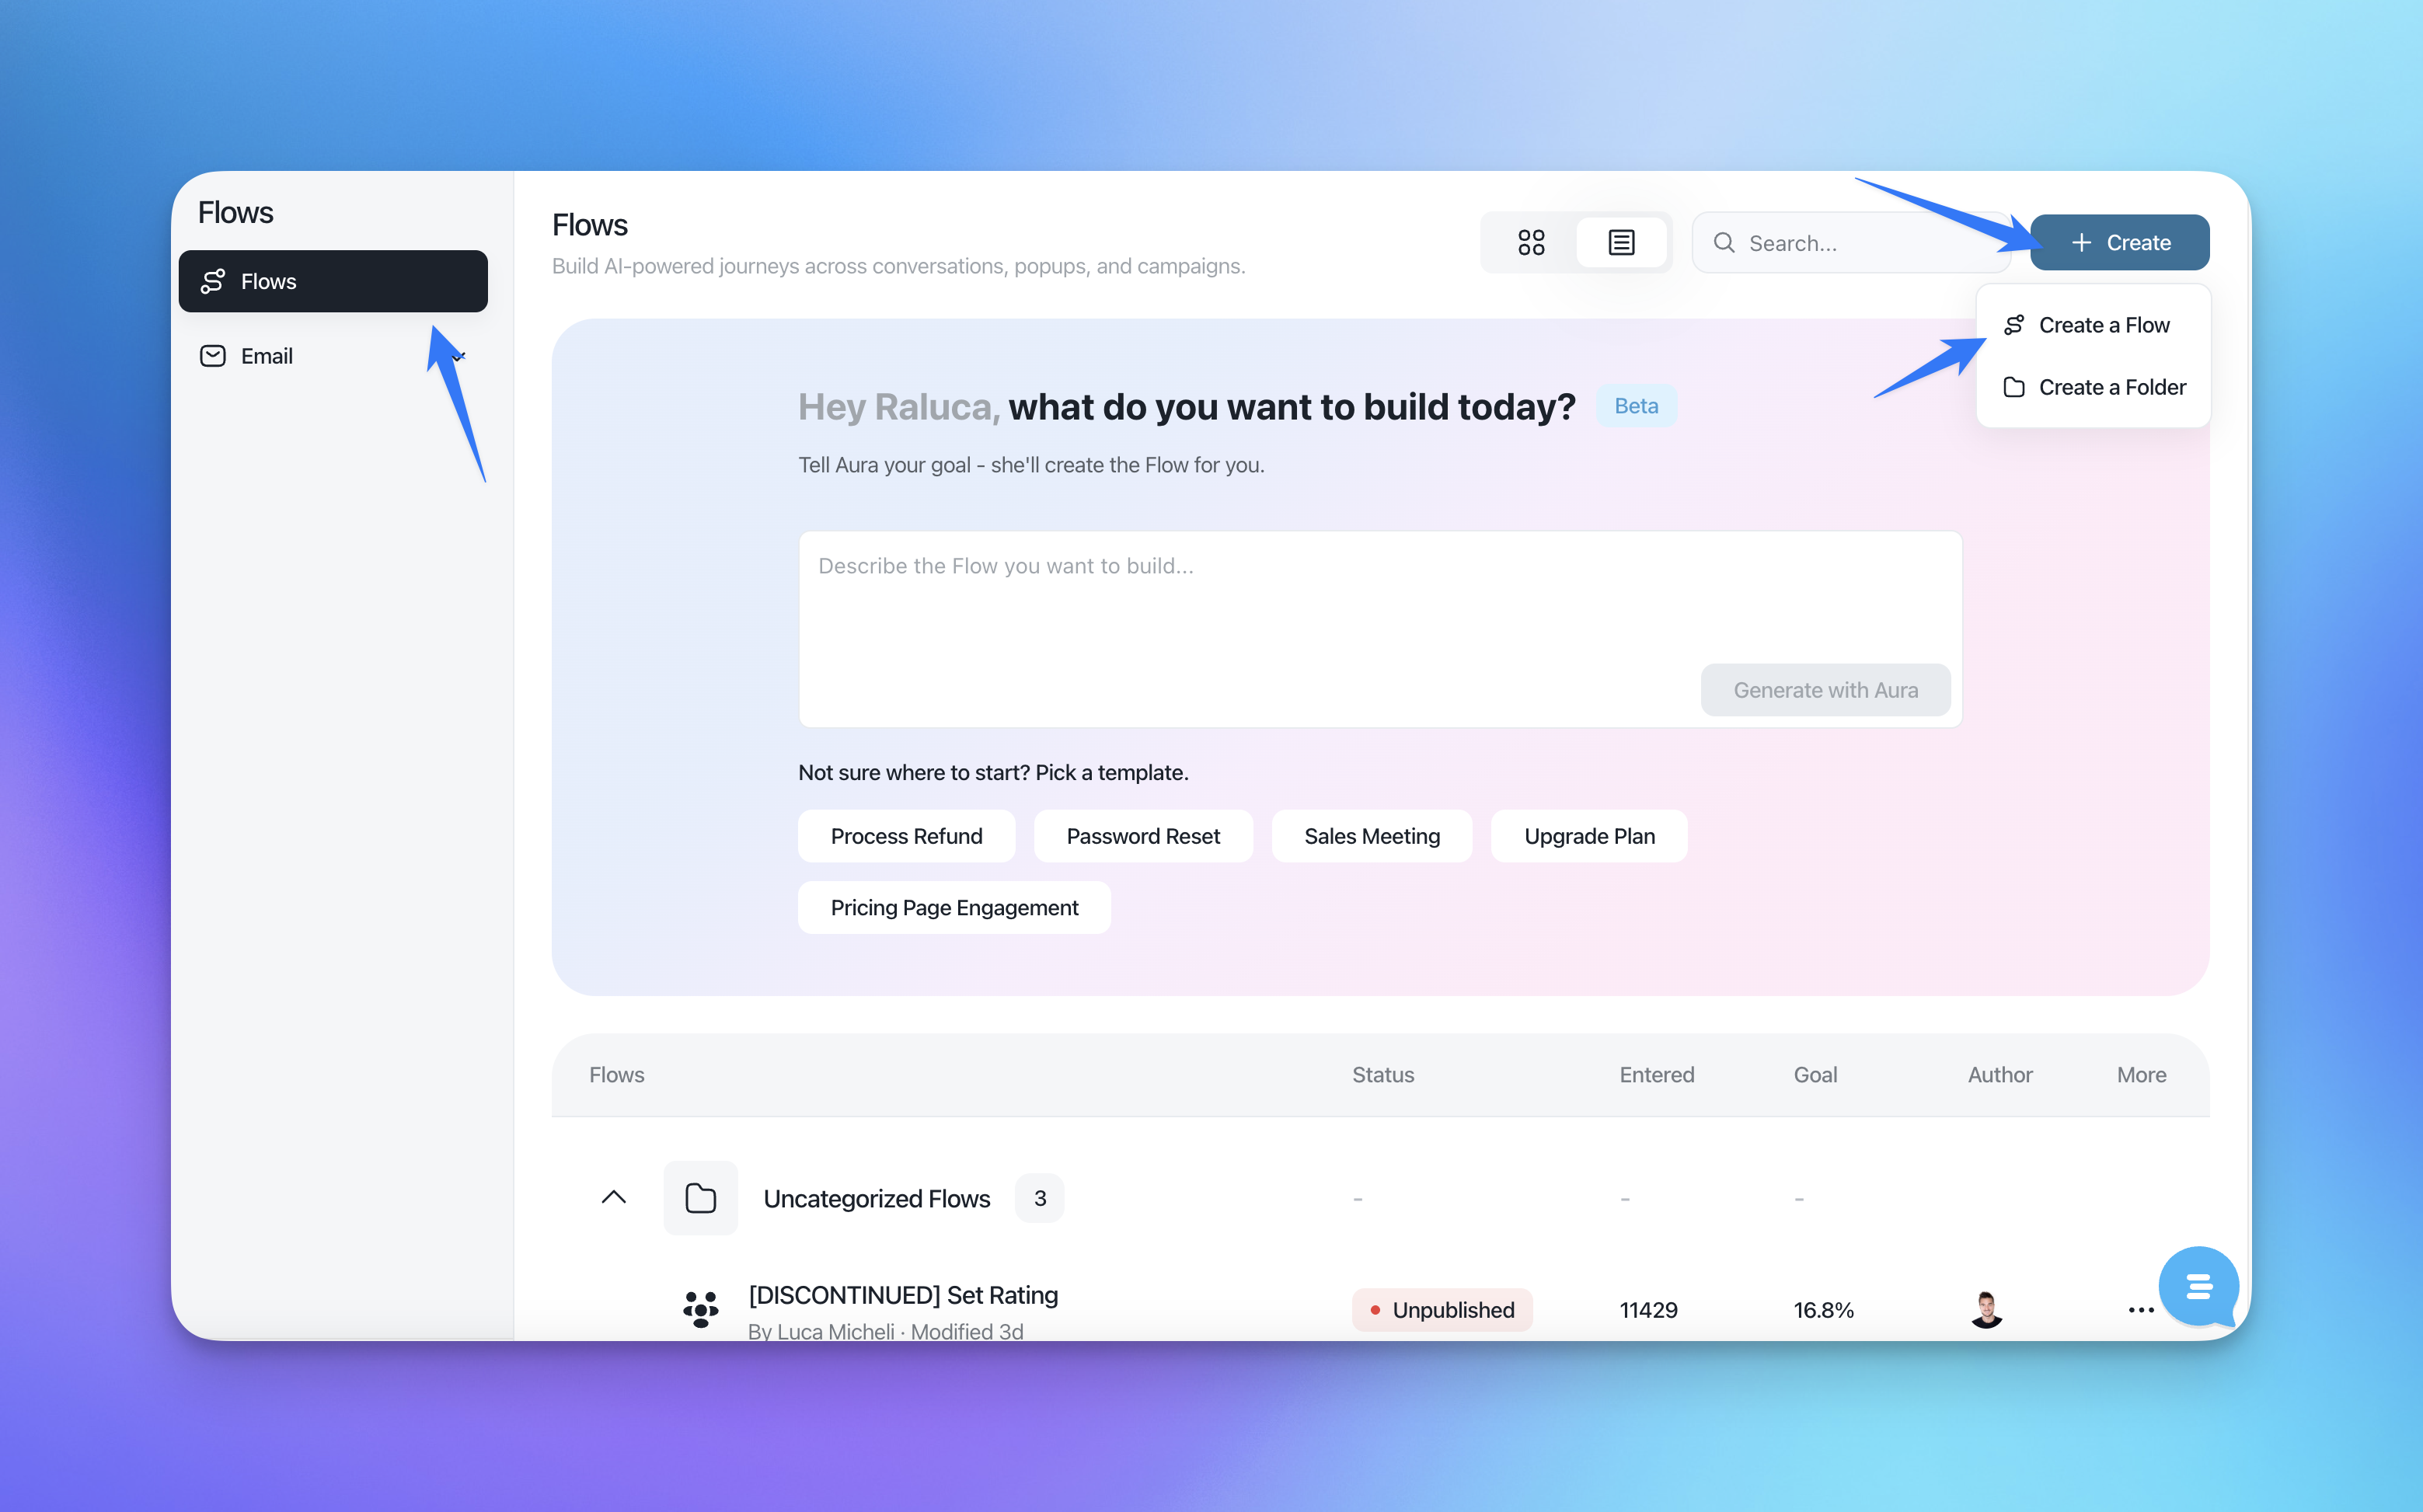
Step 1: Create a new workflow
Go to Flows and create a new flow (or edit an existing one) > create manually
Step 2: Add the Audience matched trigger
The only way to send proactive WhatsApp messages is by using the Audience matched trigger. This trigger fires when a contact enters a specific audience (segment) you've defined.
Click the + button on the canvas and select Audience matched as your starting trigger.
Make sure the audience you select filters for contacts with a valid whatsapp_number. This ensures the template is only sent to contacts who can actually receive it.
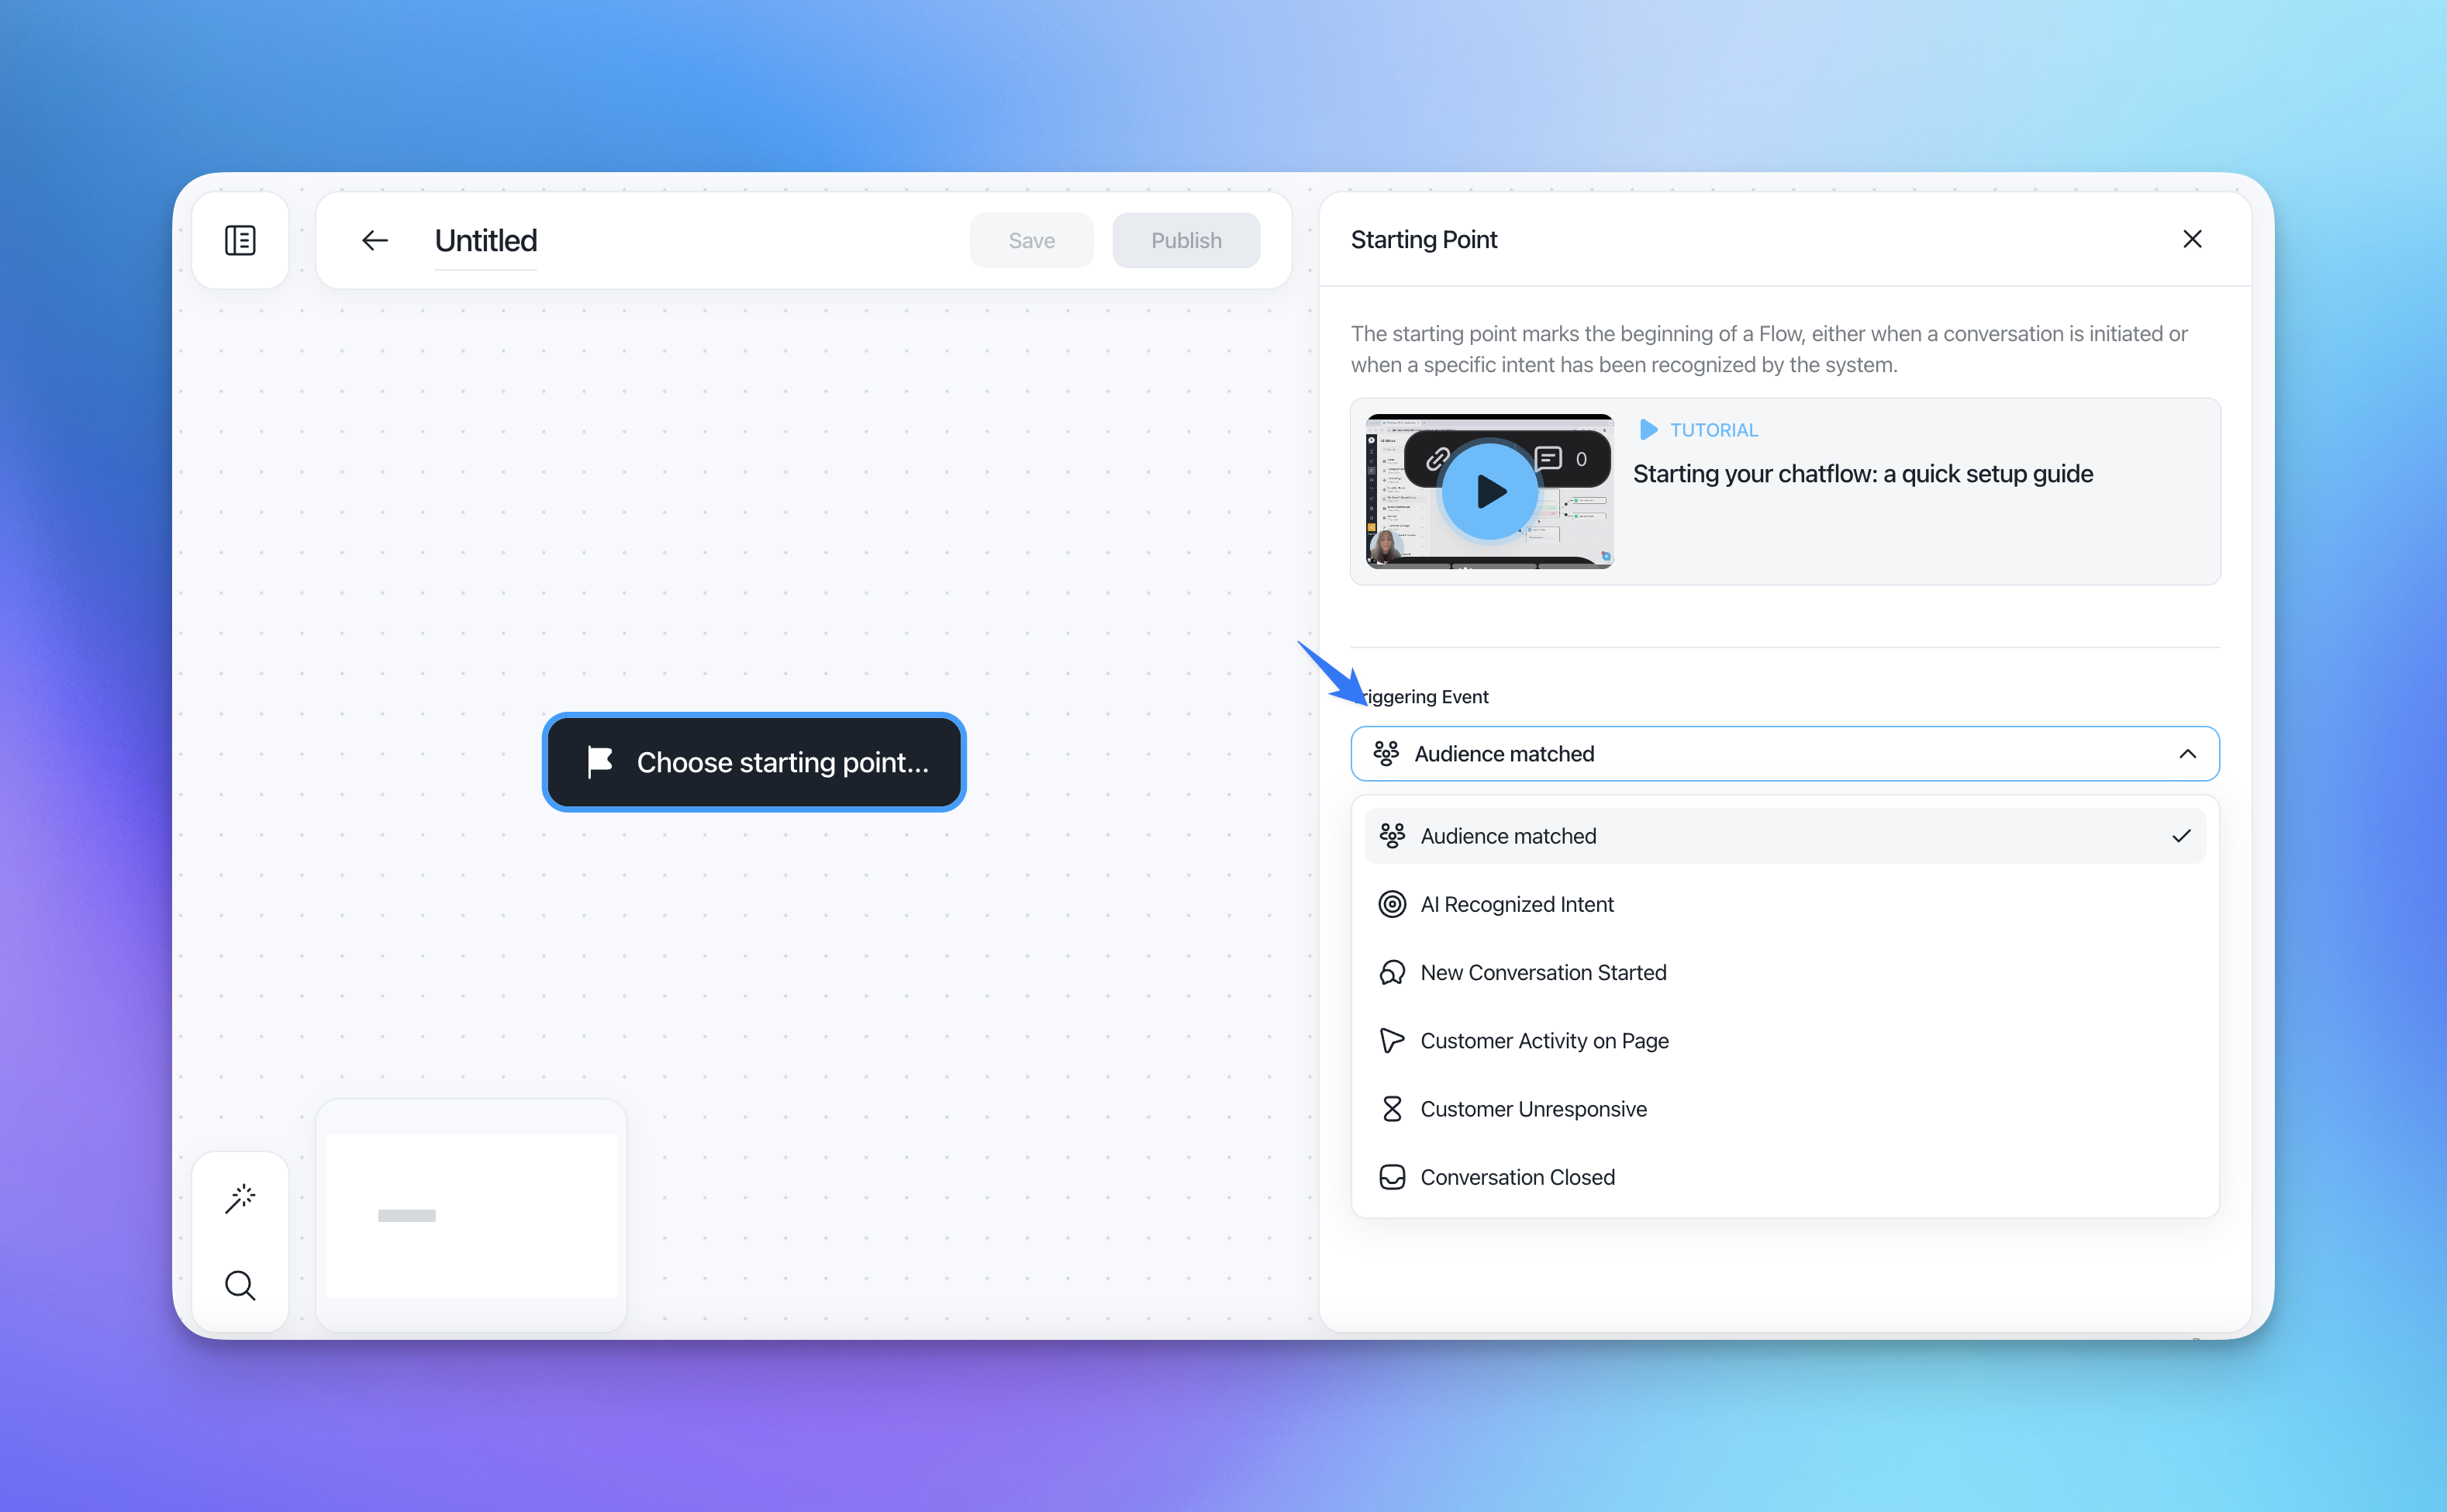
Why Audience matched? WhatsApp requires opt-in and pre-approved templates for proactive messaging. The Audience matched trigger ensures you're reaching contacts who meet specific criteria you've defined, keeping your outreach targeted and compliant.
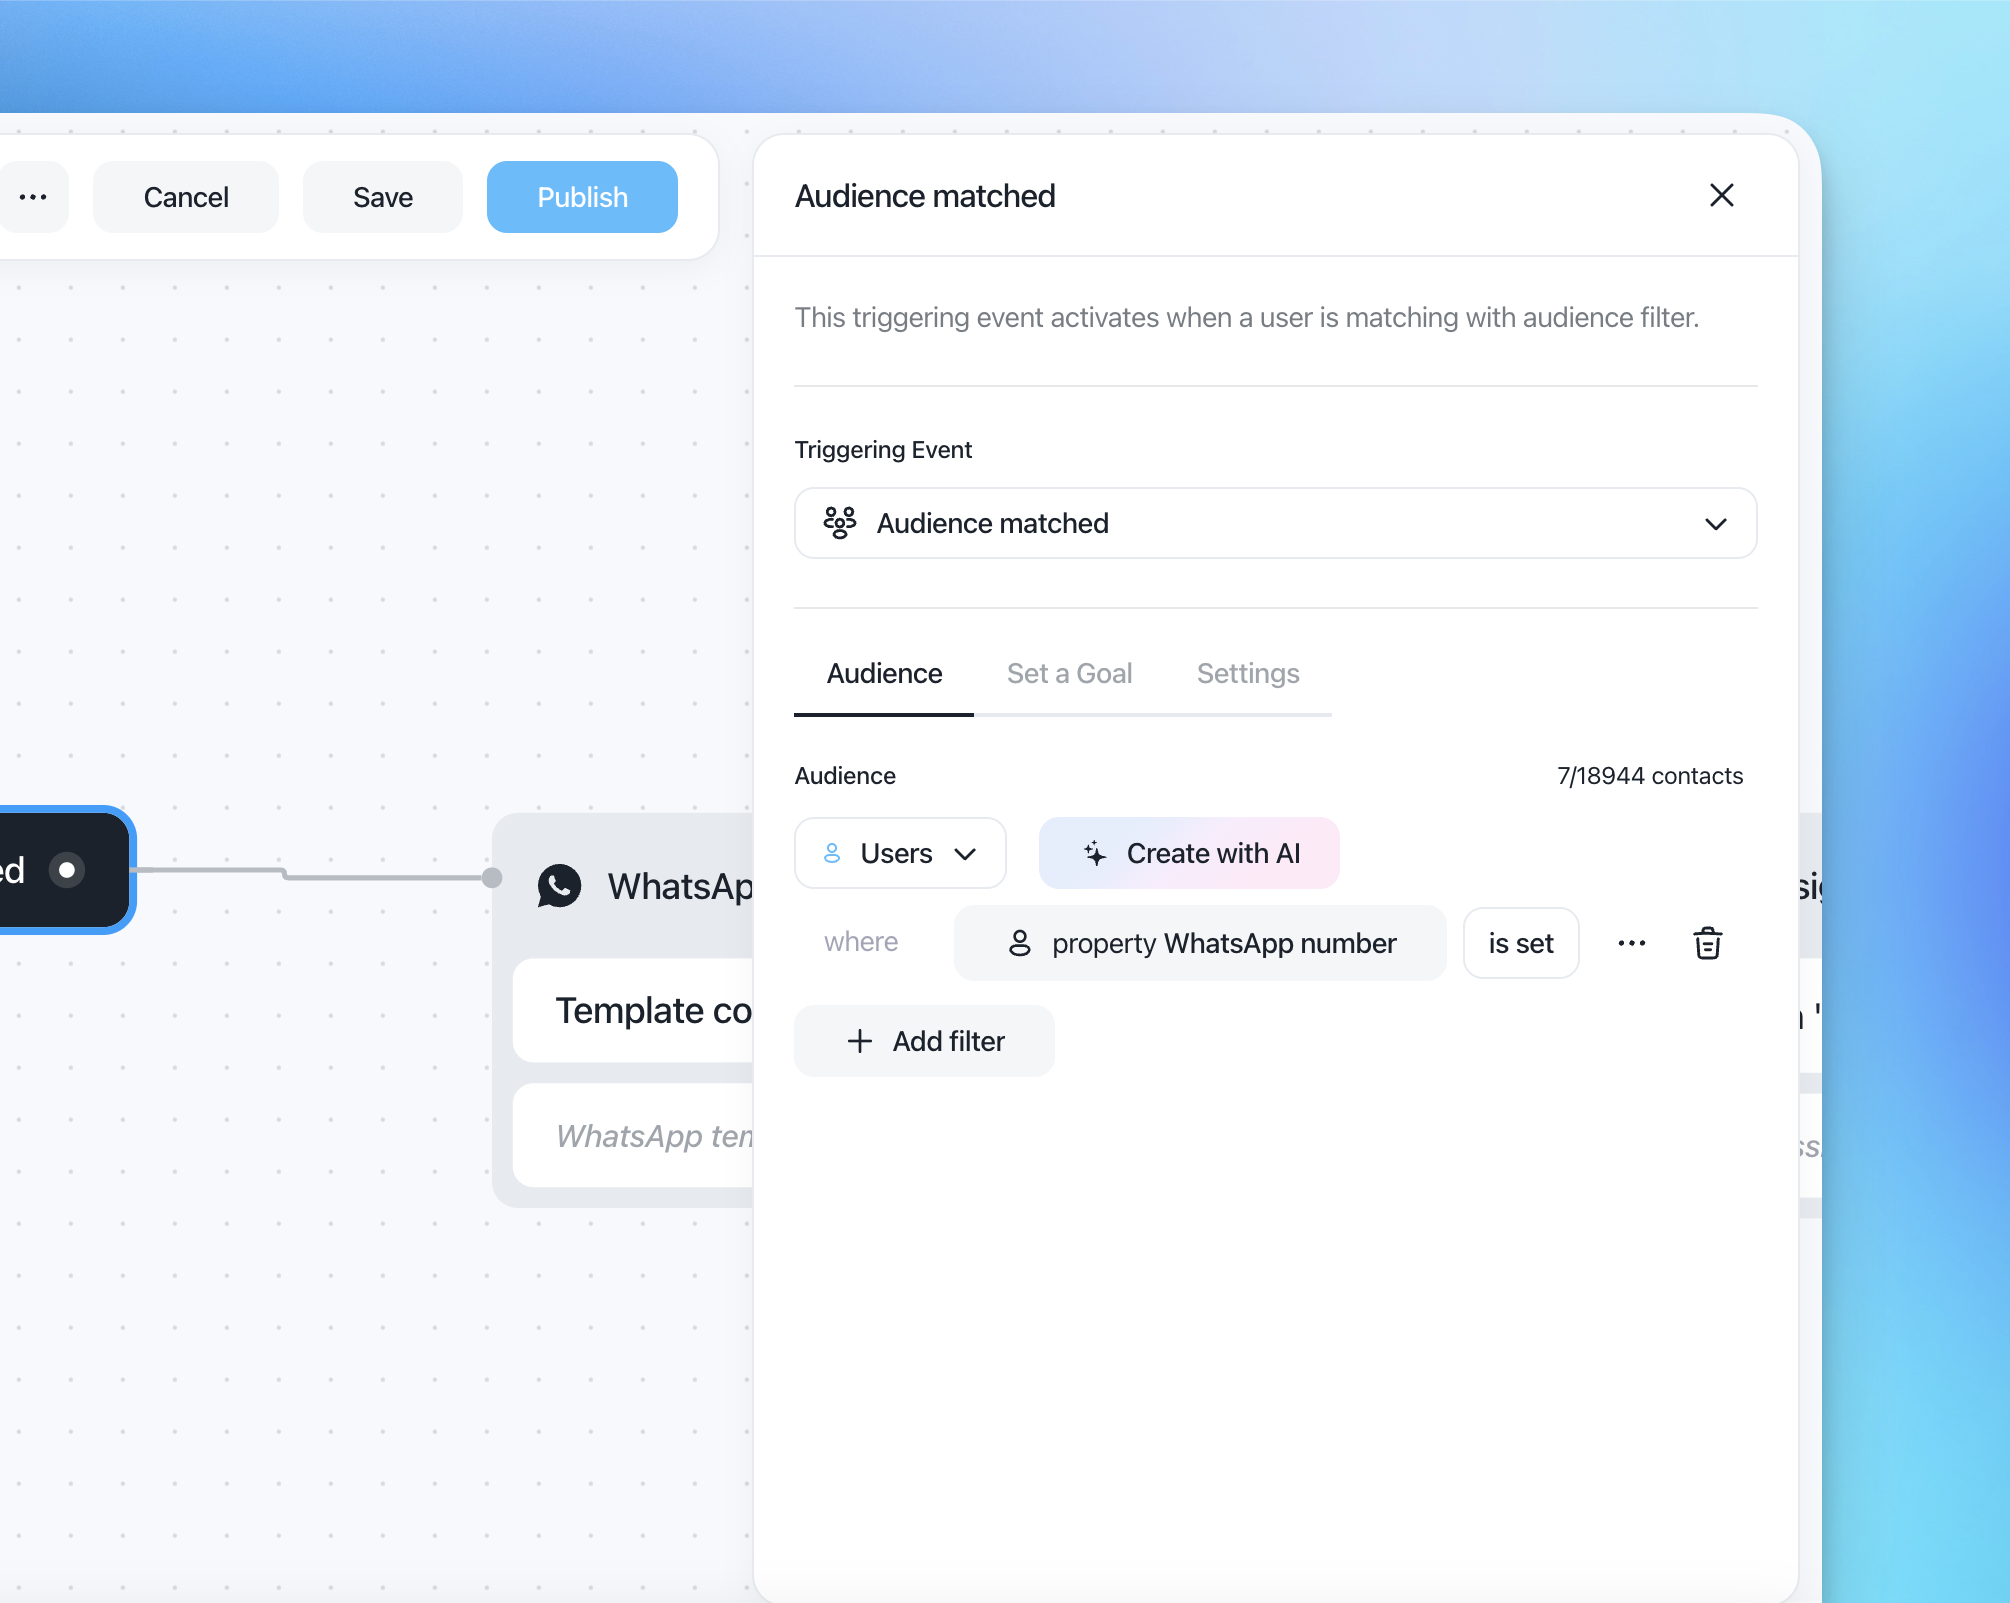
Step 3: Add the WhatsApp template flow action
From the Audience matched trigger, click the + connector to add the next step.
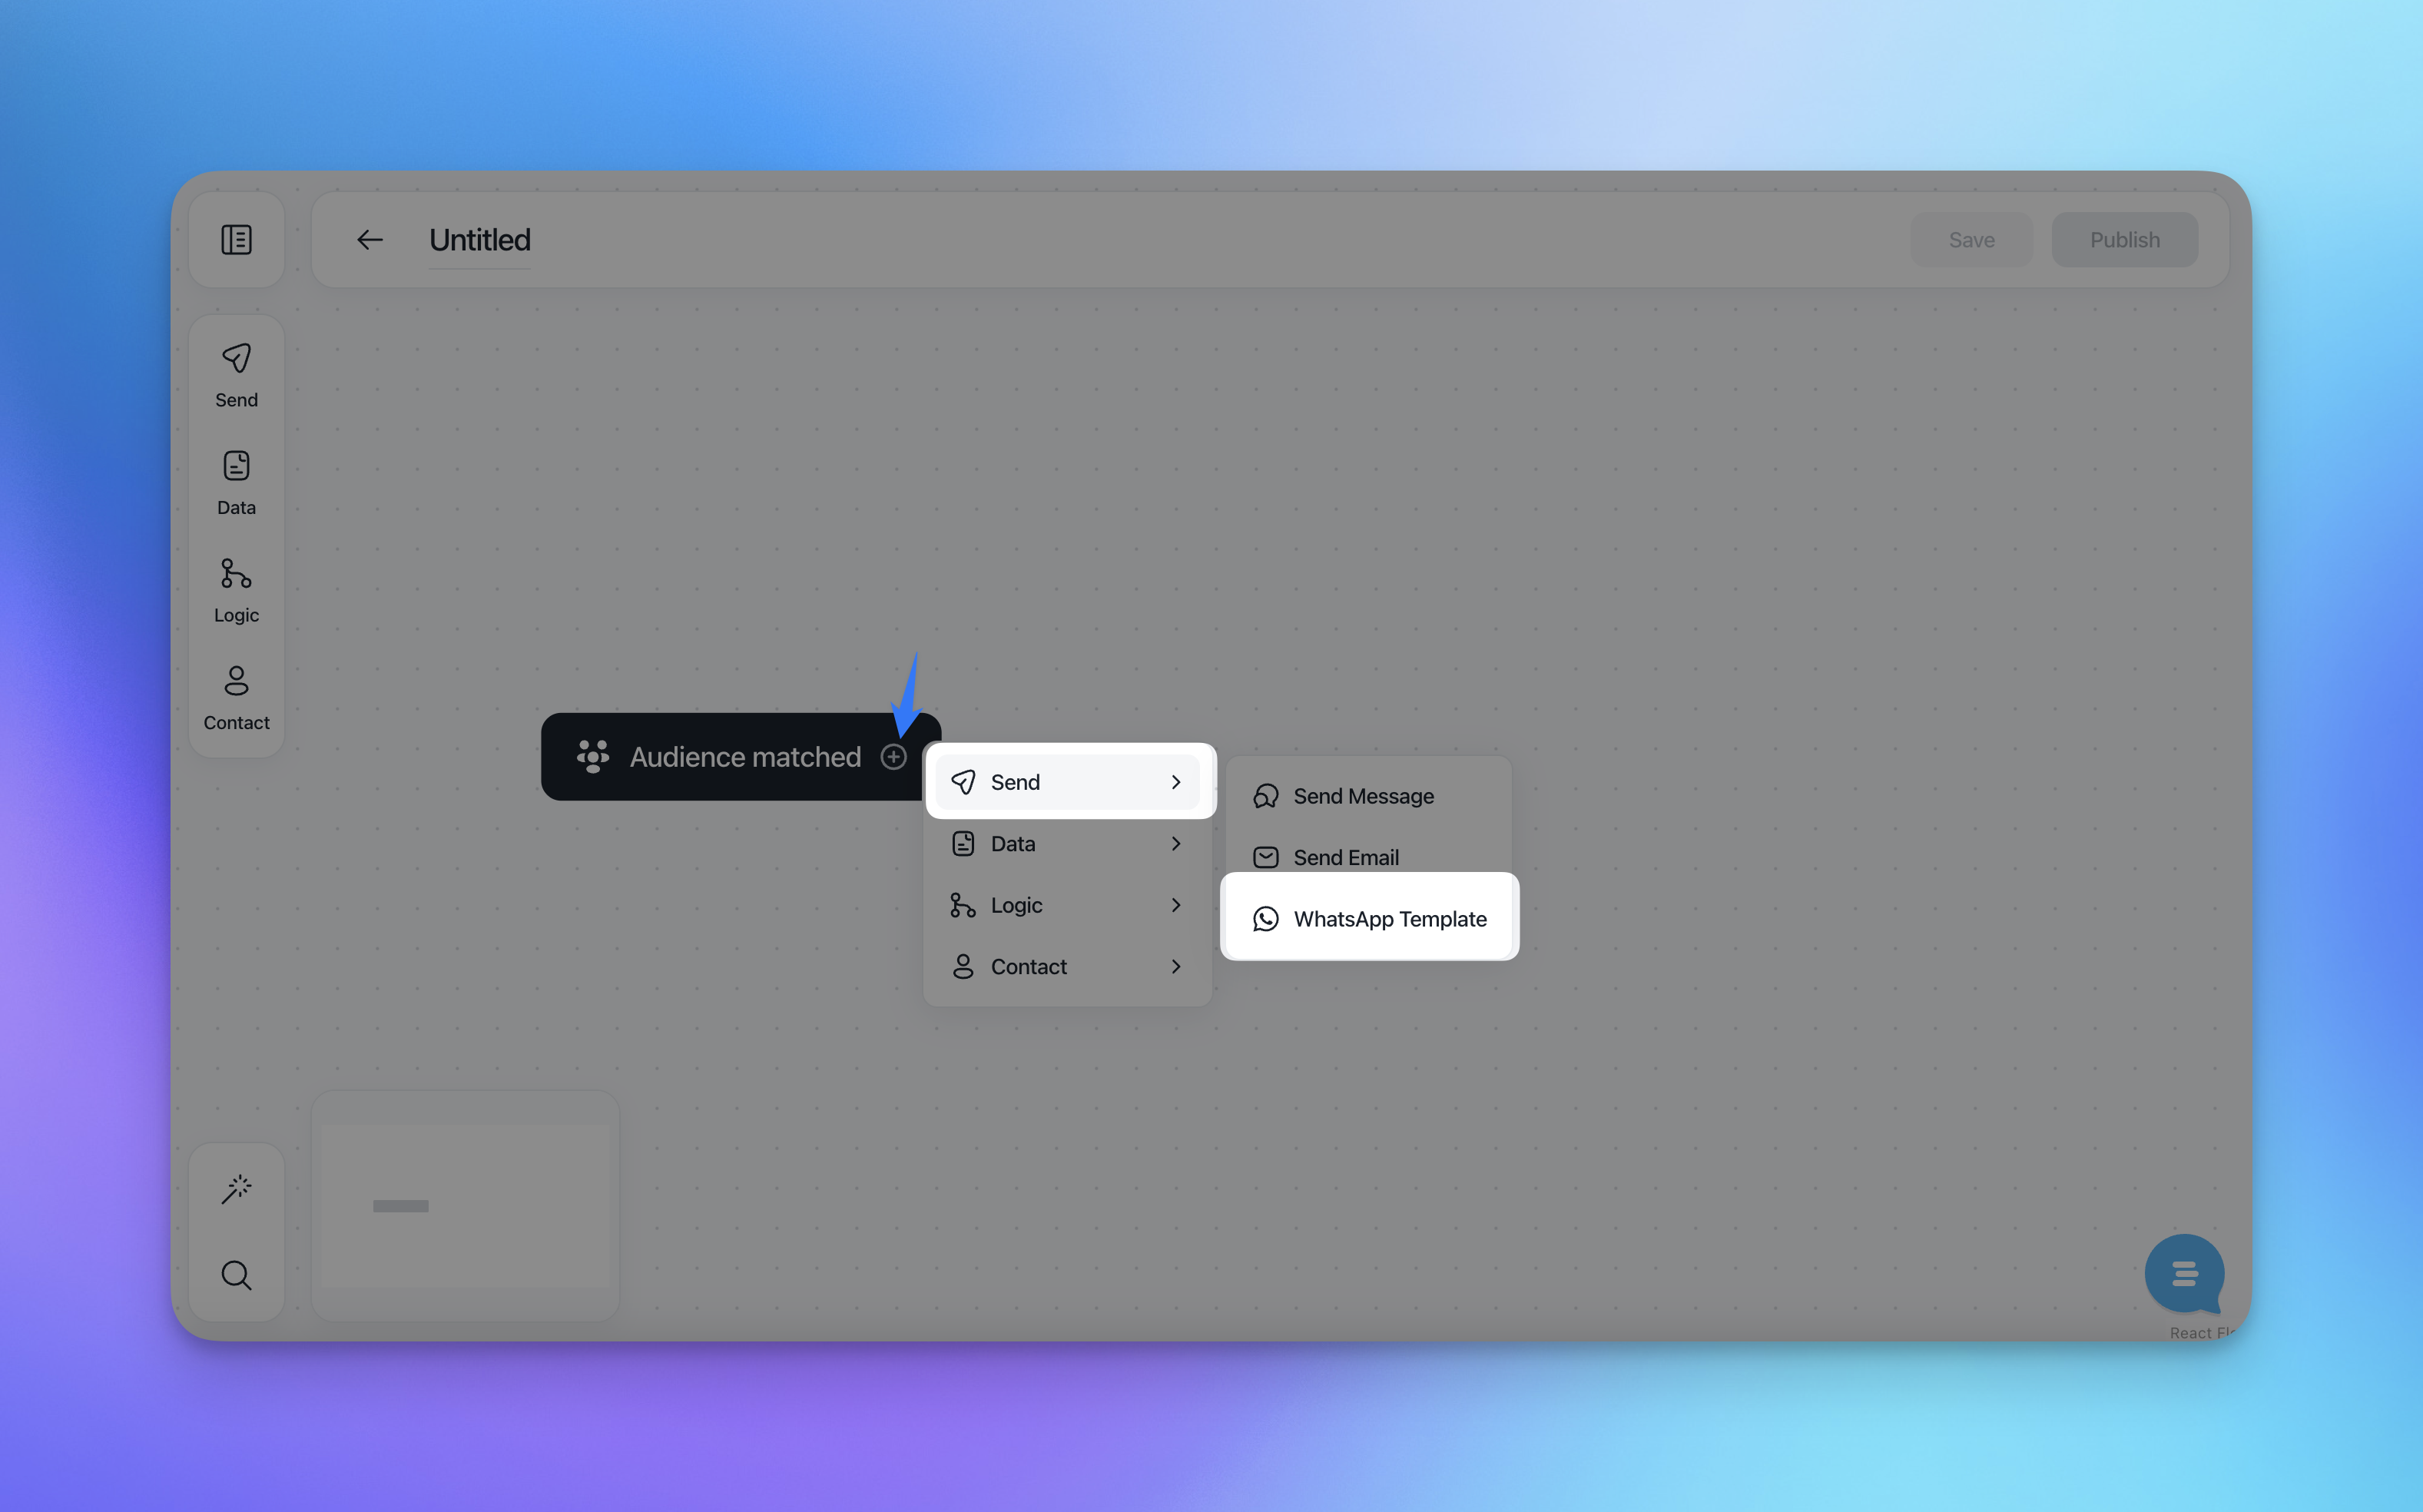
In the action menu, go to Send → WhatsApp Template.
The WhatsApp Template configuration panel will open on the right side.
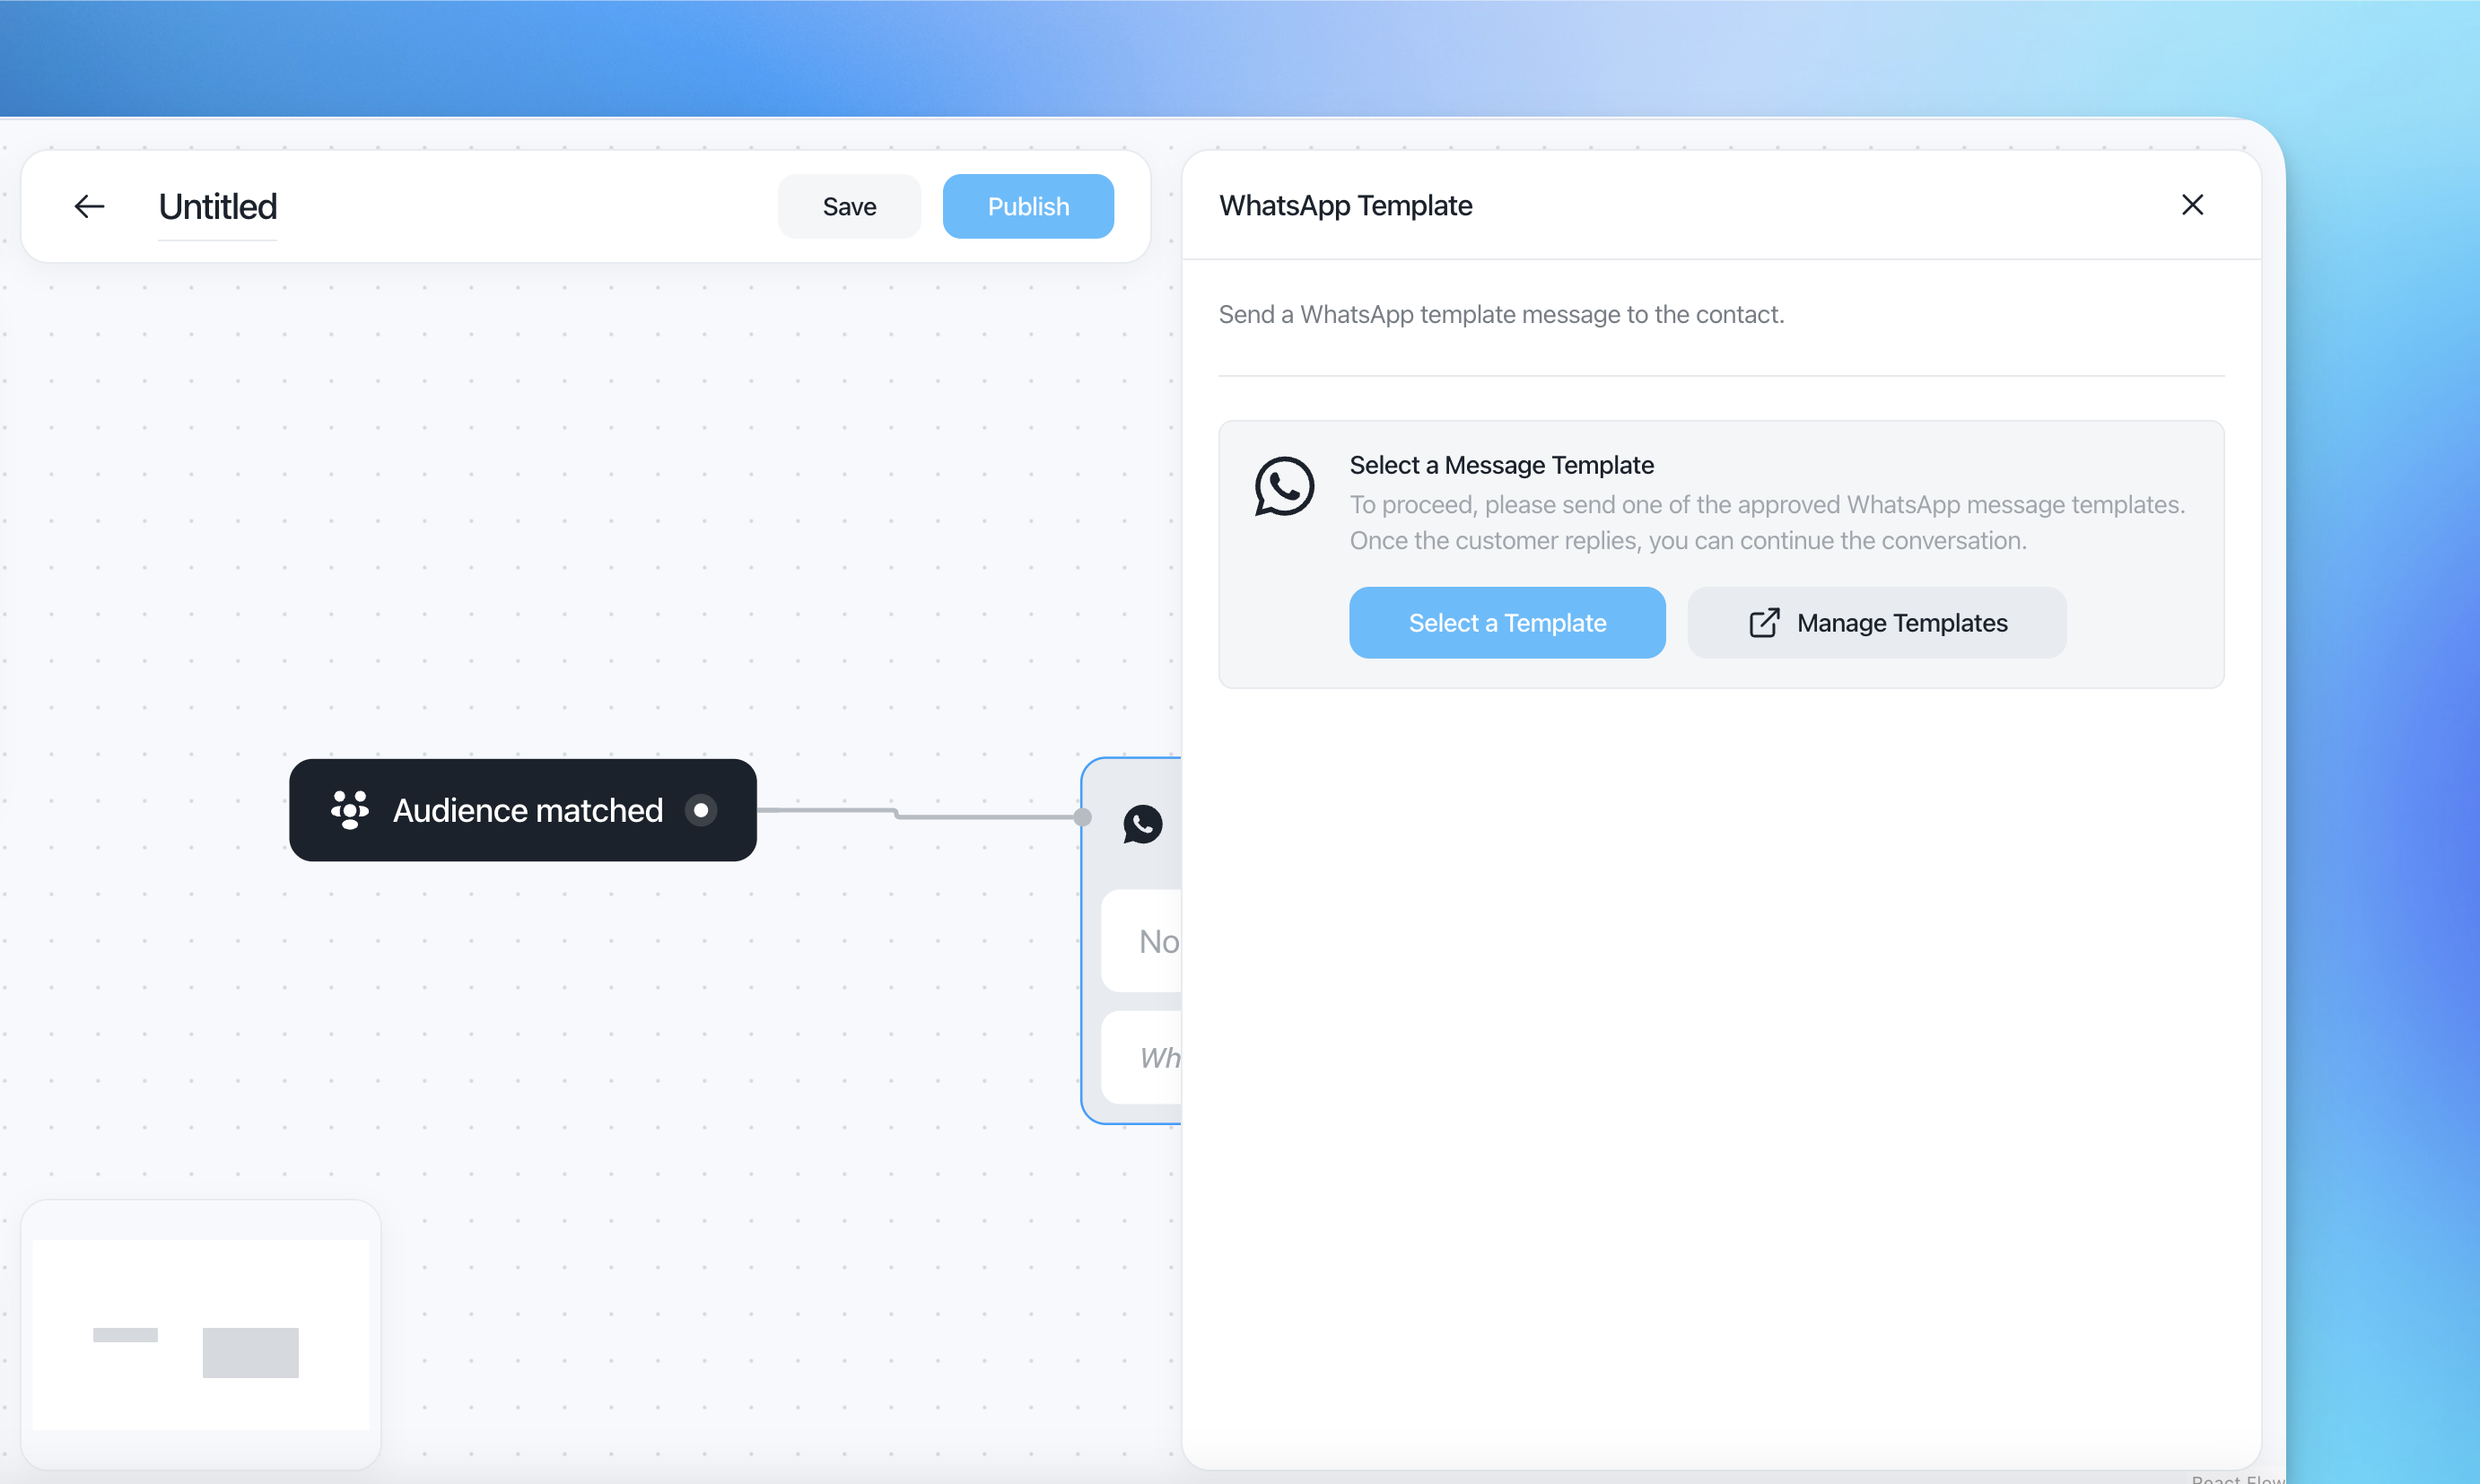
Step 4: Select a message template
In the WhatsApp Template panel, click Select a Template.
A picker will appear showing your approved WhatsApp message templates. Only text-only templates are displayed.
Choose the template you want to send.
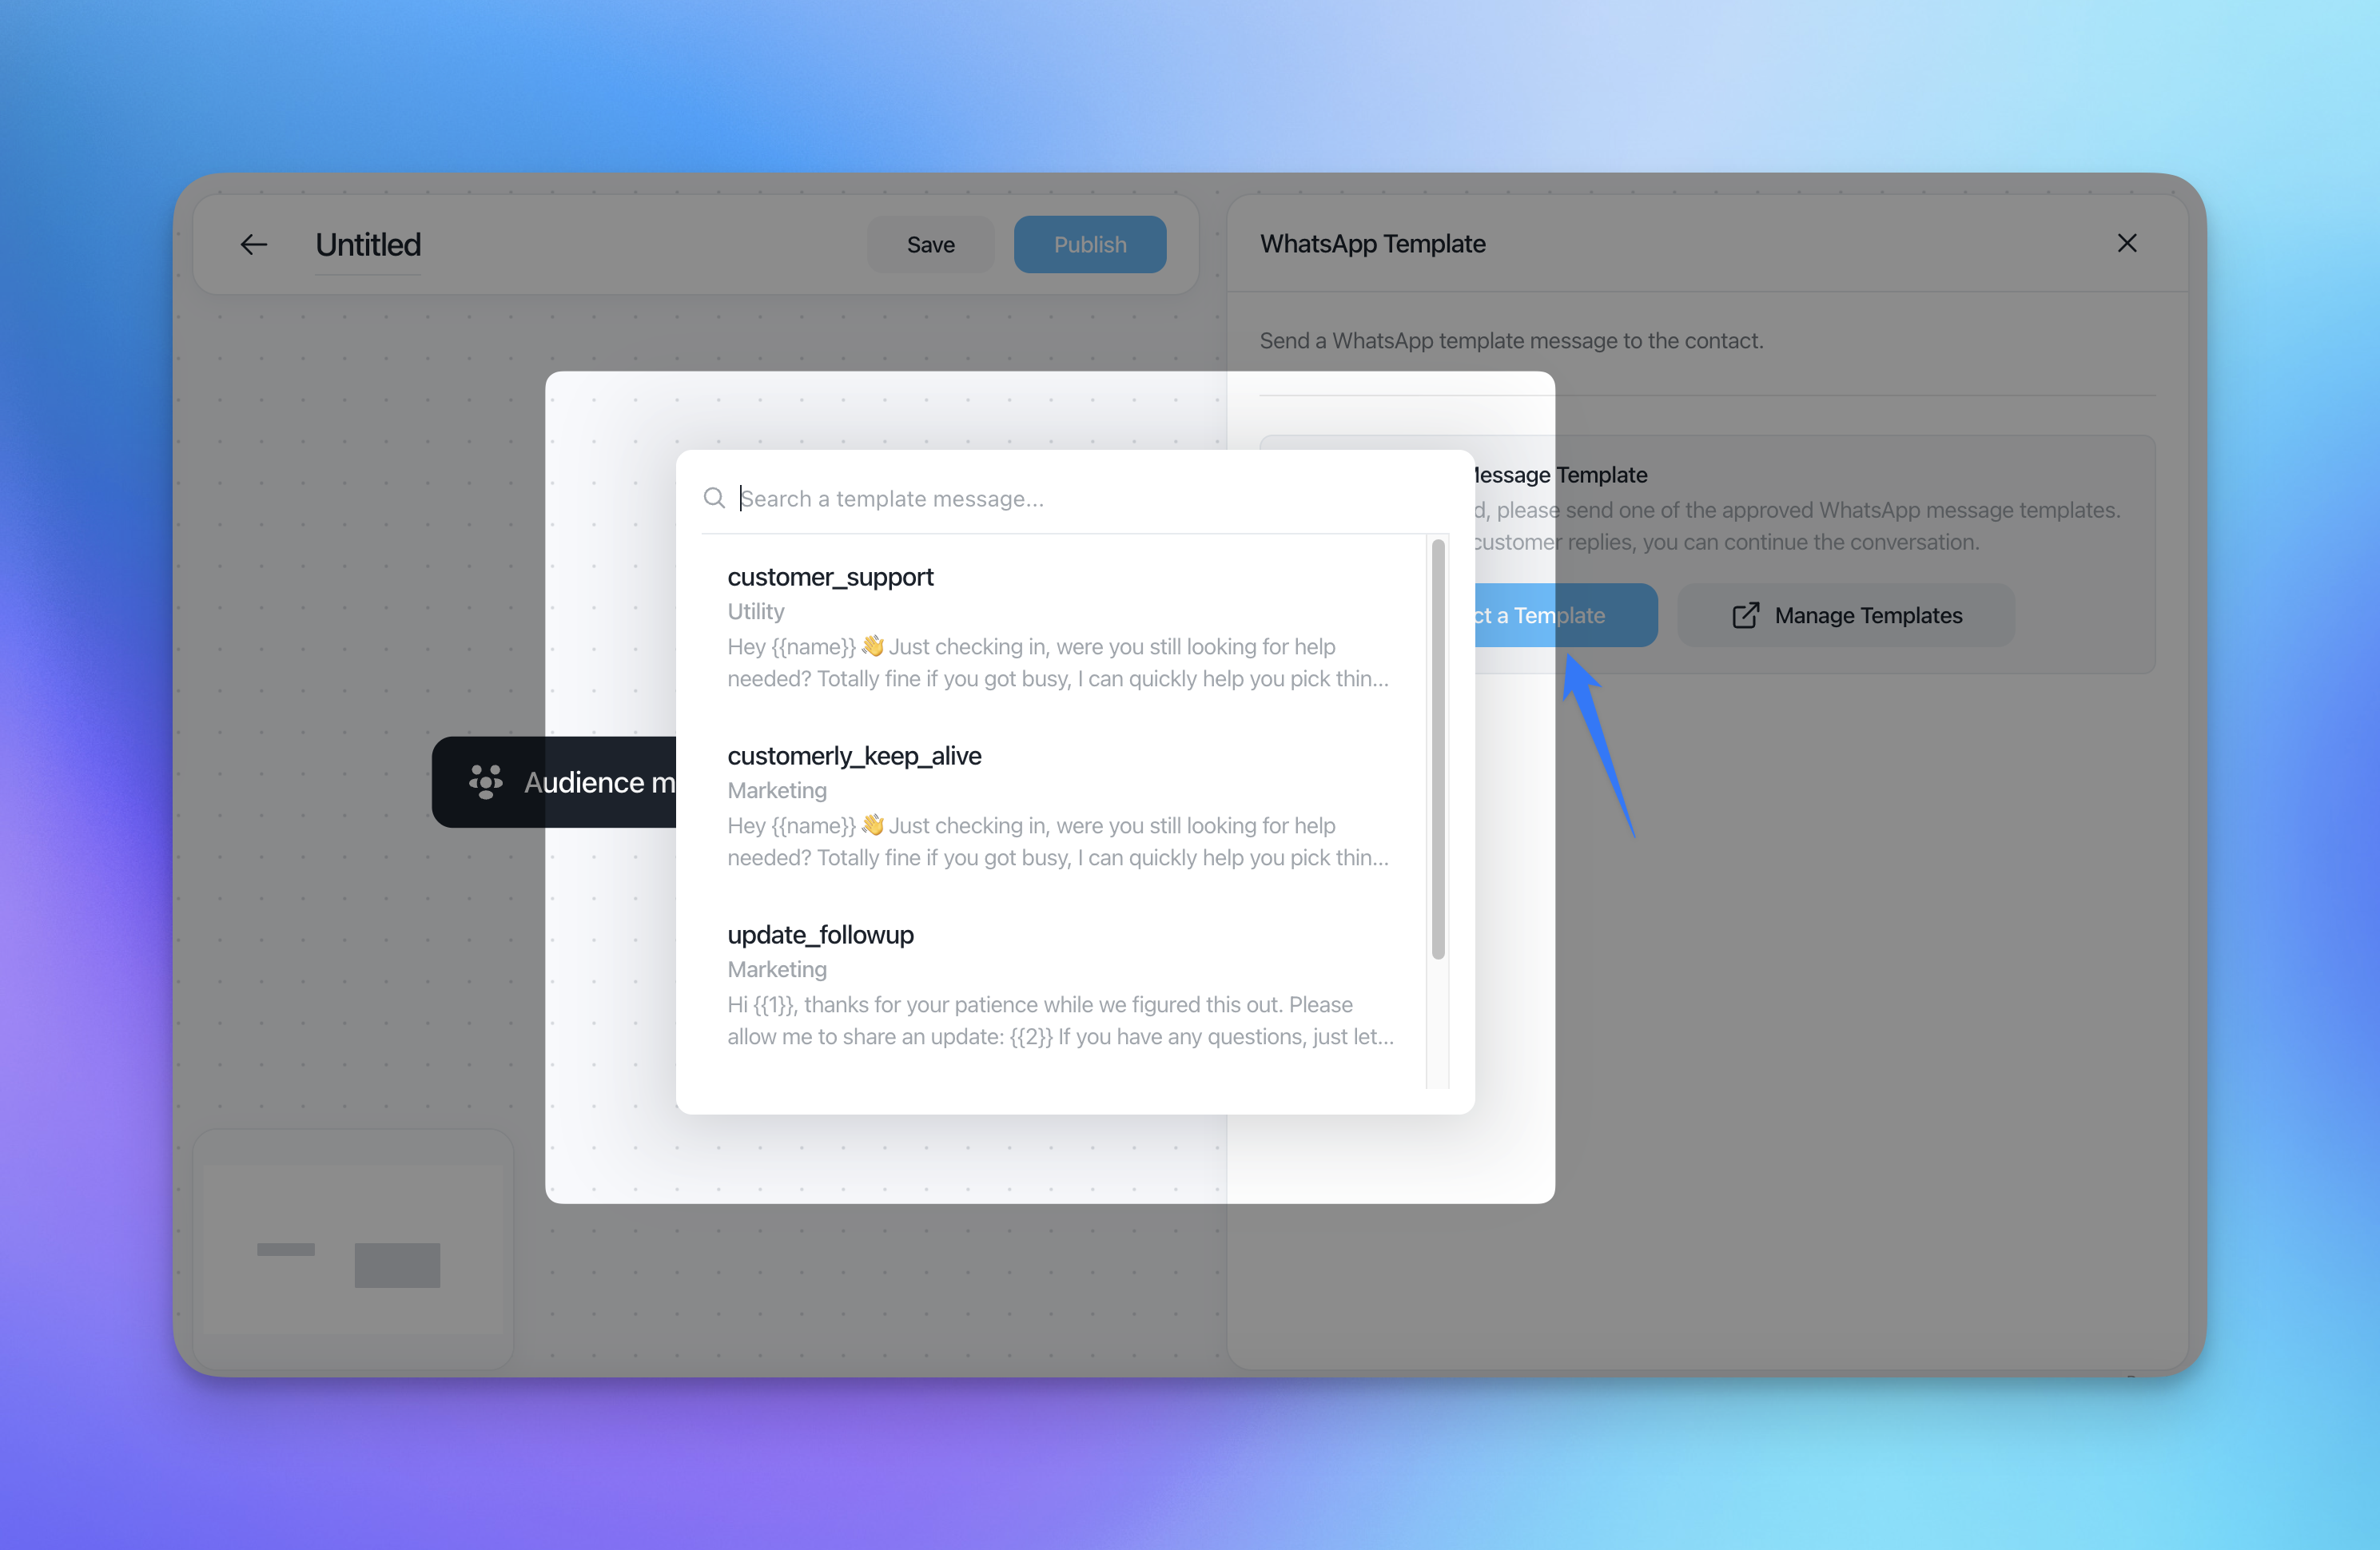
Each template shows its name, category (Utility or Marketing), and a preview of the message body.
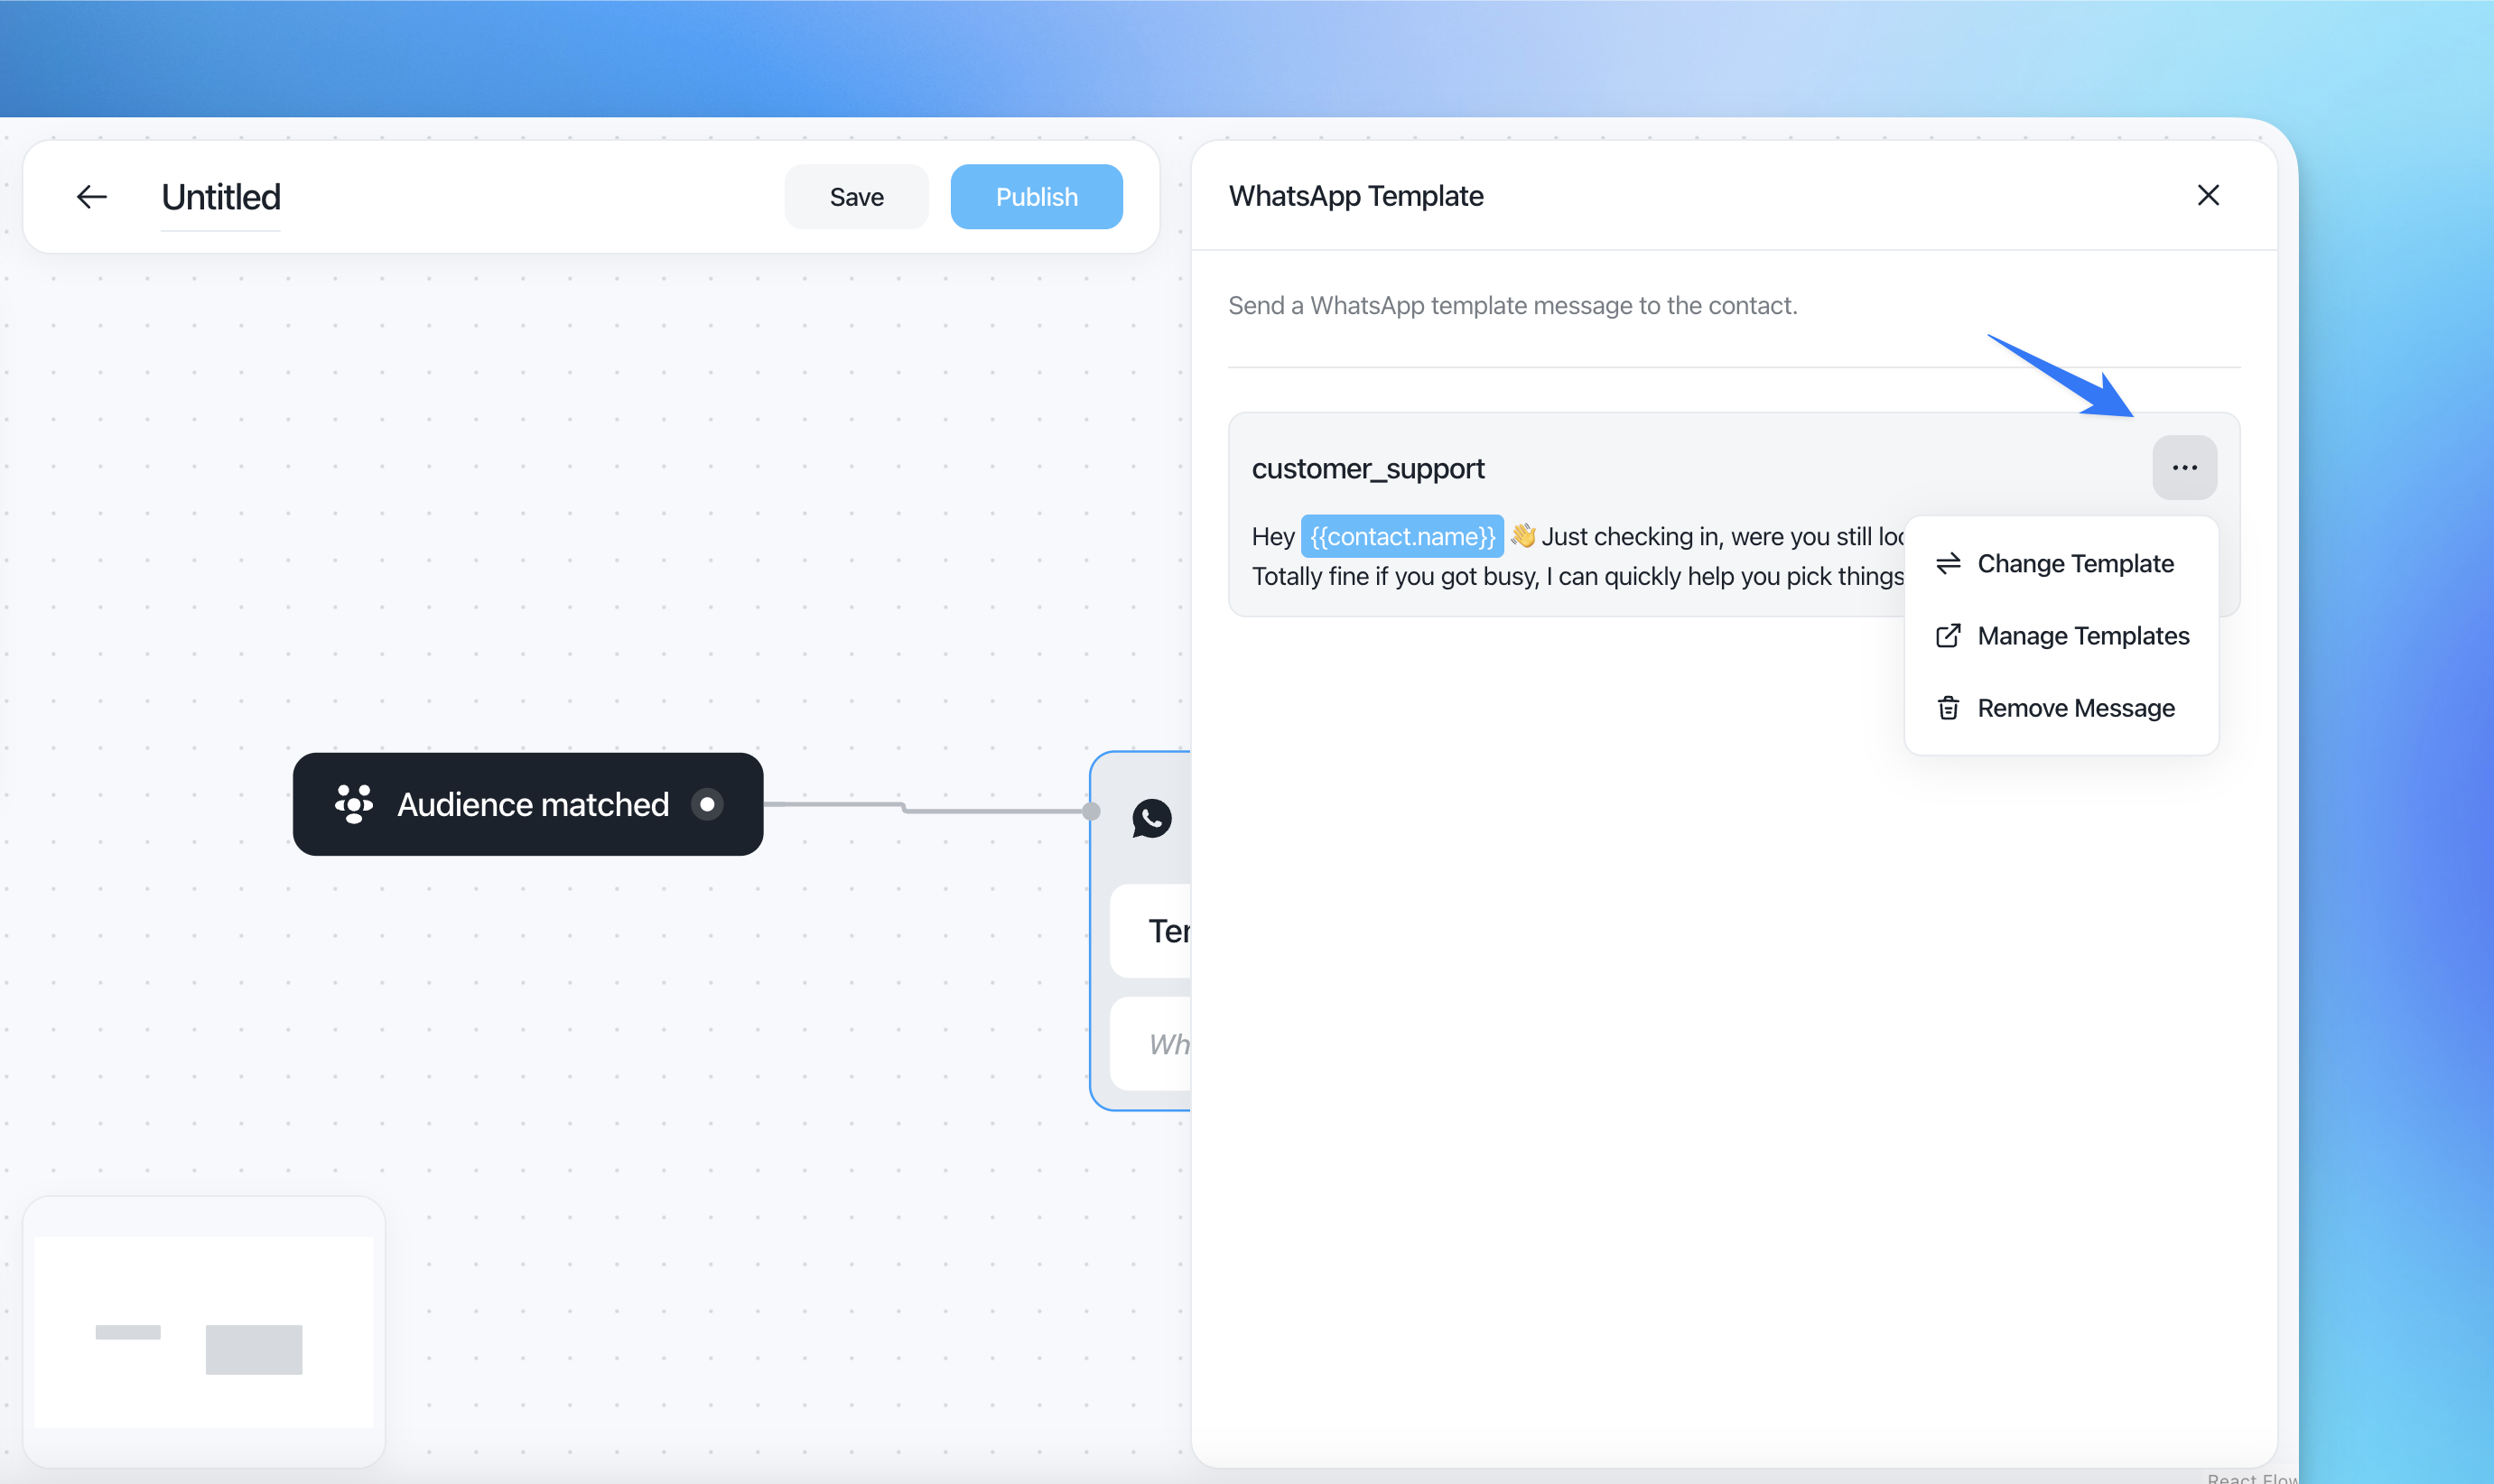
Step 5: Review your selected template
Once a template is selected, the panel shows a preview of the message body. Variables like {{contact.name}} are automatically highlighted. Customerly will replace them with the contact's actual data at send time.
From here, you can click the ⋯ (three-dot) menu on the template card to:
Change Template — swap to a different approved template.
Manage Templates — open Meta's WhatsApp Manager to create or edit templates.
Remove Message — remove the template from this action entirely.
Step 6: Fill in template variables (if applicable)
If your template includes numbered placeholders like {{1}} or {{2}}, you'll need to map them to contact attributes or provide static values. Templates using named variables like {{contact.name}} are filled automatically by Customerly.
Step 7: Save and publish
Once everything is configured:
Click Save to save the workflow.
Click Publish to activate it.
The workflow will now automatically send the selected WhatsApp template to any contact who matches the defined audience.