Learn how to connect your WhatsApp Business account to Customerly. This guide explains the setup steps, required permissions, handling two-factor authentication (2FA), and how to customize WhatsApp options such as Messenger handoff, conversation reset, and phone number management.
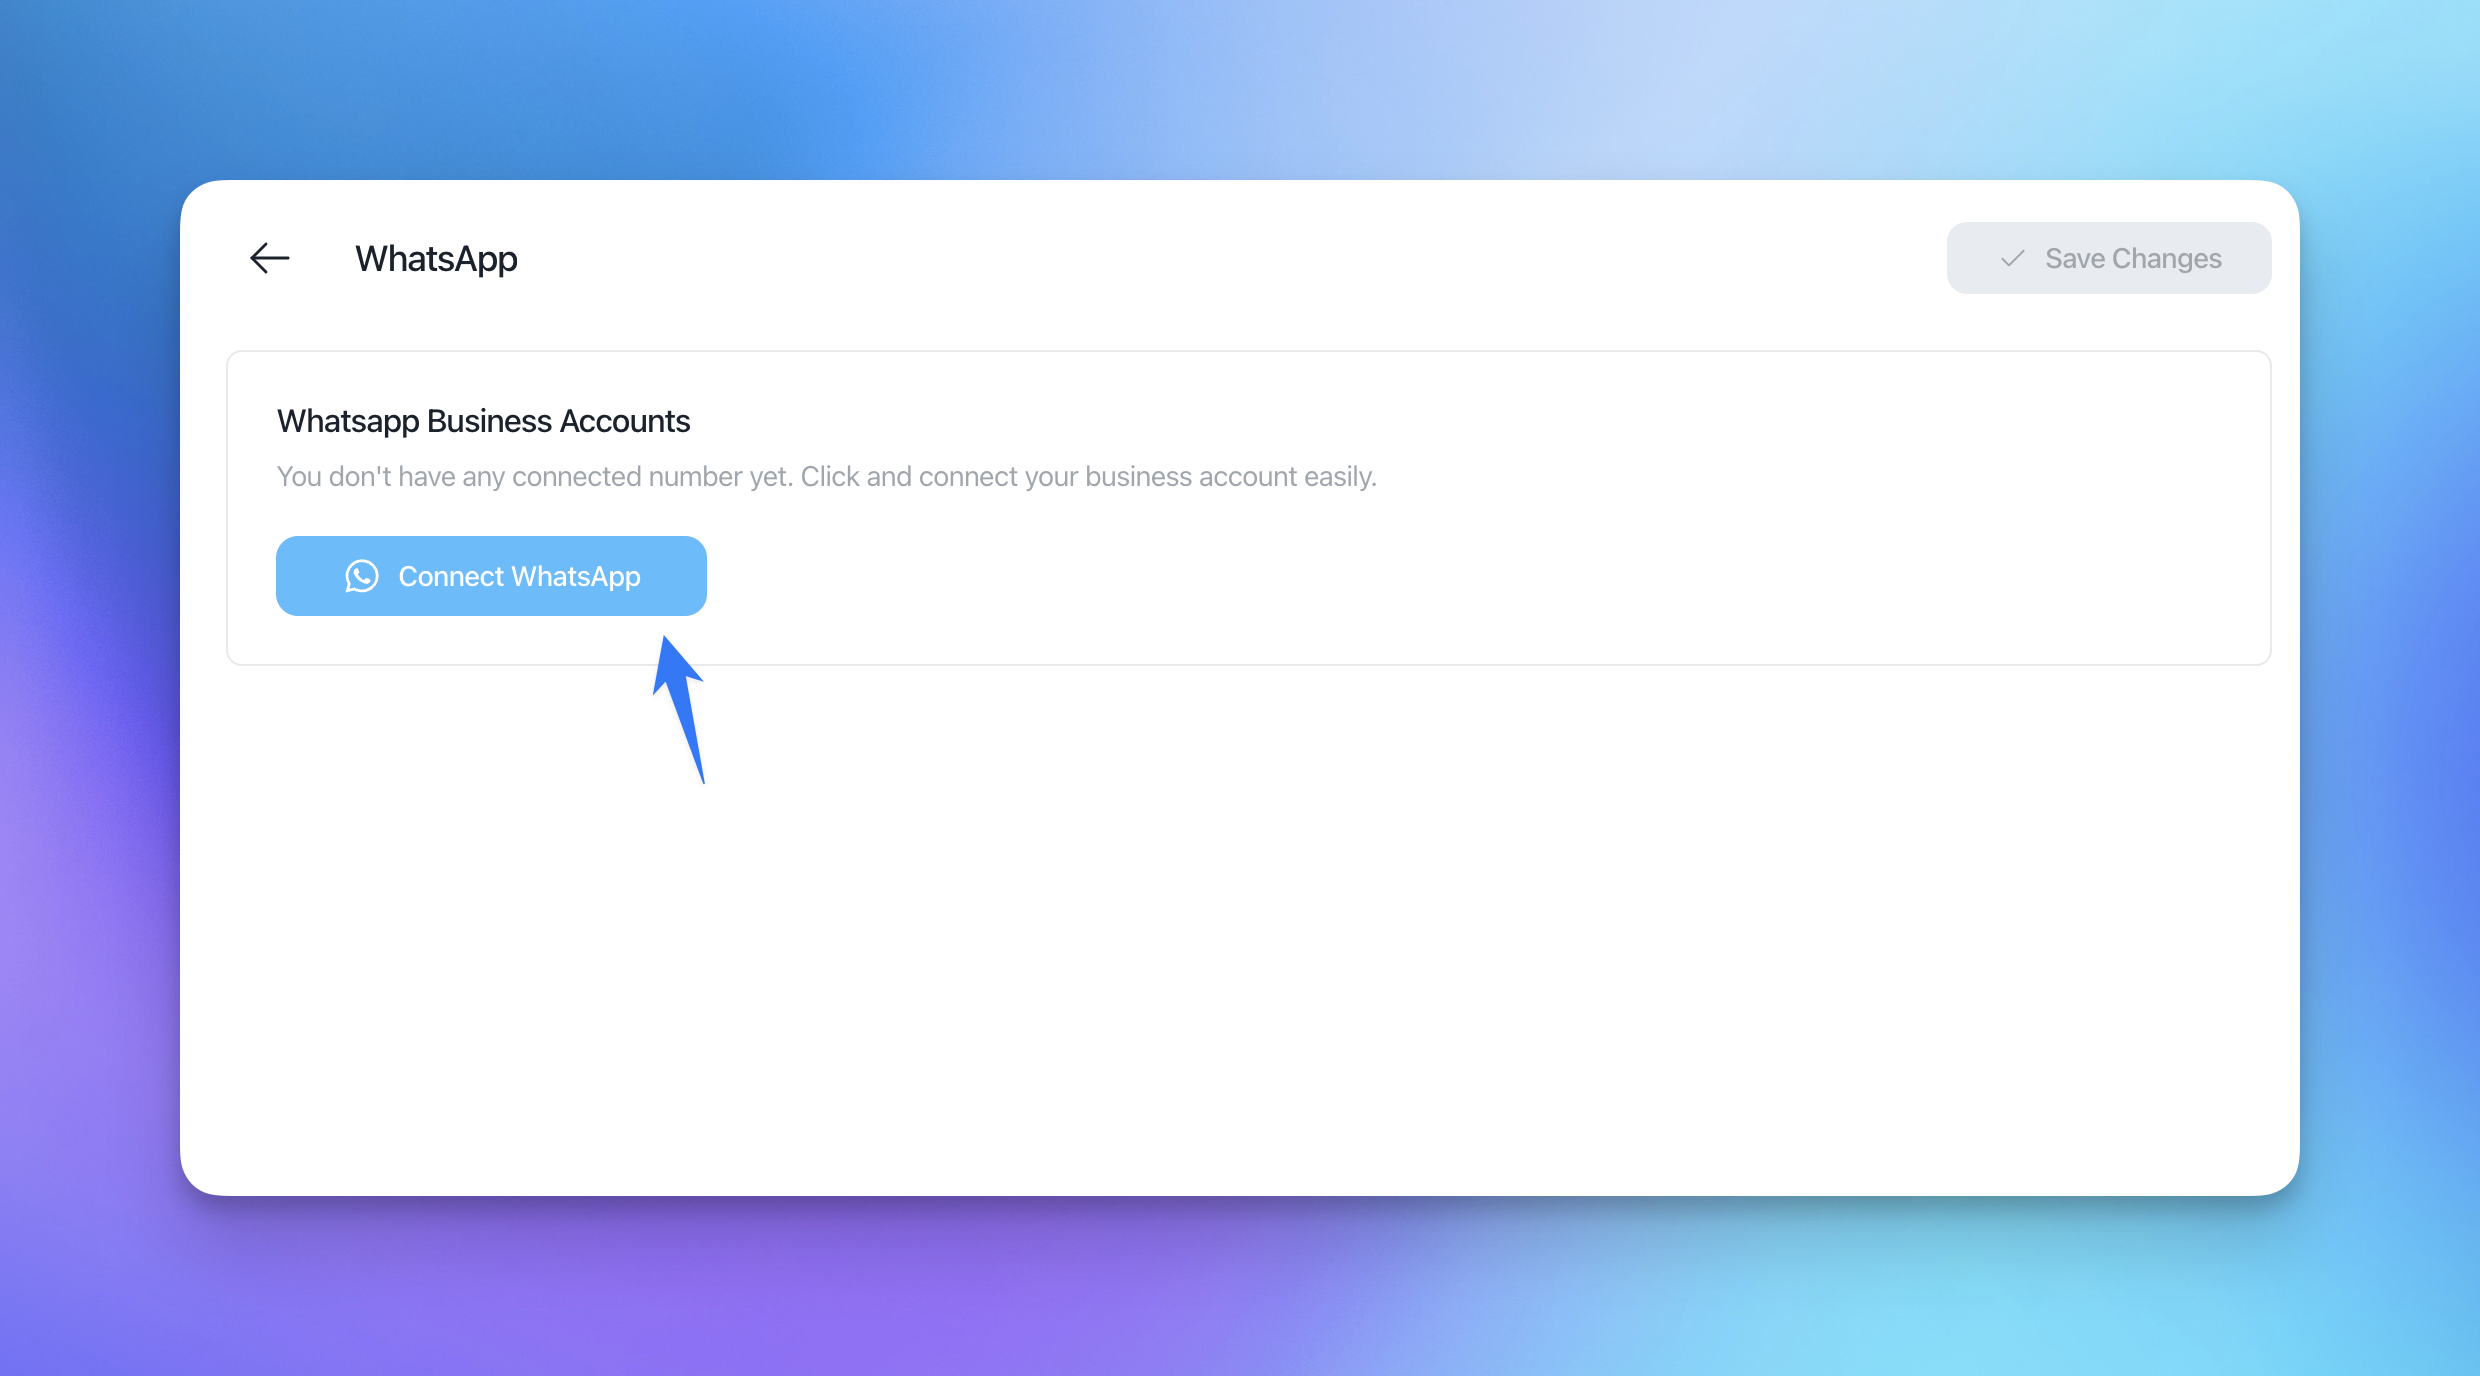
Connect WhatsApp
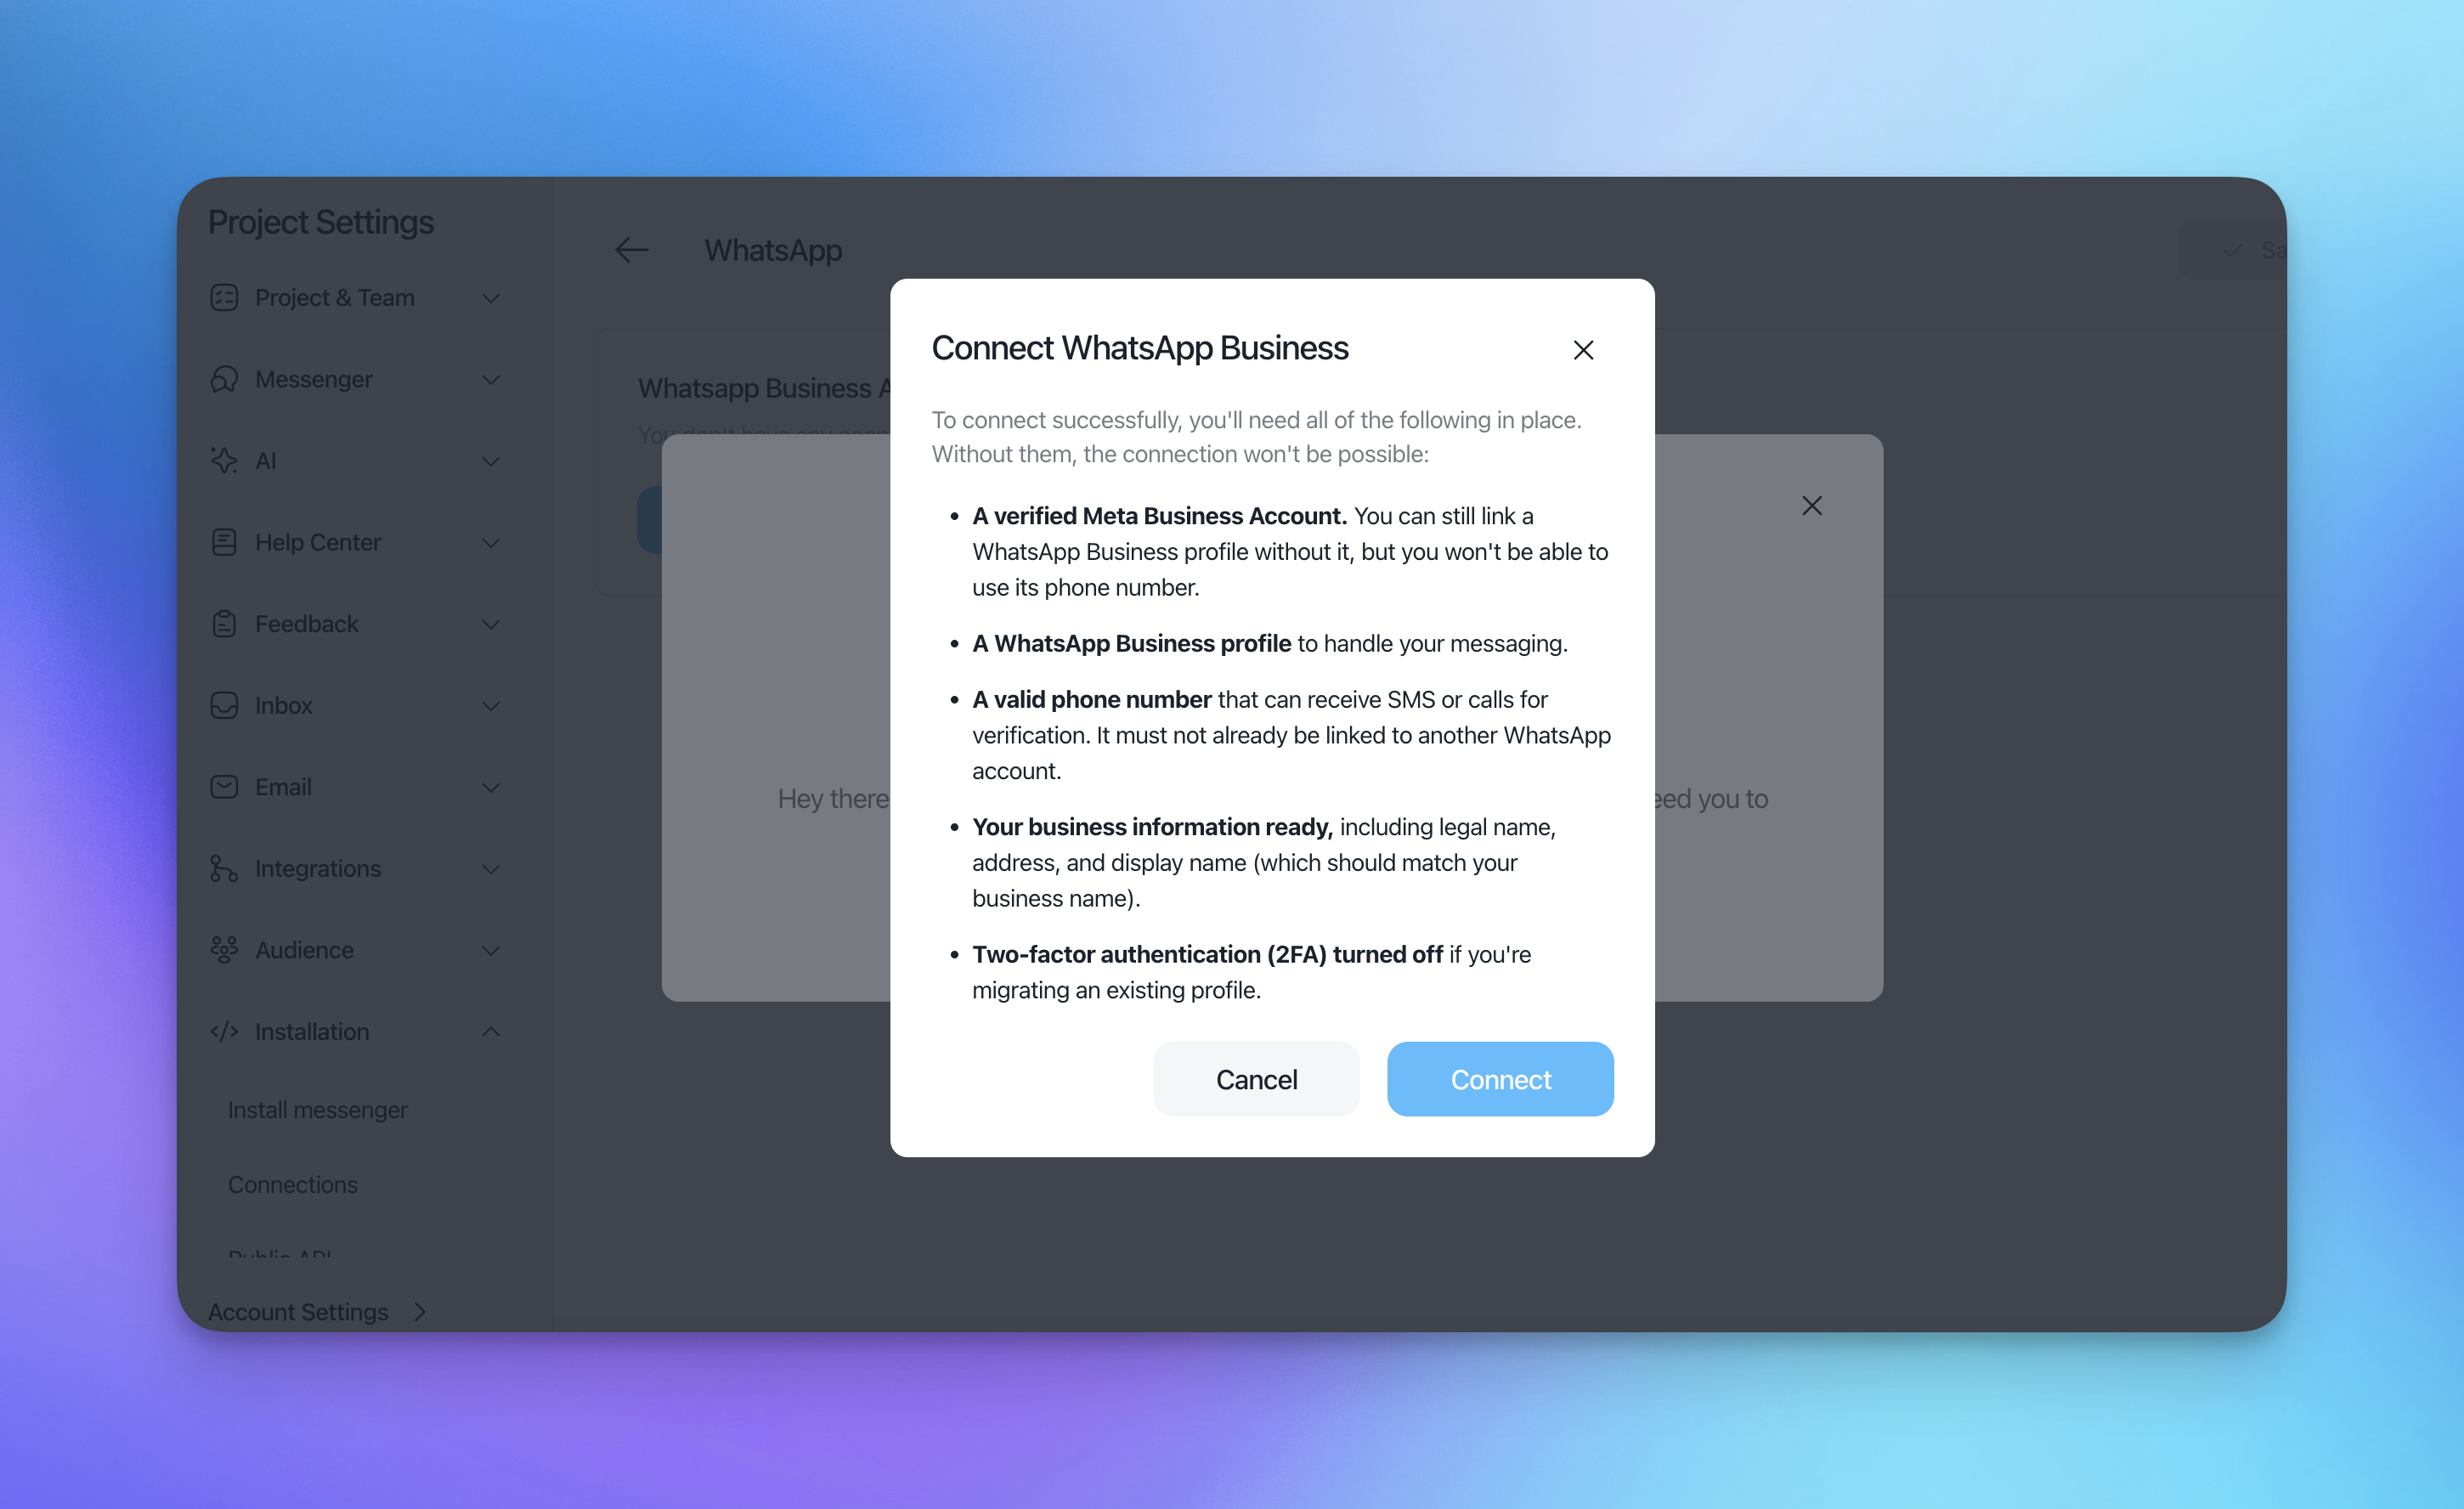
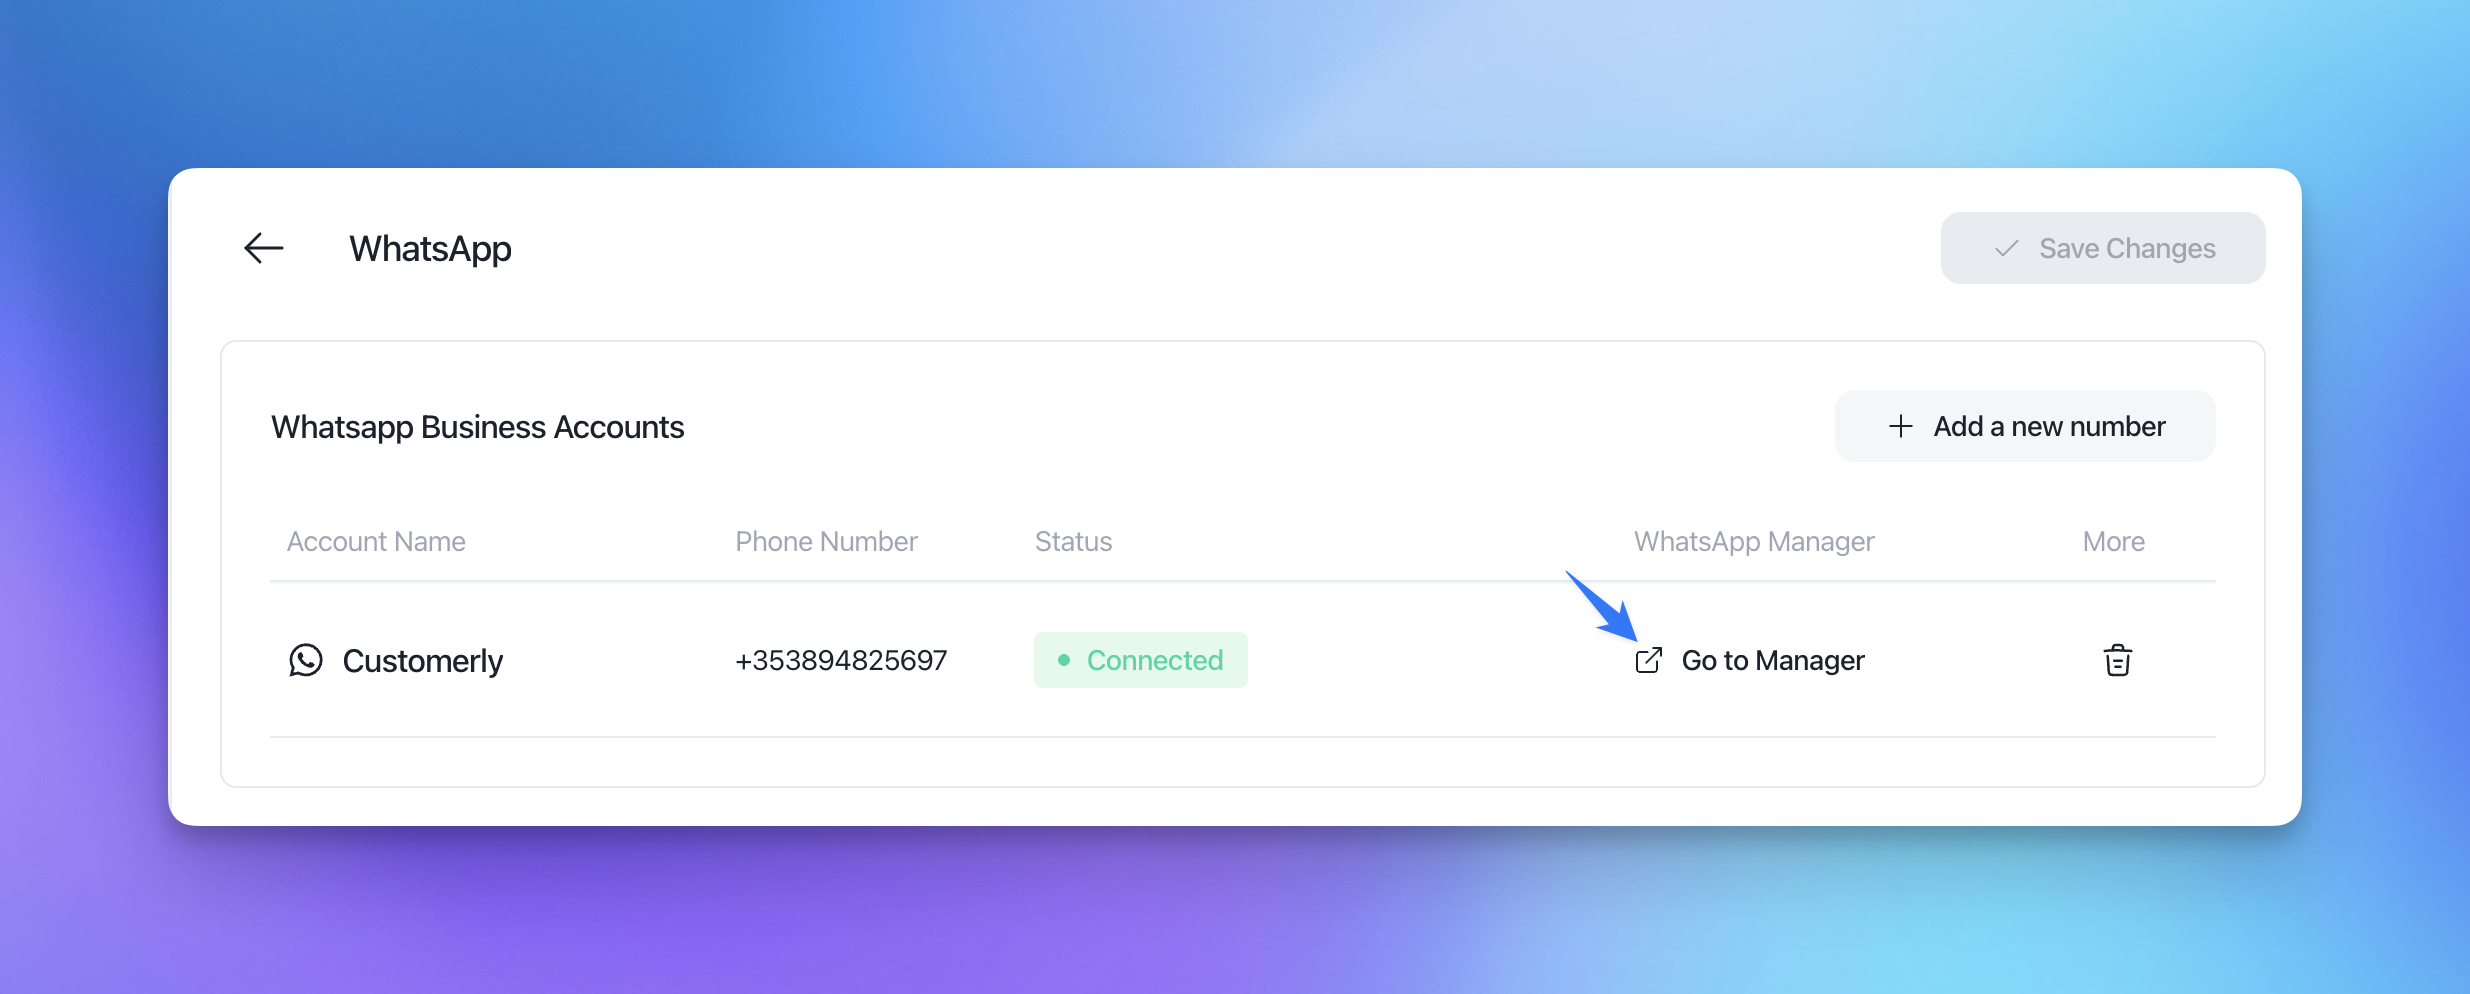
To start, go to your Project Settings > Installation > Connections > Manage Connection
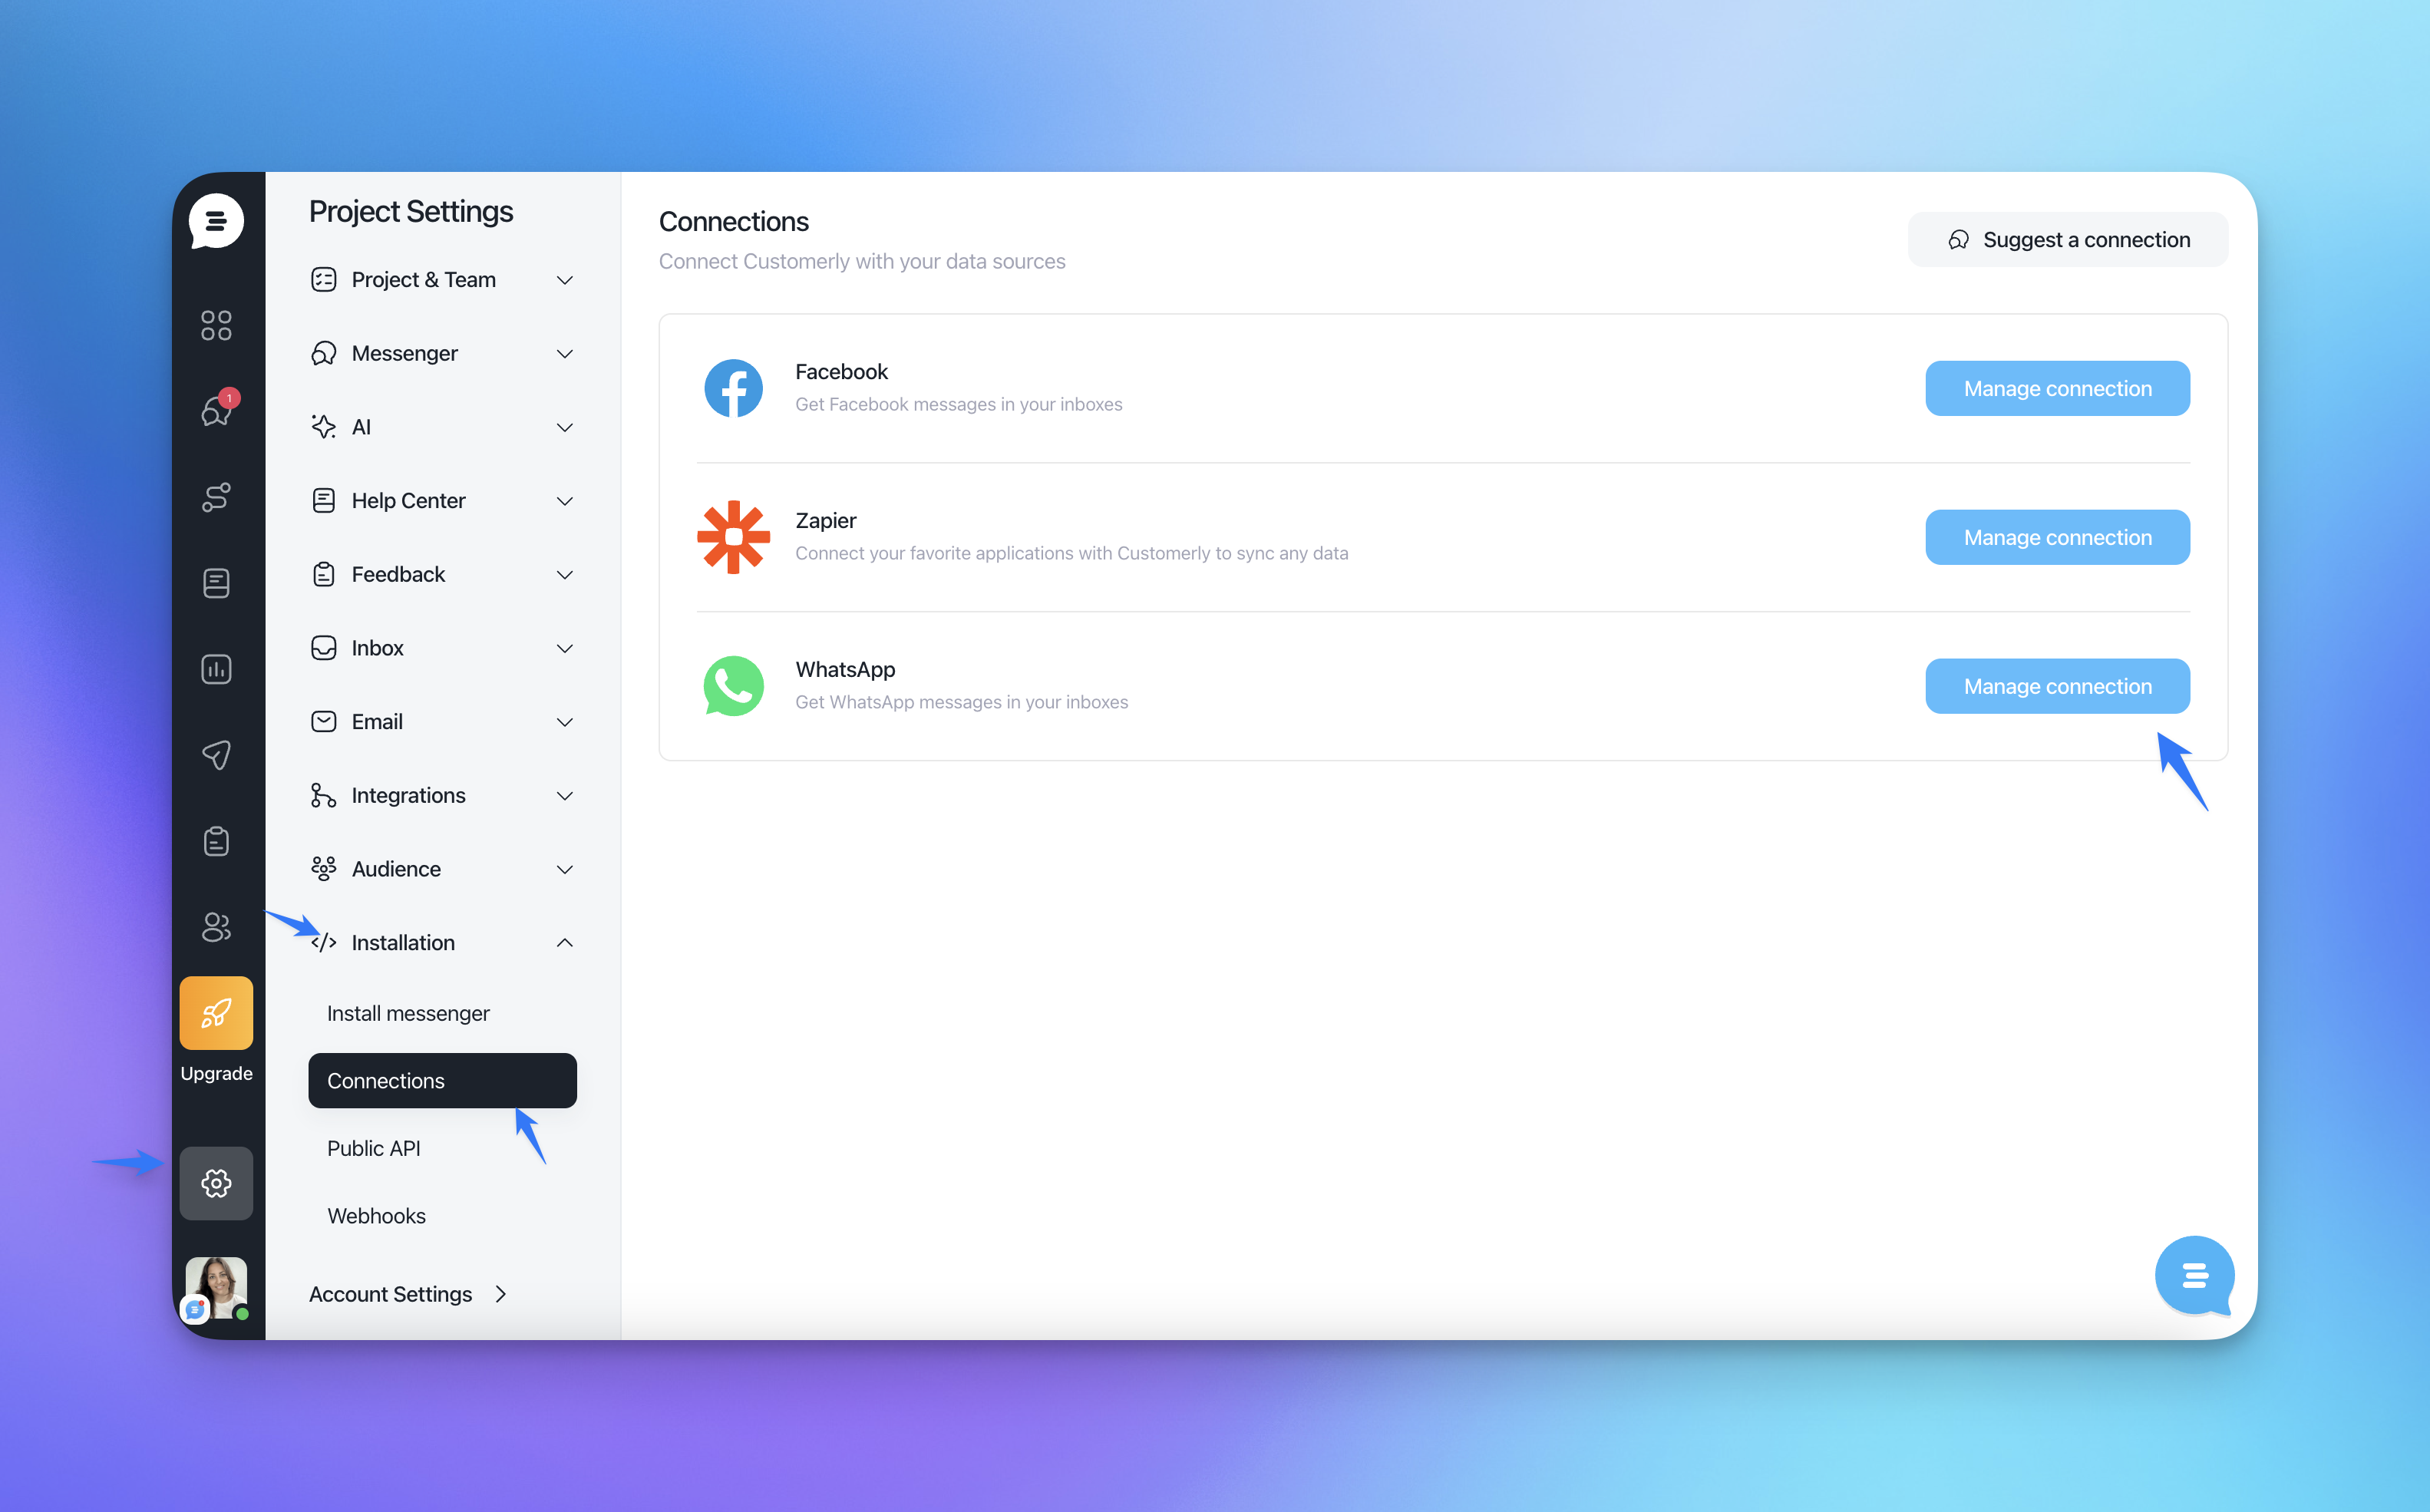
Connect WhatsApp
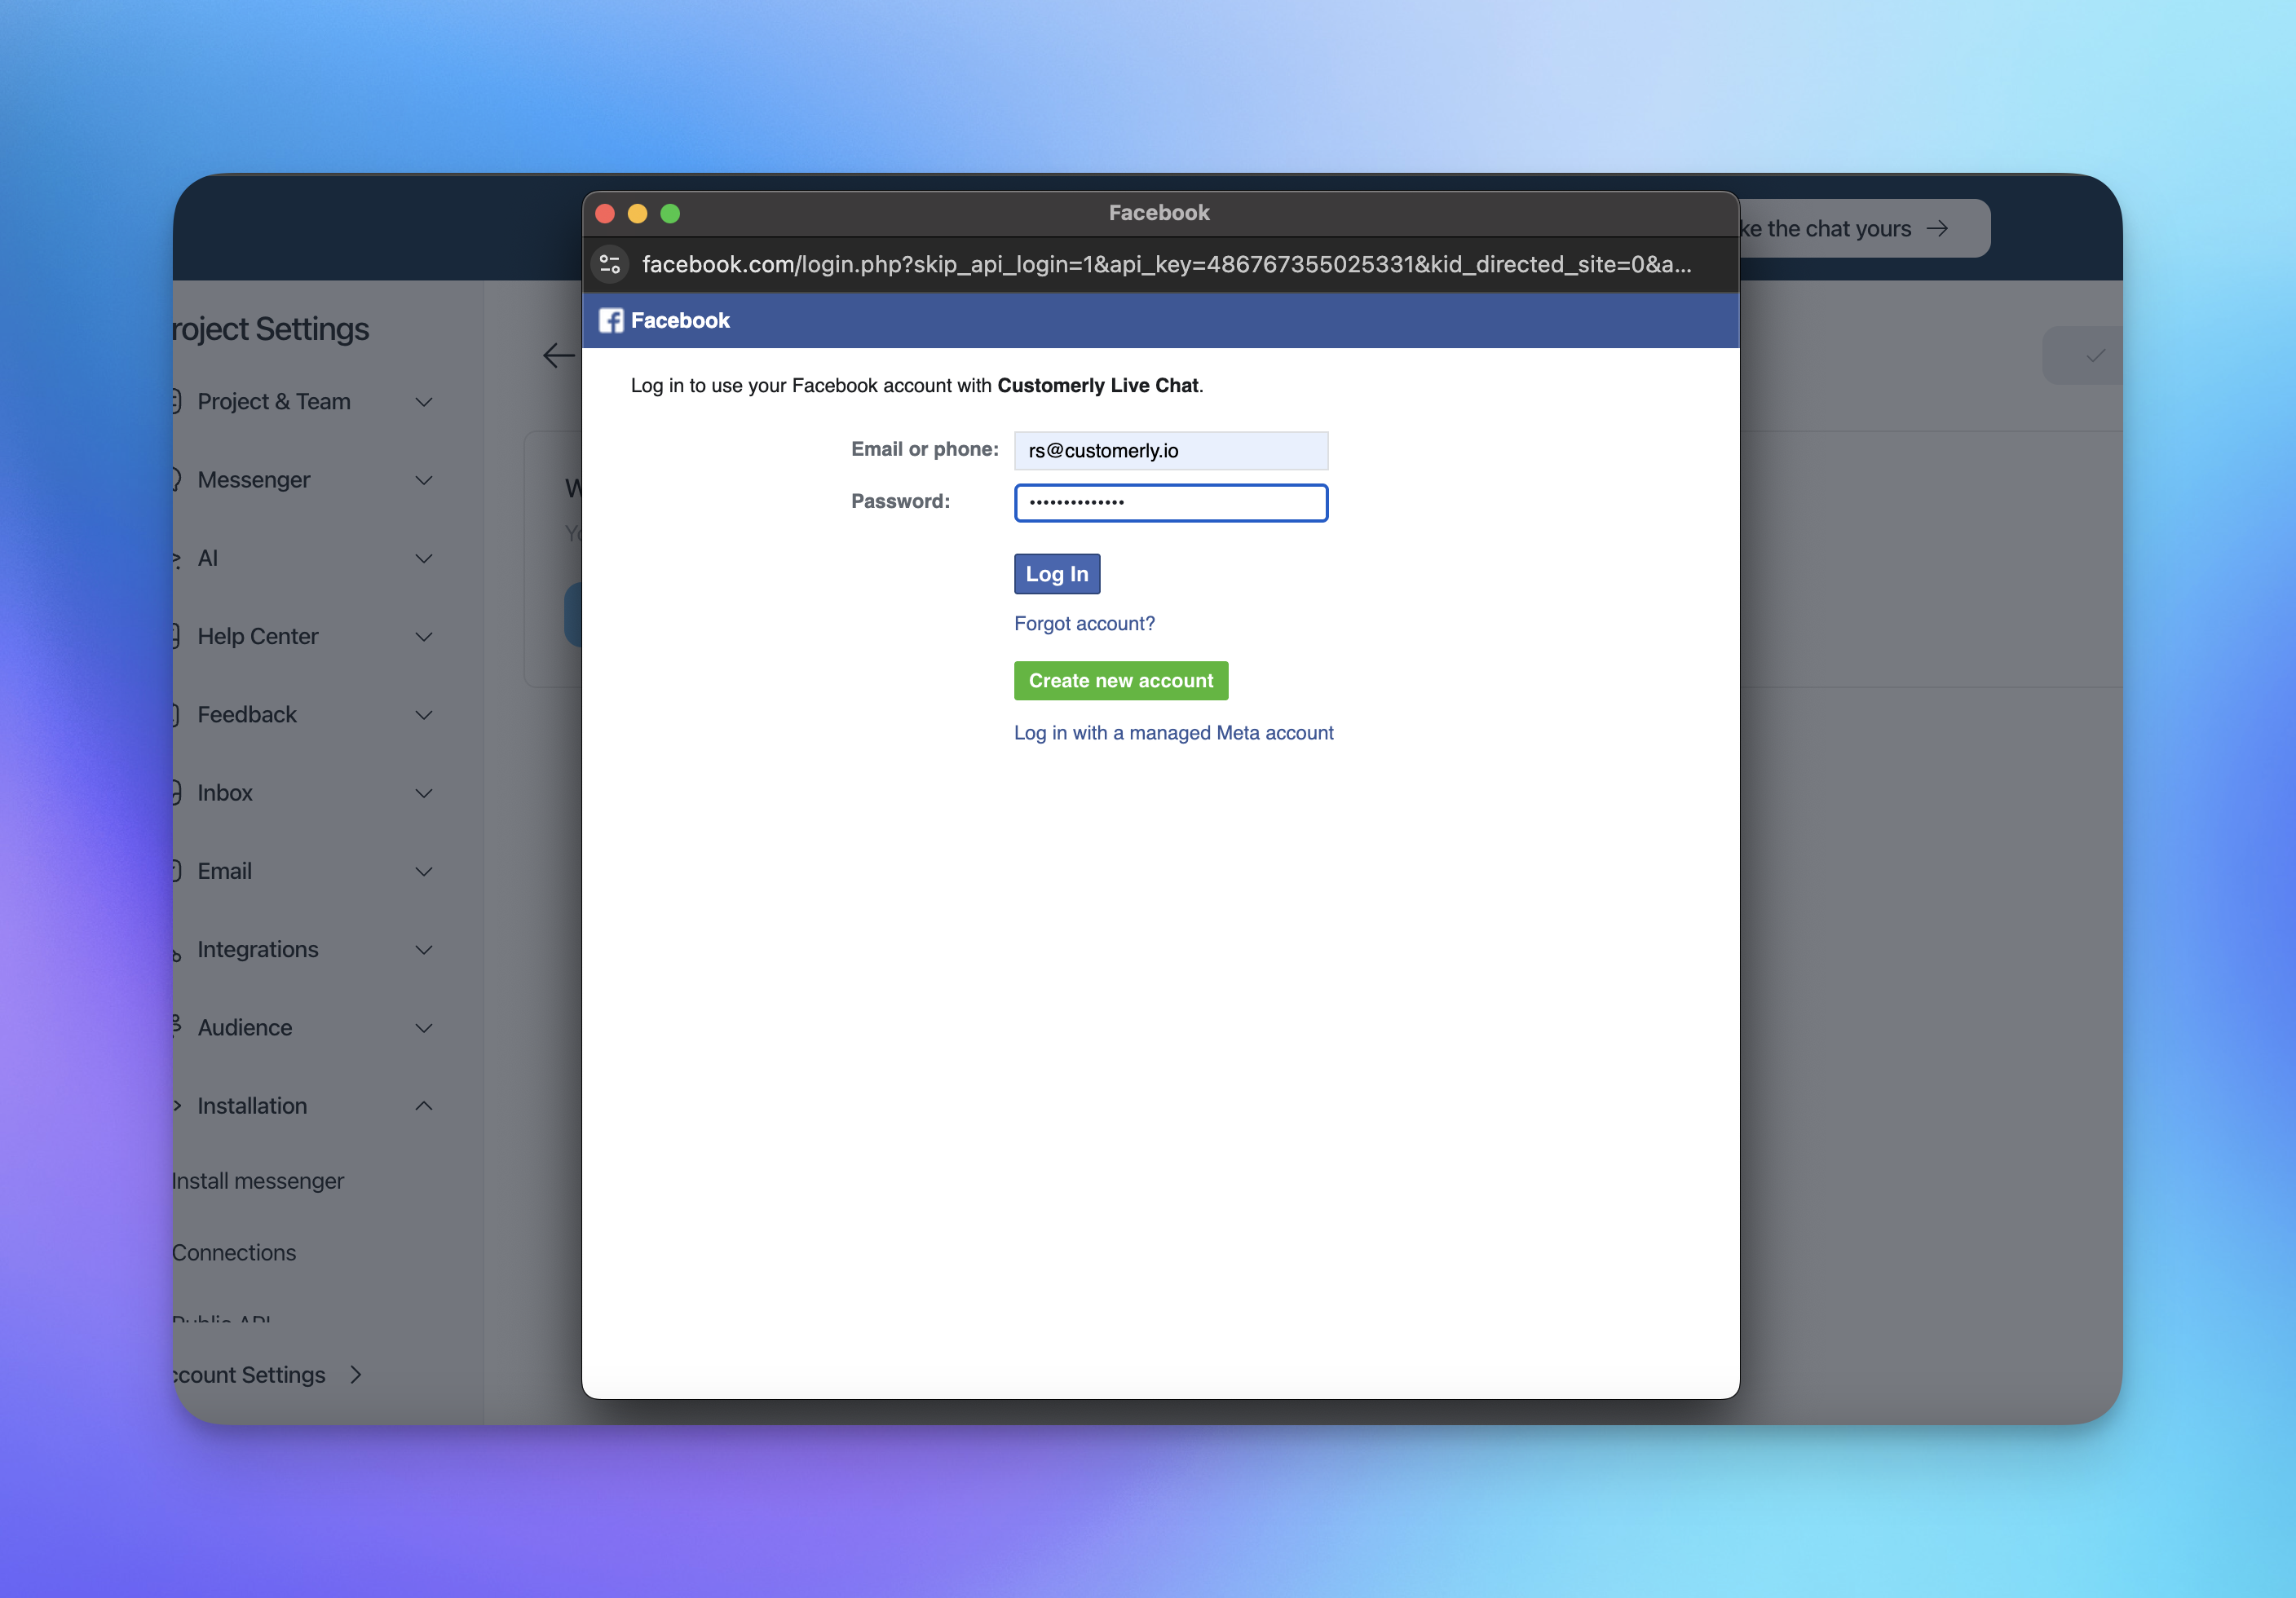
Connect your Facebook Account and go to your dedicated page
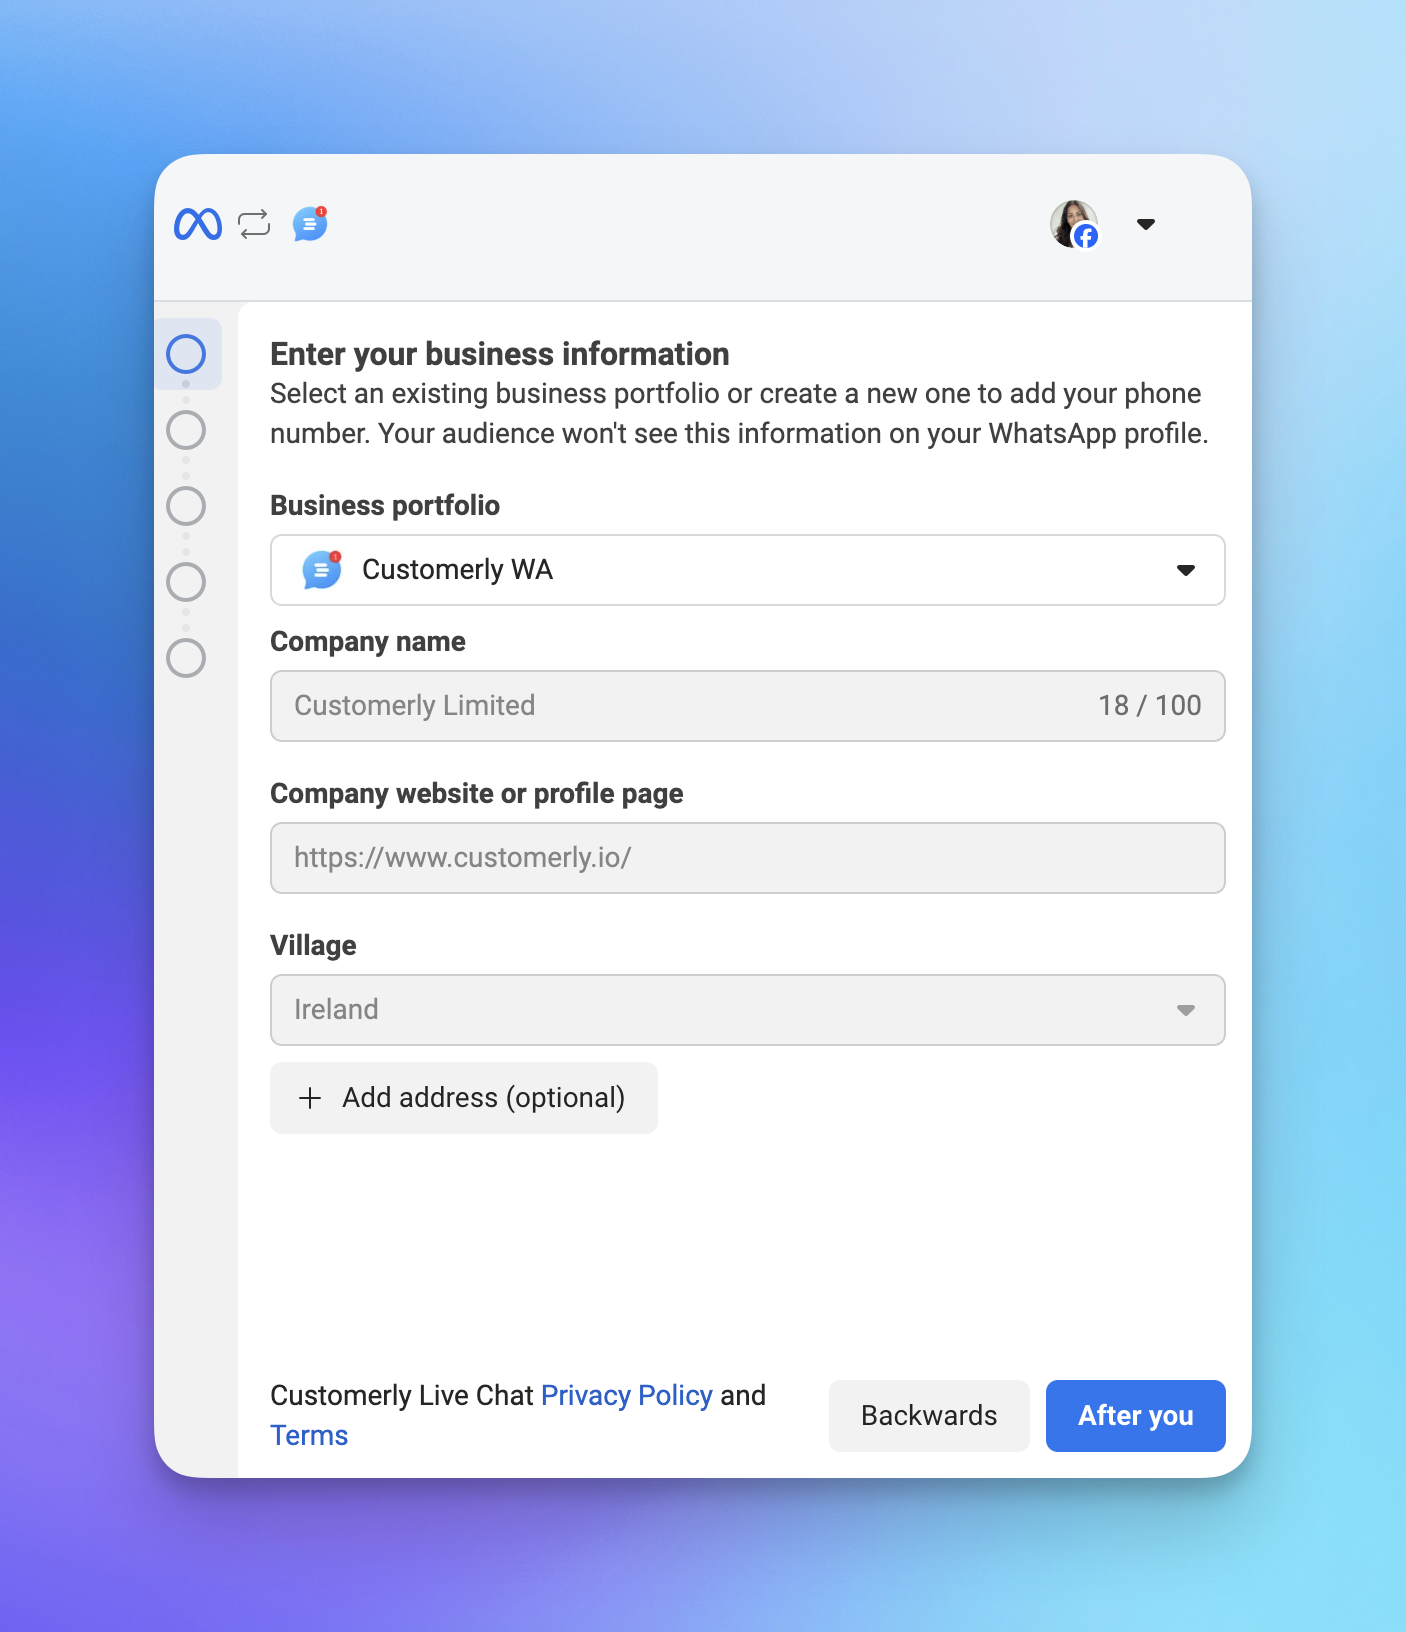
Set your business information (it should automatically pop-up everything already connected to your Facebook account)
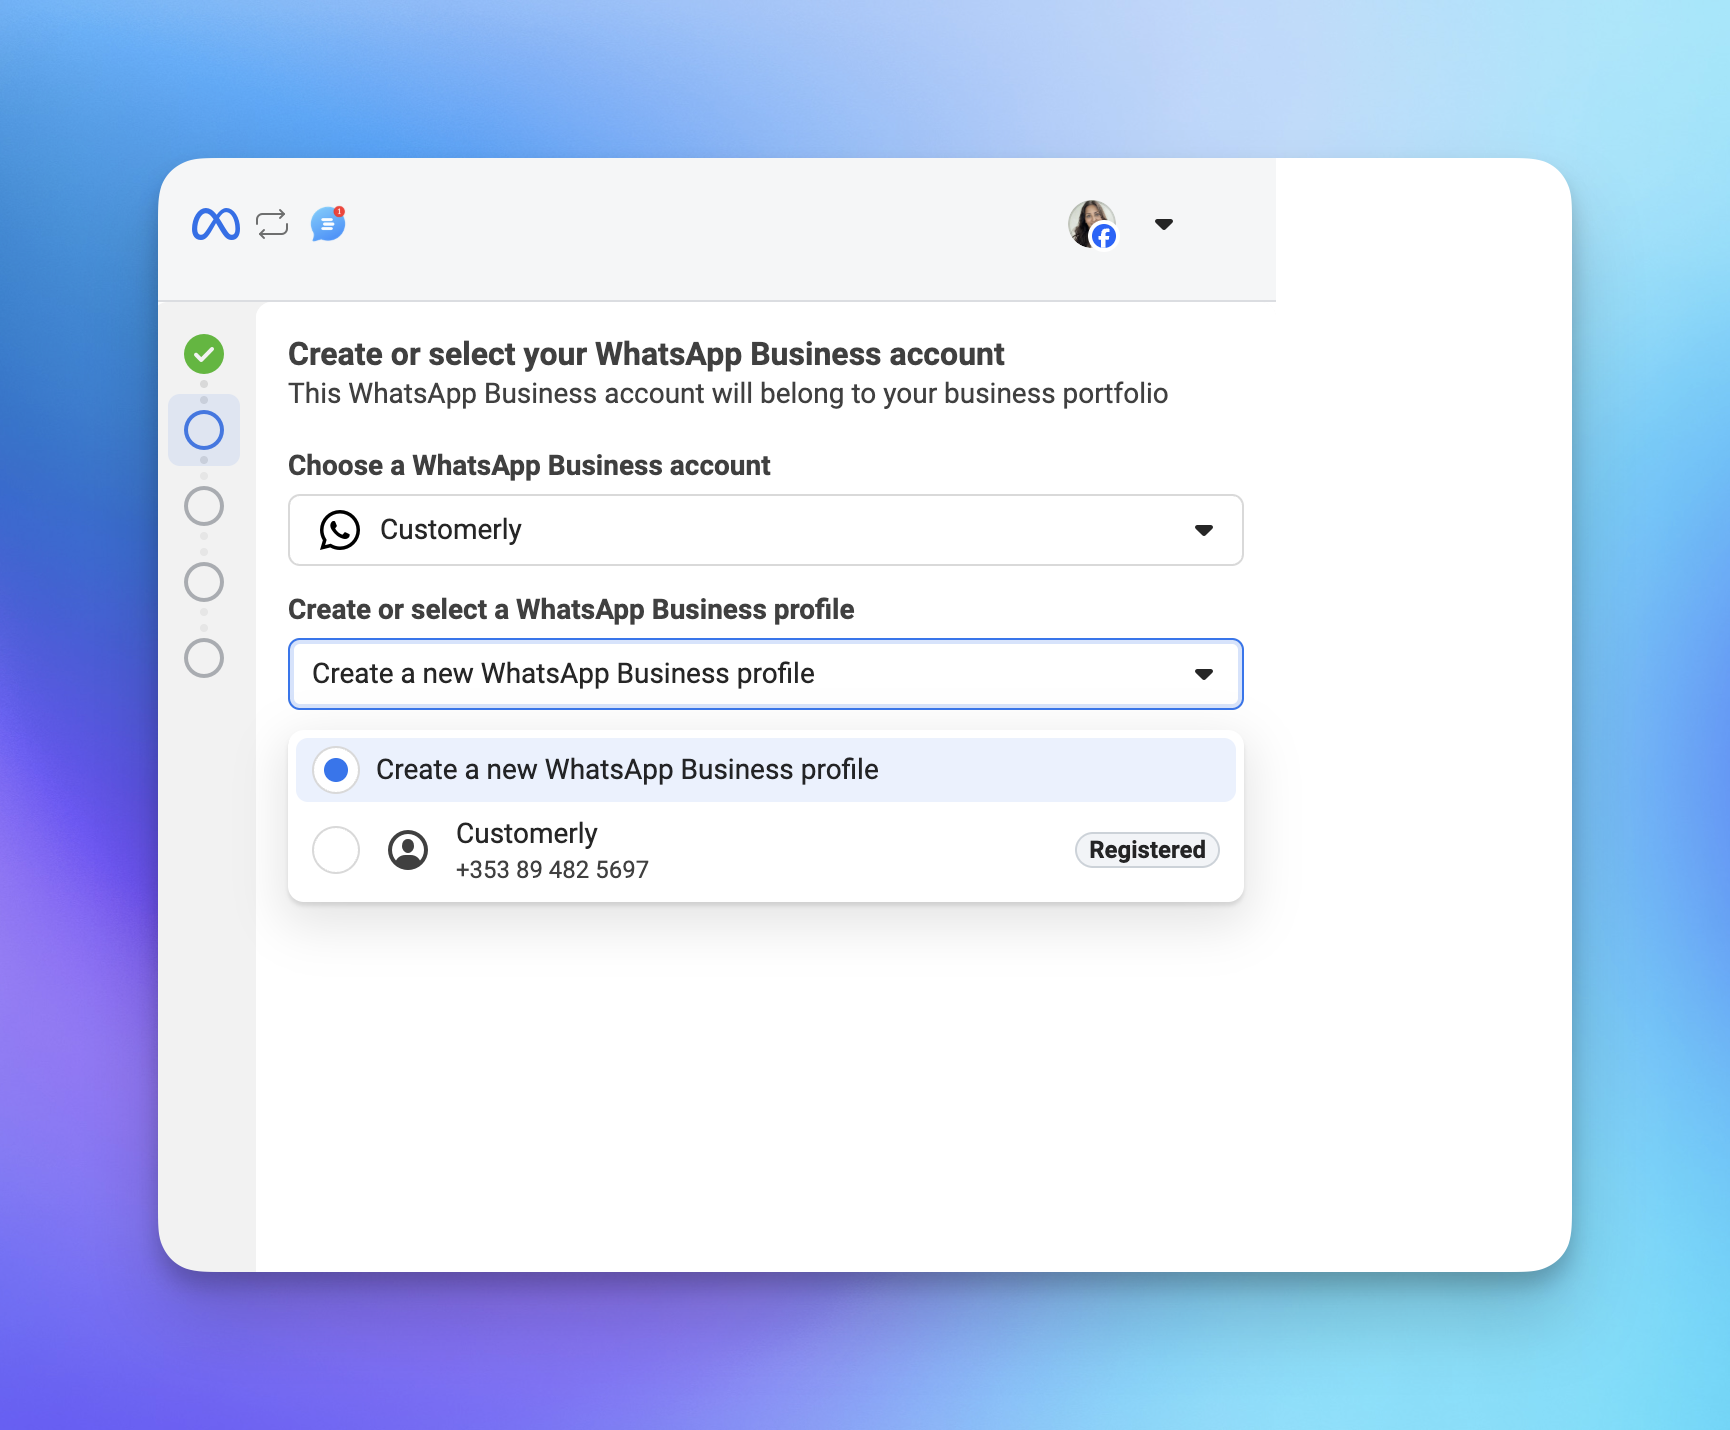
Create or Select a WhatsApp Business Account and confirm
Click end
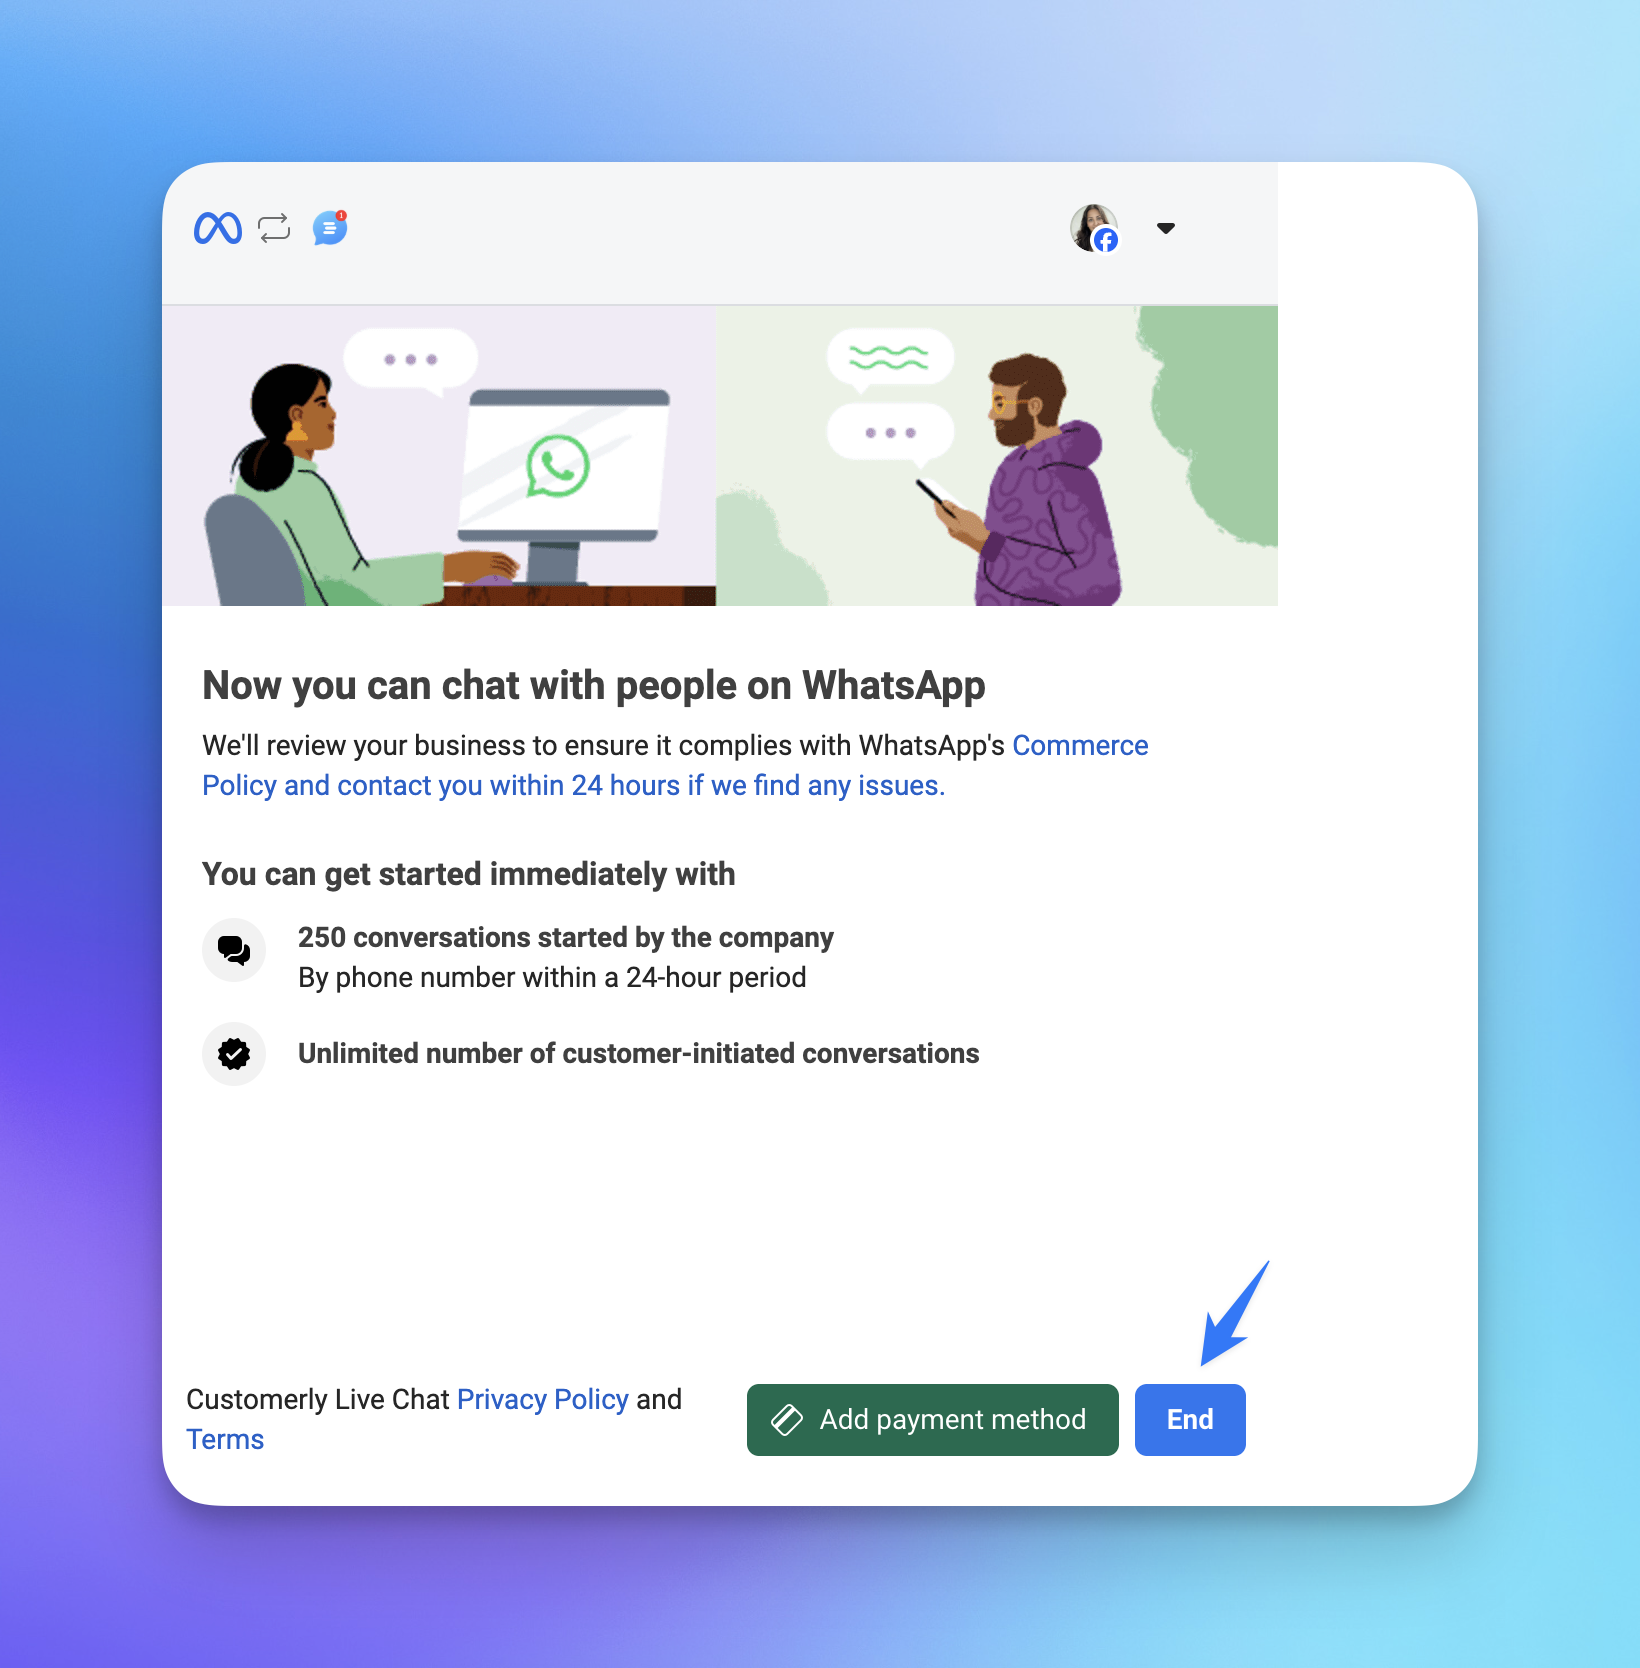
Your phone number has been connected

Prepare your Whatsapp business account
Before connecting, make sure you meet these requirements:
Verified Meta Business Account: without it, you cannot use the phone number.
WhatsApp Business profile: required to handle messaging.
Valid phone number: must be able to receive SMS or calls for verification and not be linked to another WhatsApp account.
Business information: have your legal name, address, and display name ready.
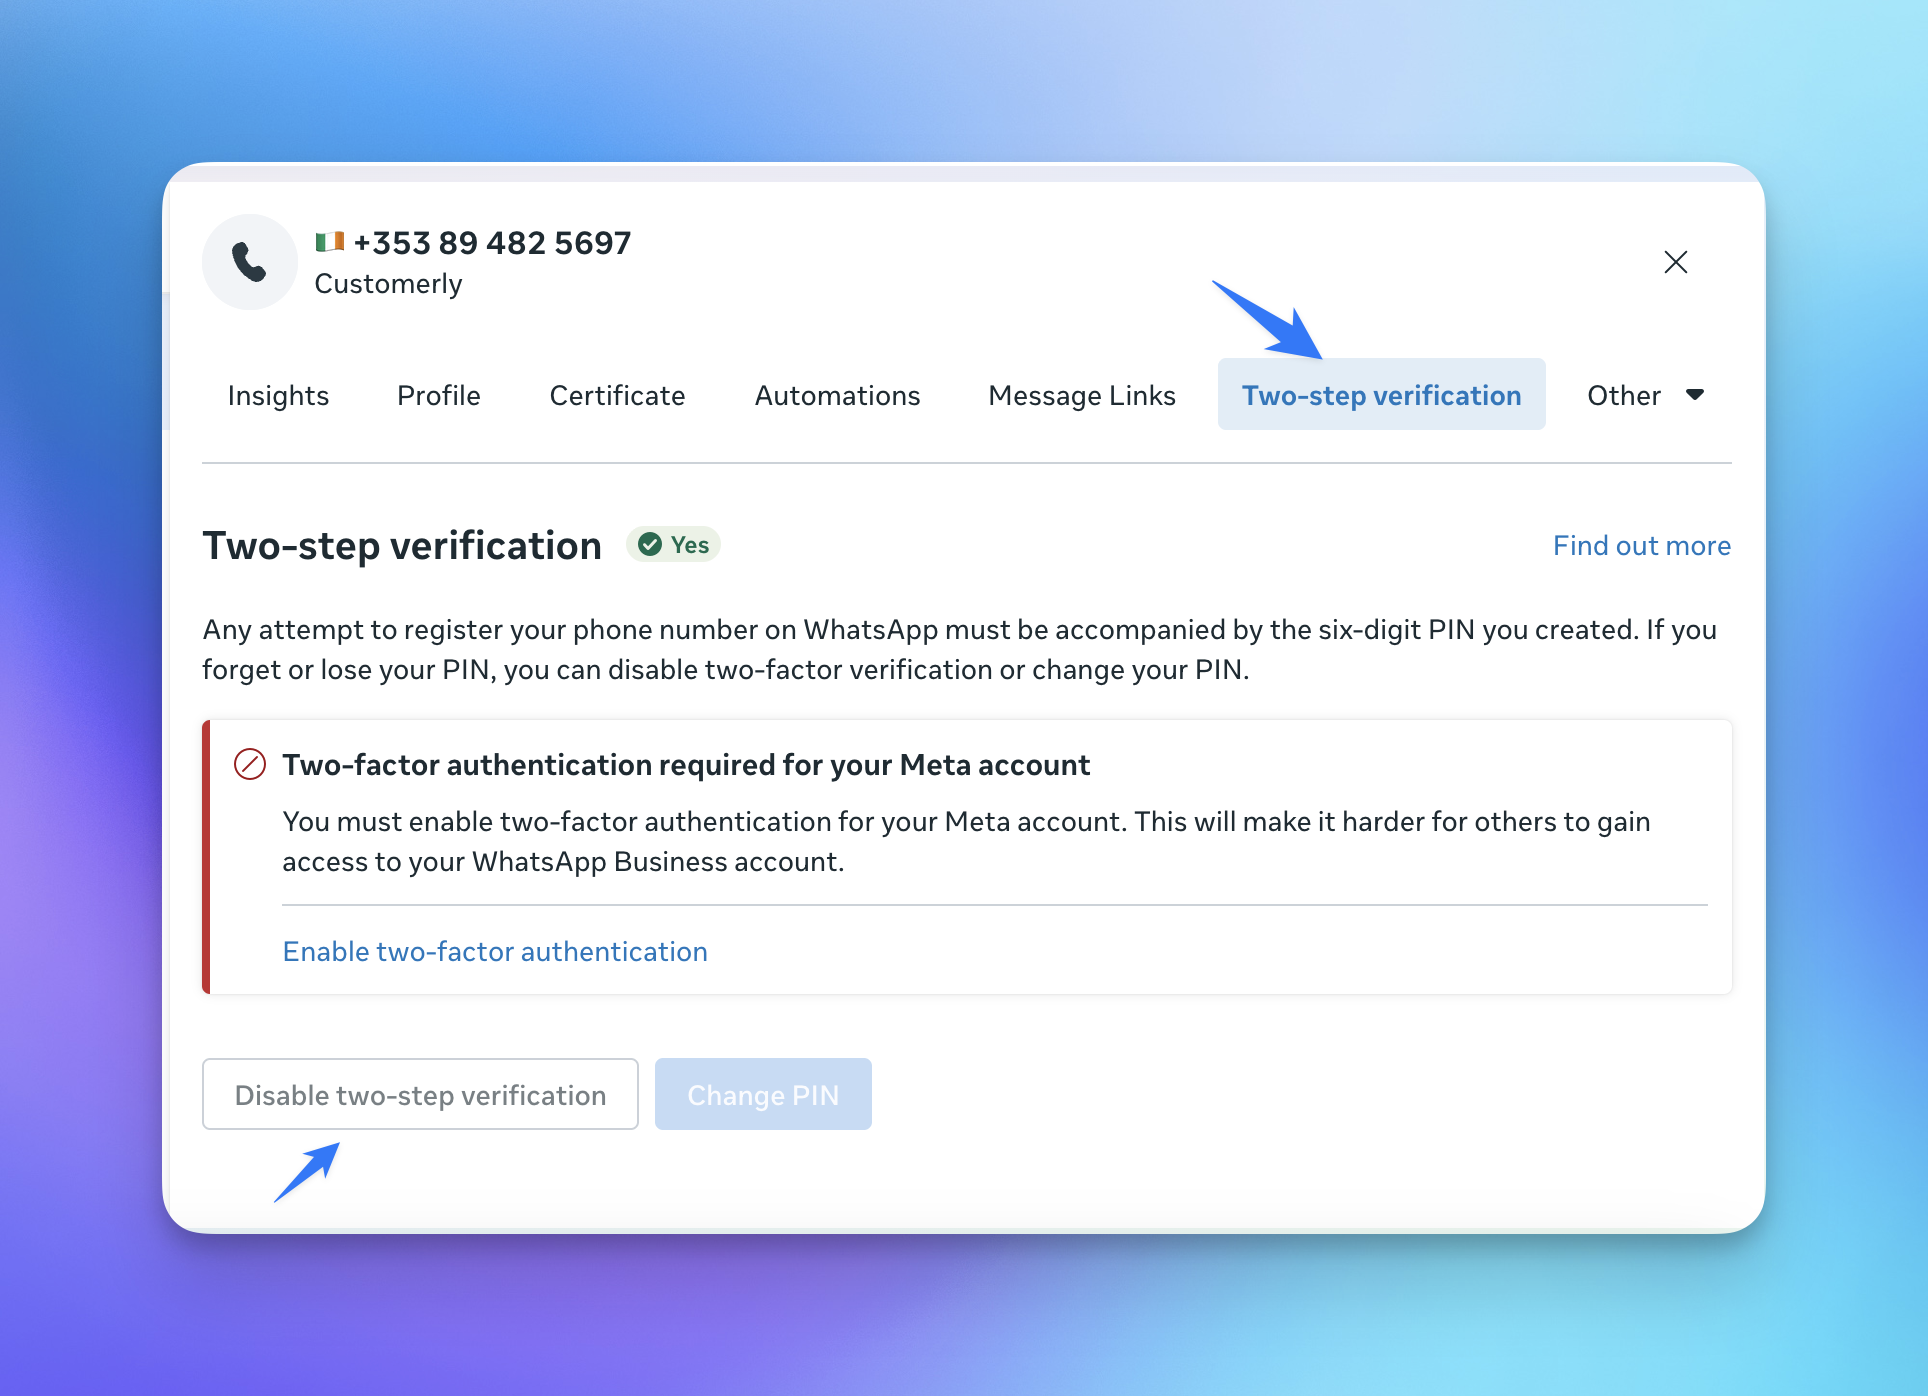
Two-factor authentication (2FA) disabled if migrating from another tool (like Intercom or Zendesk).
⚠️ Important: If you’re moving a number from Customerly to another project in Customerly, you don’t need to disable 2FA. But if the number will be used in another tool (outside Customerly), you must disable it first.
You can do this directly in the WhatsApp Manager by selecting your phone number
Two-step verification > Disable two-step verification
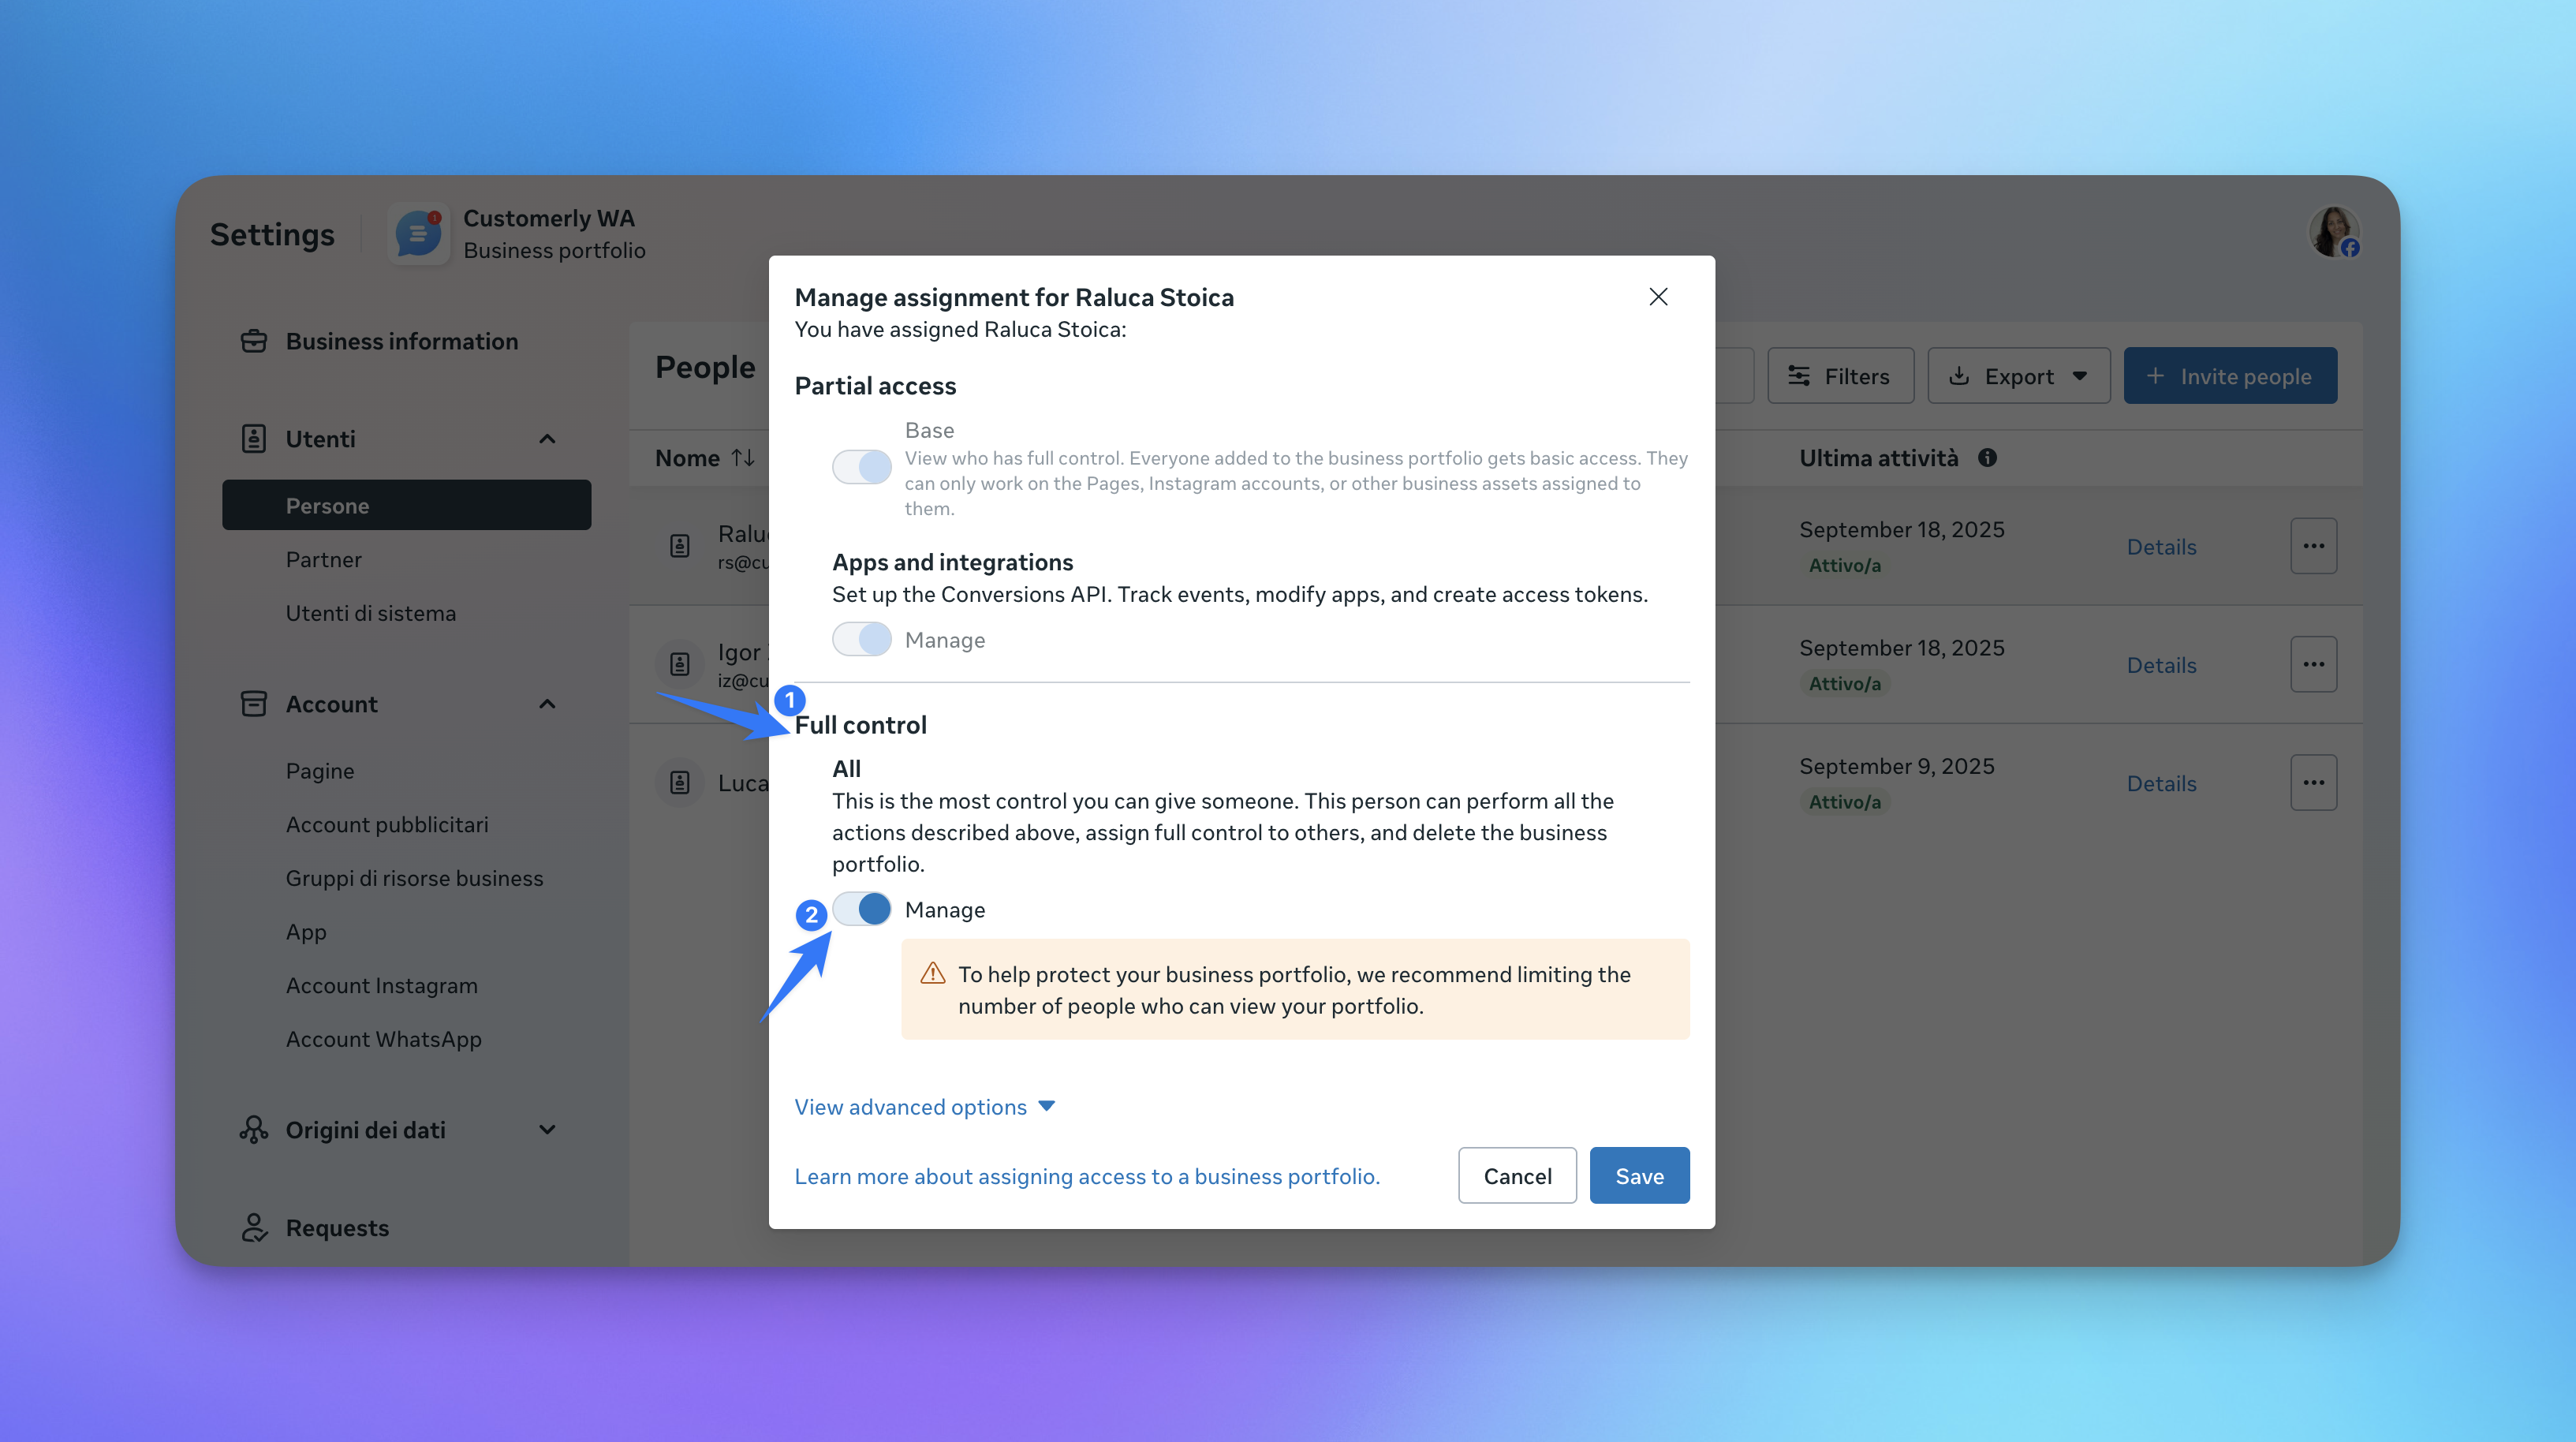
Ensure admin permissions
If the person connecting WhatsApp is not an admin, the connection will fail. The user must:
Be an admin of the WhatsApp Business account.
Have Full control permissions enabled (as shown in the screenshot), including access to apps, integrations, and phone number management.