
Connect your Customerly workspace directly to Claude and let it work with your contacts, conversations, help center and insights — without leaving the chat.
This guide uses Claude Desktop, but the same steps work in Claude on the web.
What you can do once connected
Once Customerly is connected to Claude, you can ask things like:
"How many conversations were opened last week, and what were the top topics?"
"Draft a help center article about our new billing flow and save it as a draft."
"Find every contact at Acme Inc. and summarise their last conversation."
"Reply to conversation #4821 with a friendly follow-up."
Claude reads and writes through the same permissions you grant during setup — nothing more.
Before you start
You'll need:
A Customerly account with Administrator access to the workspace you want to connect
A Claude account on a paid plan (custom connectors aren't available on the Free plan)
The Customerly MCP endpoint:
https://mcp.customerly.io/mcp
Step 1 — Add Customerly as a custom connector
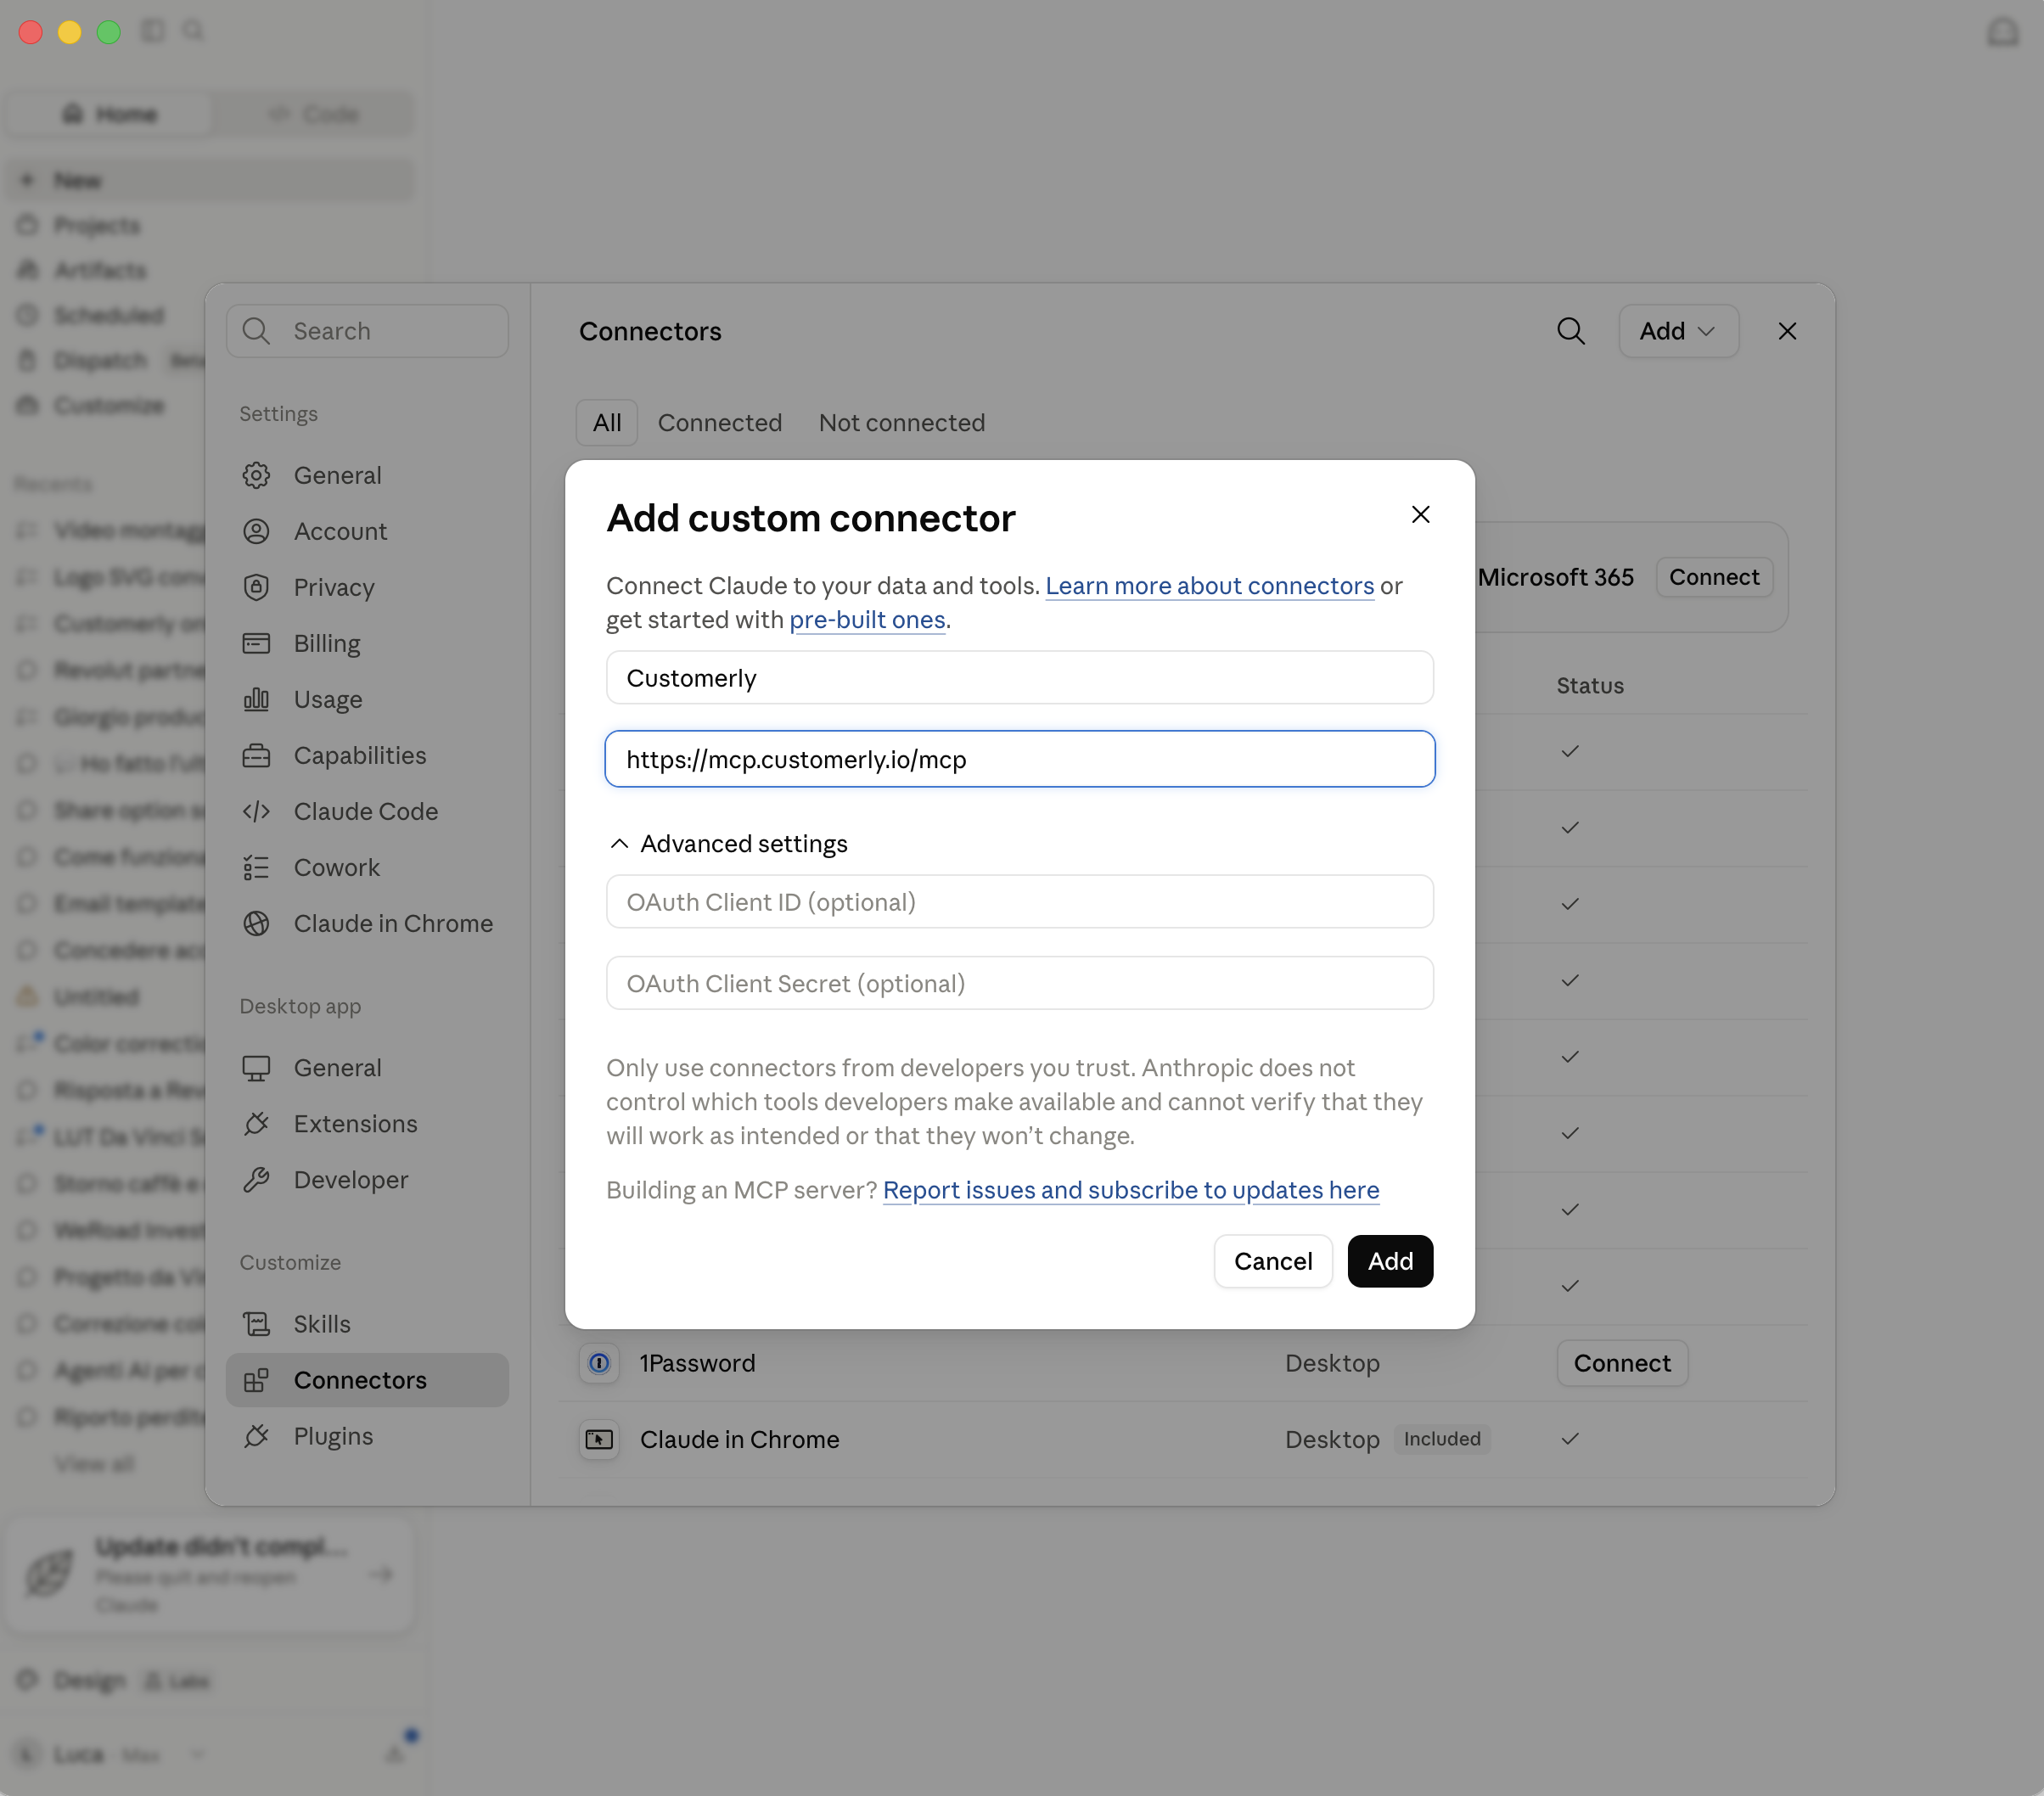
In Claude, open Settings → Connectors, then click Add → Add custom connector.
Fill in the two fields:
Name:
CustomerlyRemote MCP server URL:
https://mcp.customerly.io/mcp
Leave Advanced settings empty — the OAuth Client ID and Secret are not required, Customerly handles the authentication for you.
Click Add.
Step 2 — Start the connection
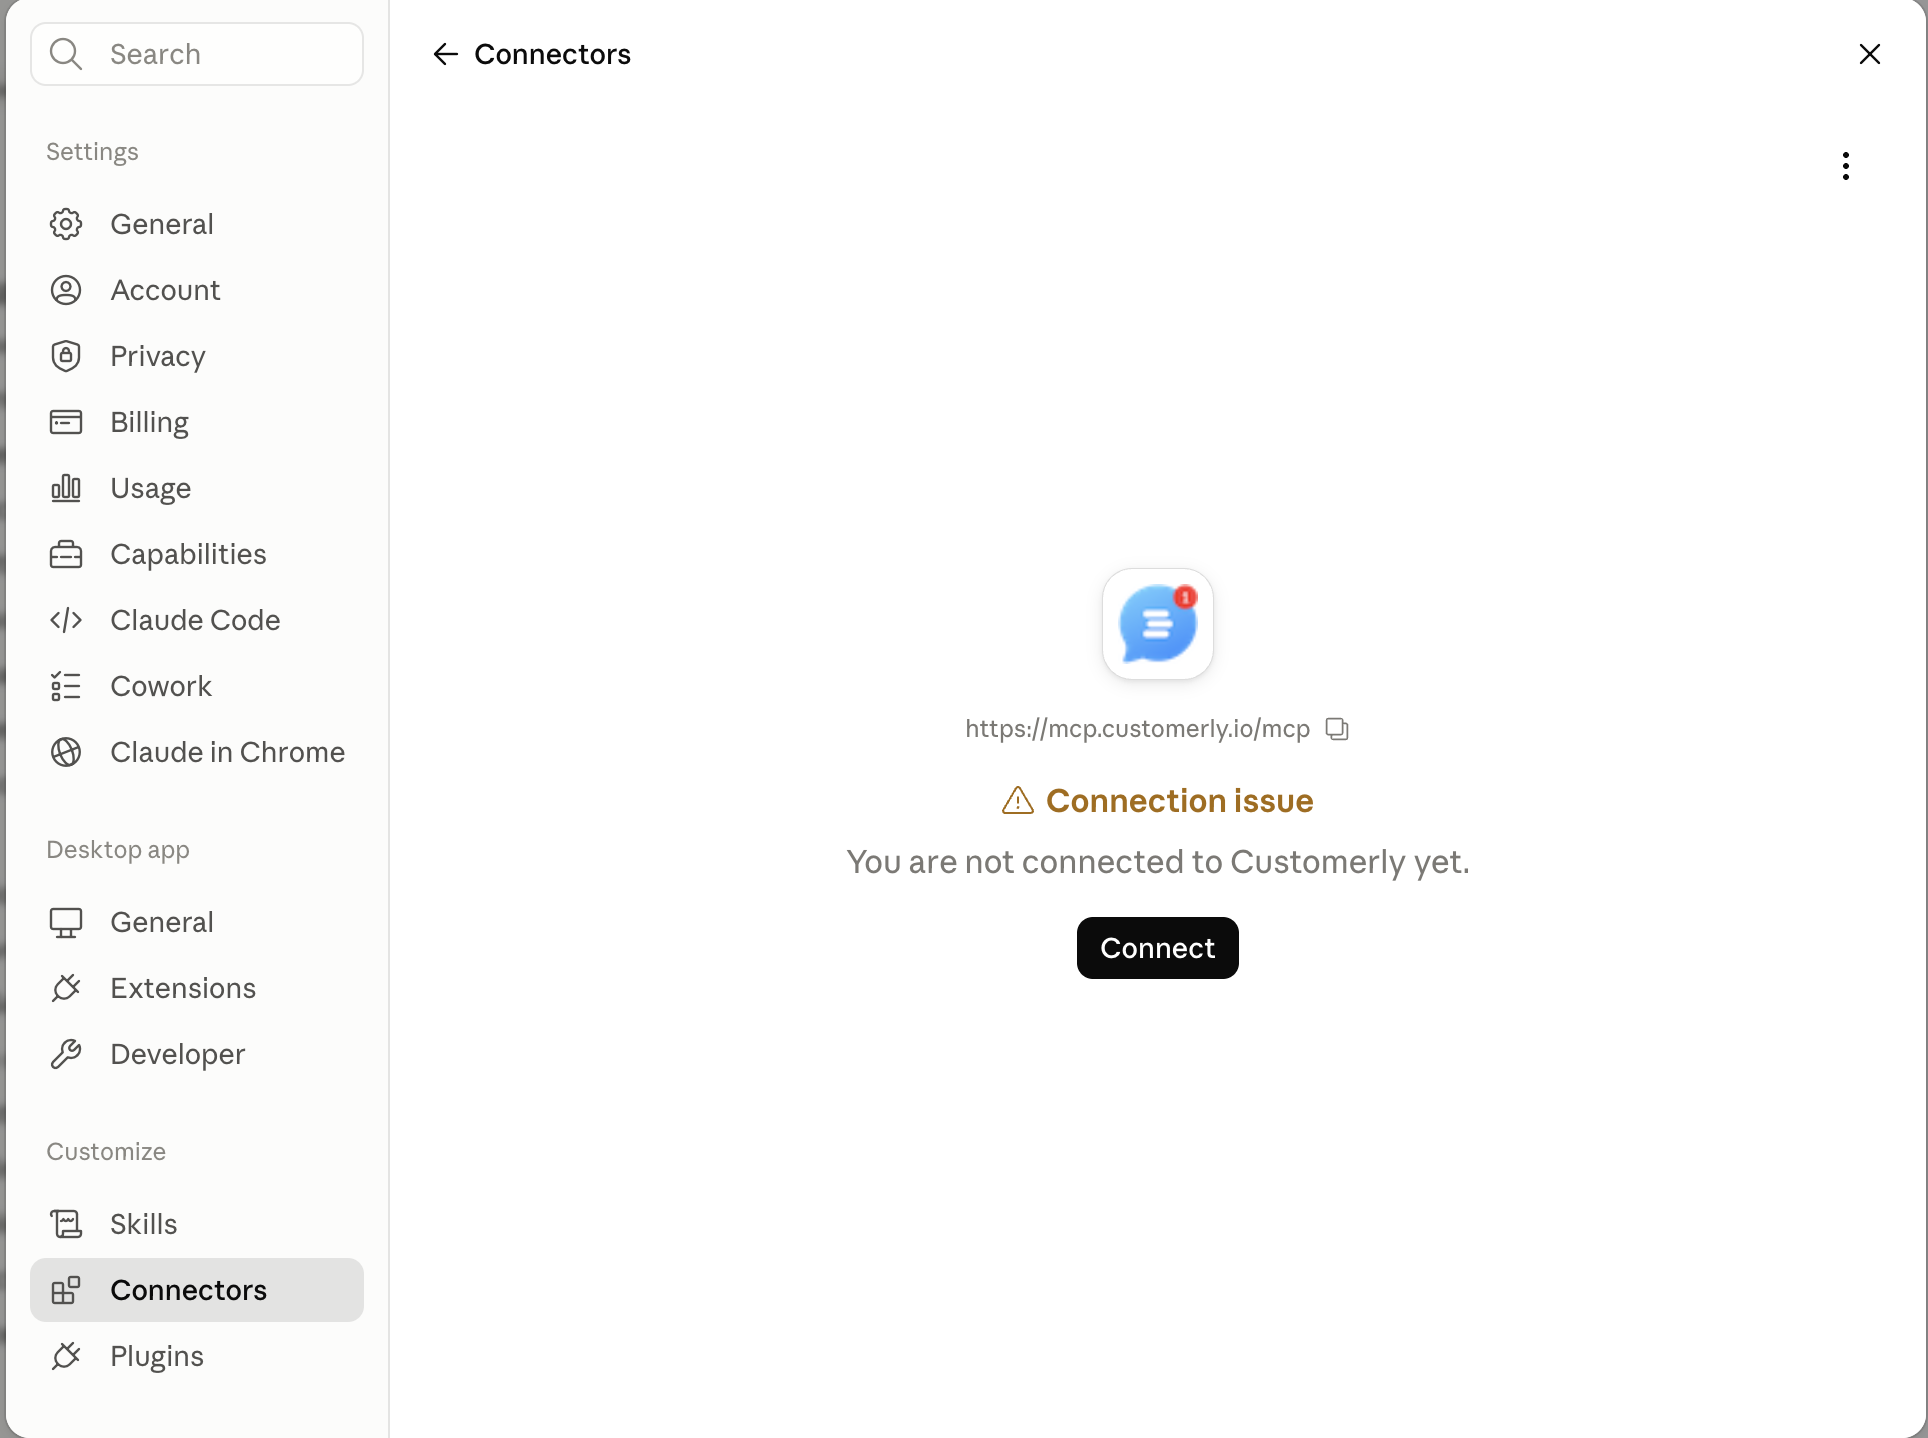
Customerly now appears in your connector list, but it isn't authorised yet. You'll see "You are not connected to Customerly yet."
Click Connect. A browser window opens.
Step 3 — Choose the workspace to connect
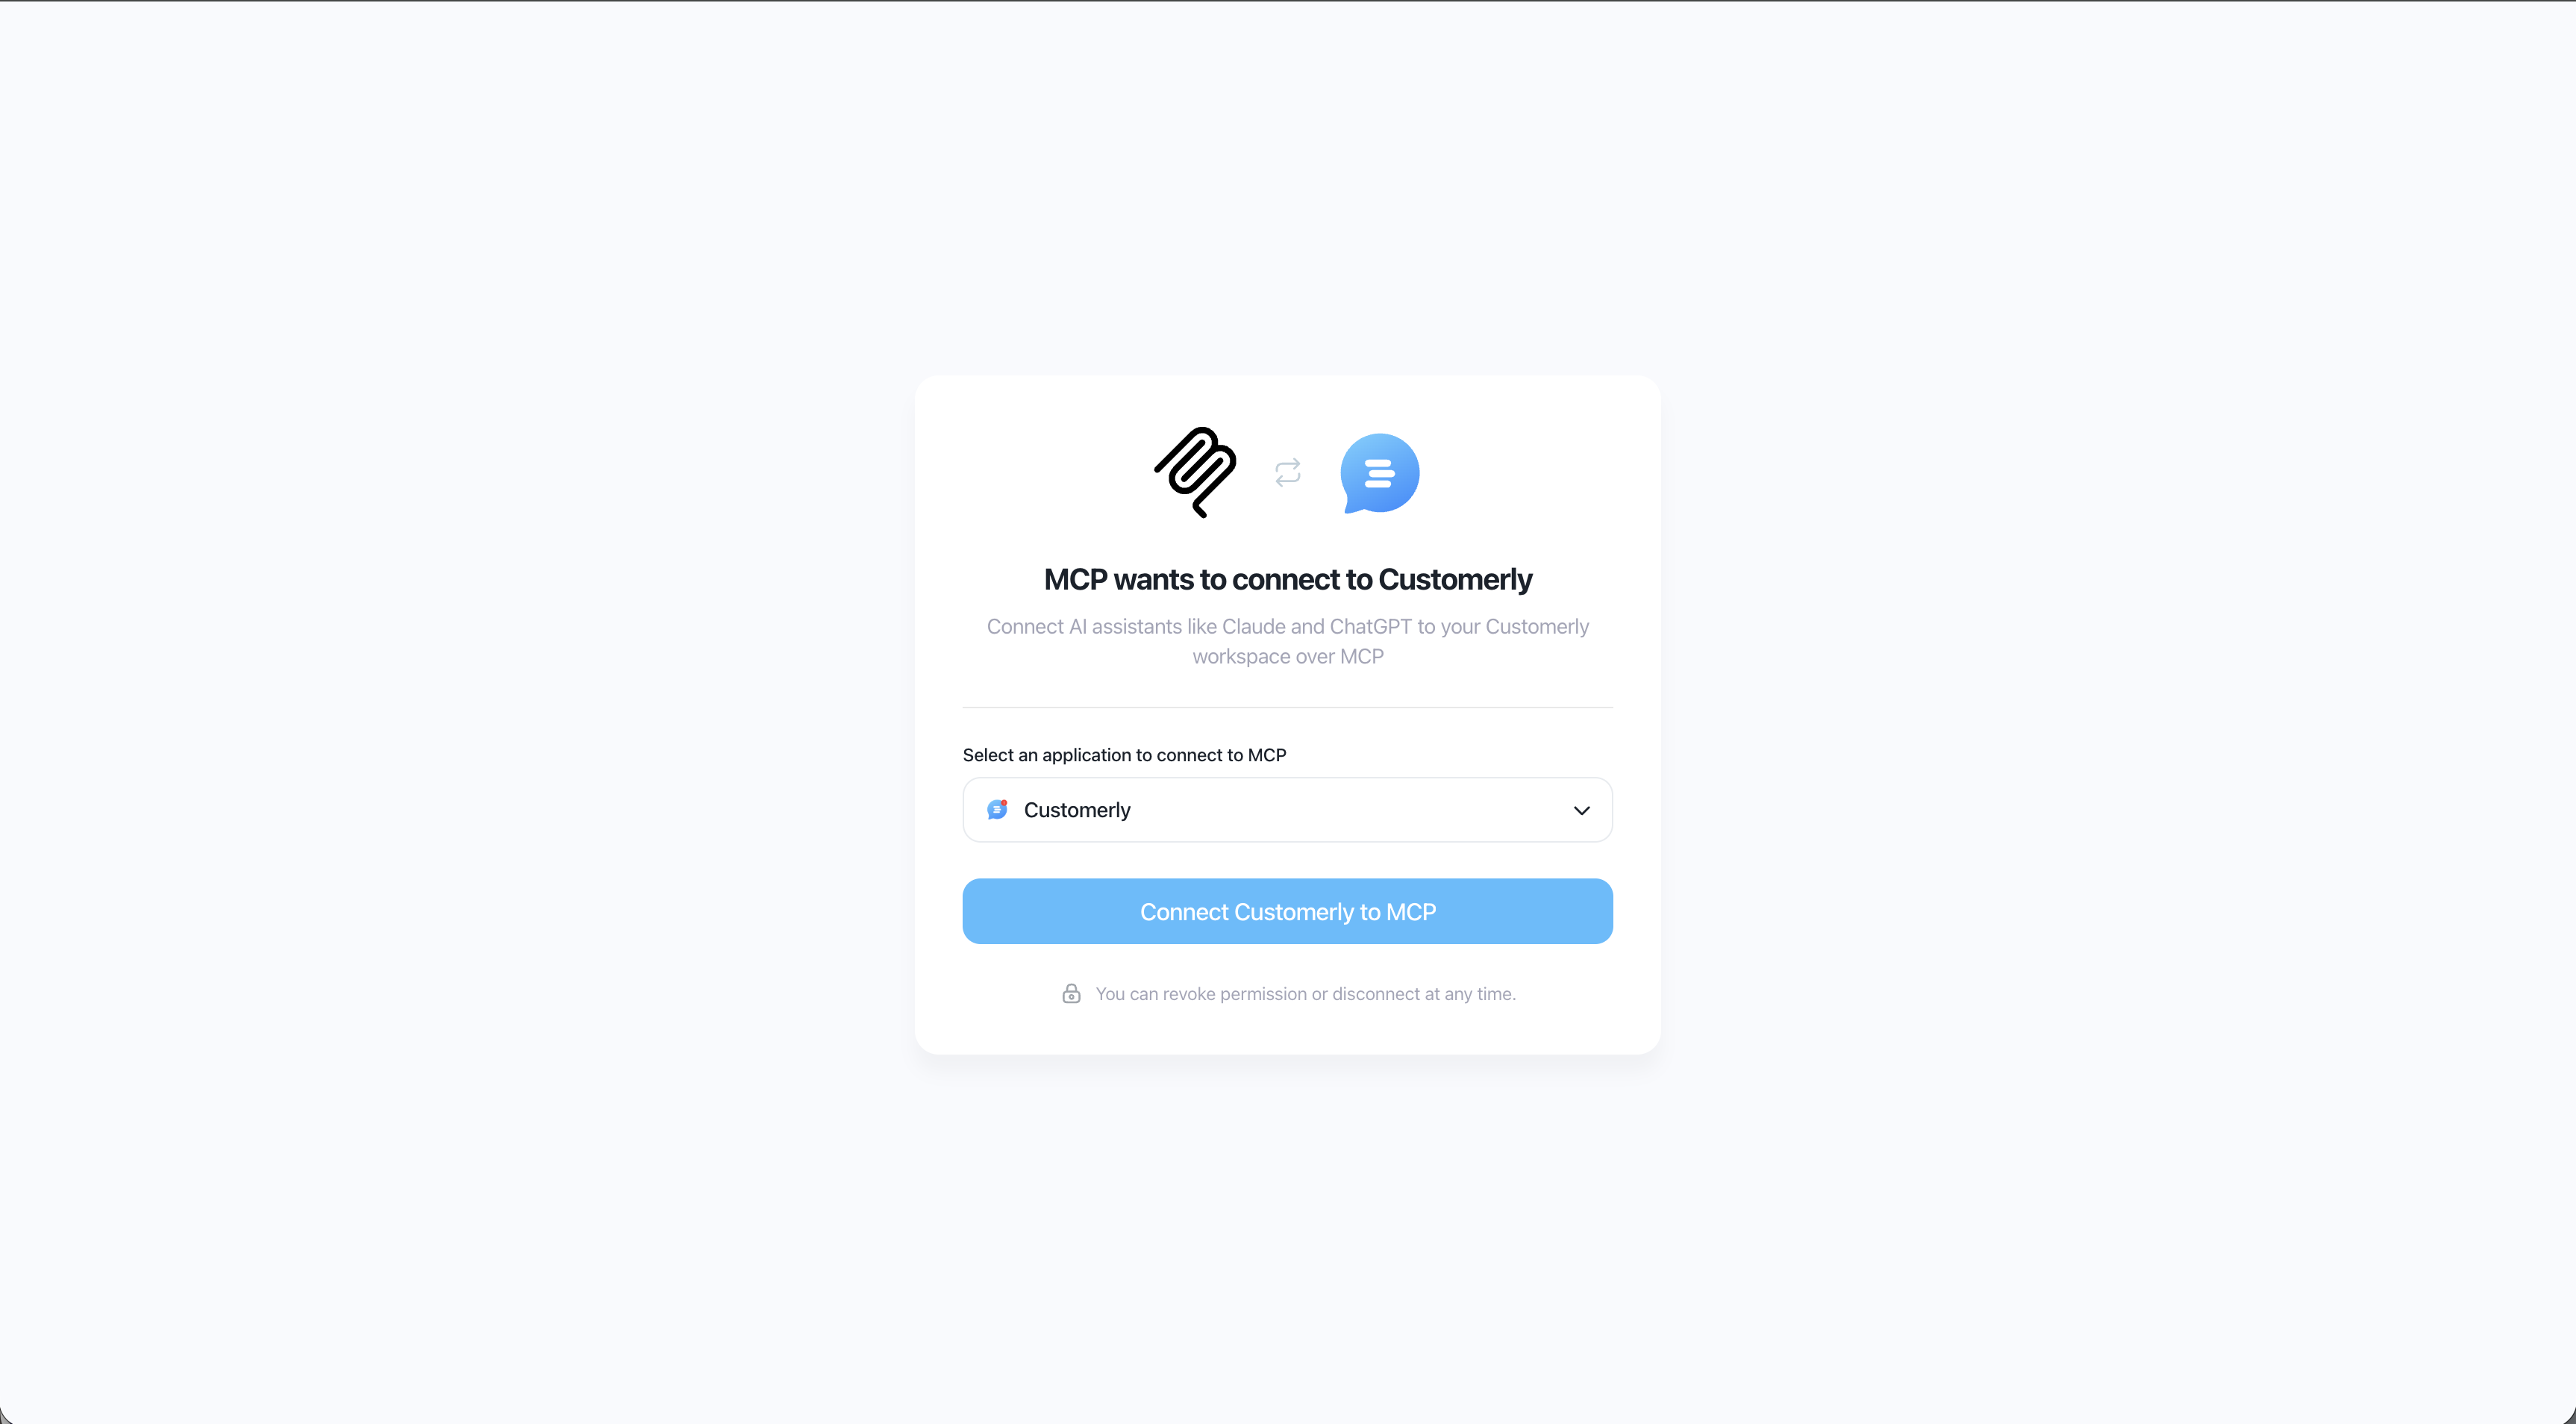
You'll land on the Customerly authorisation page. If you belong to more than one Customerly project, pick the one you want Claude to work with from the dropdown.
Click Connect Customerly to MCP.
Step 4 — Grant permissions
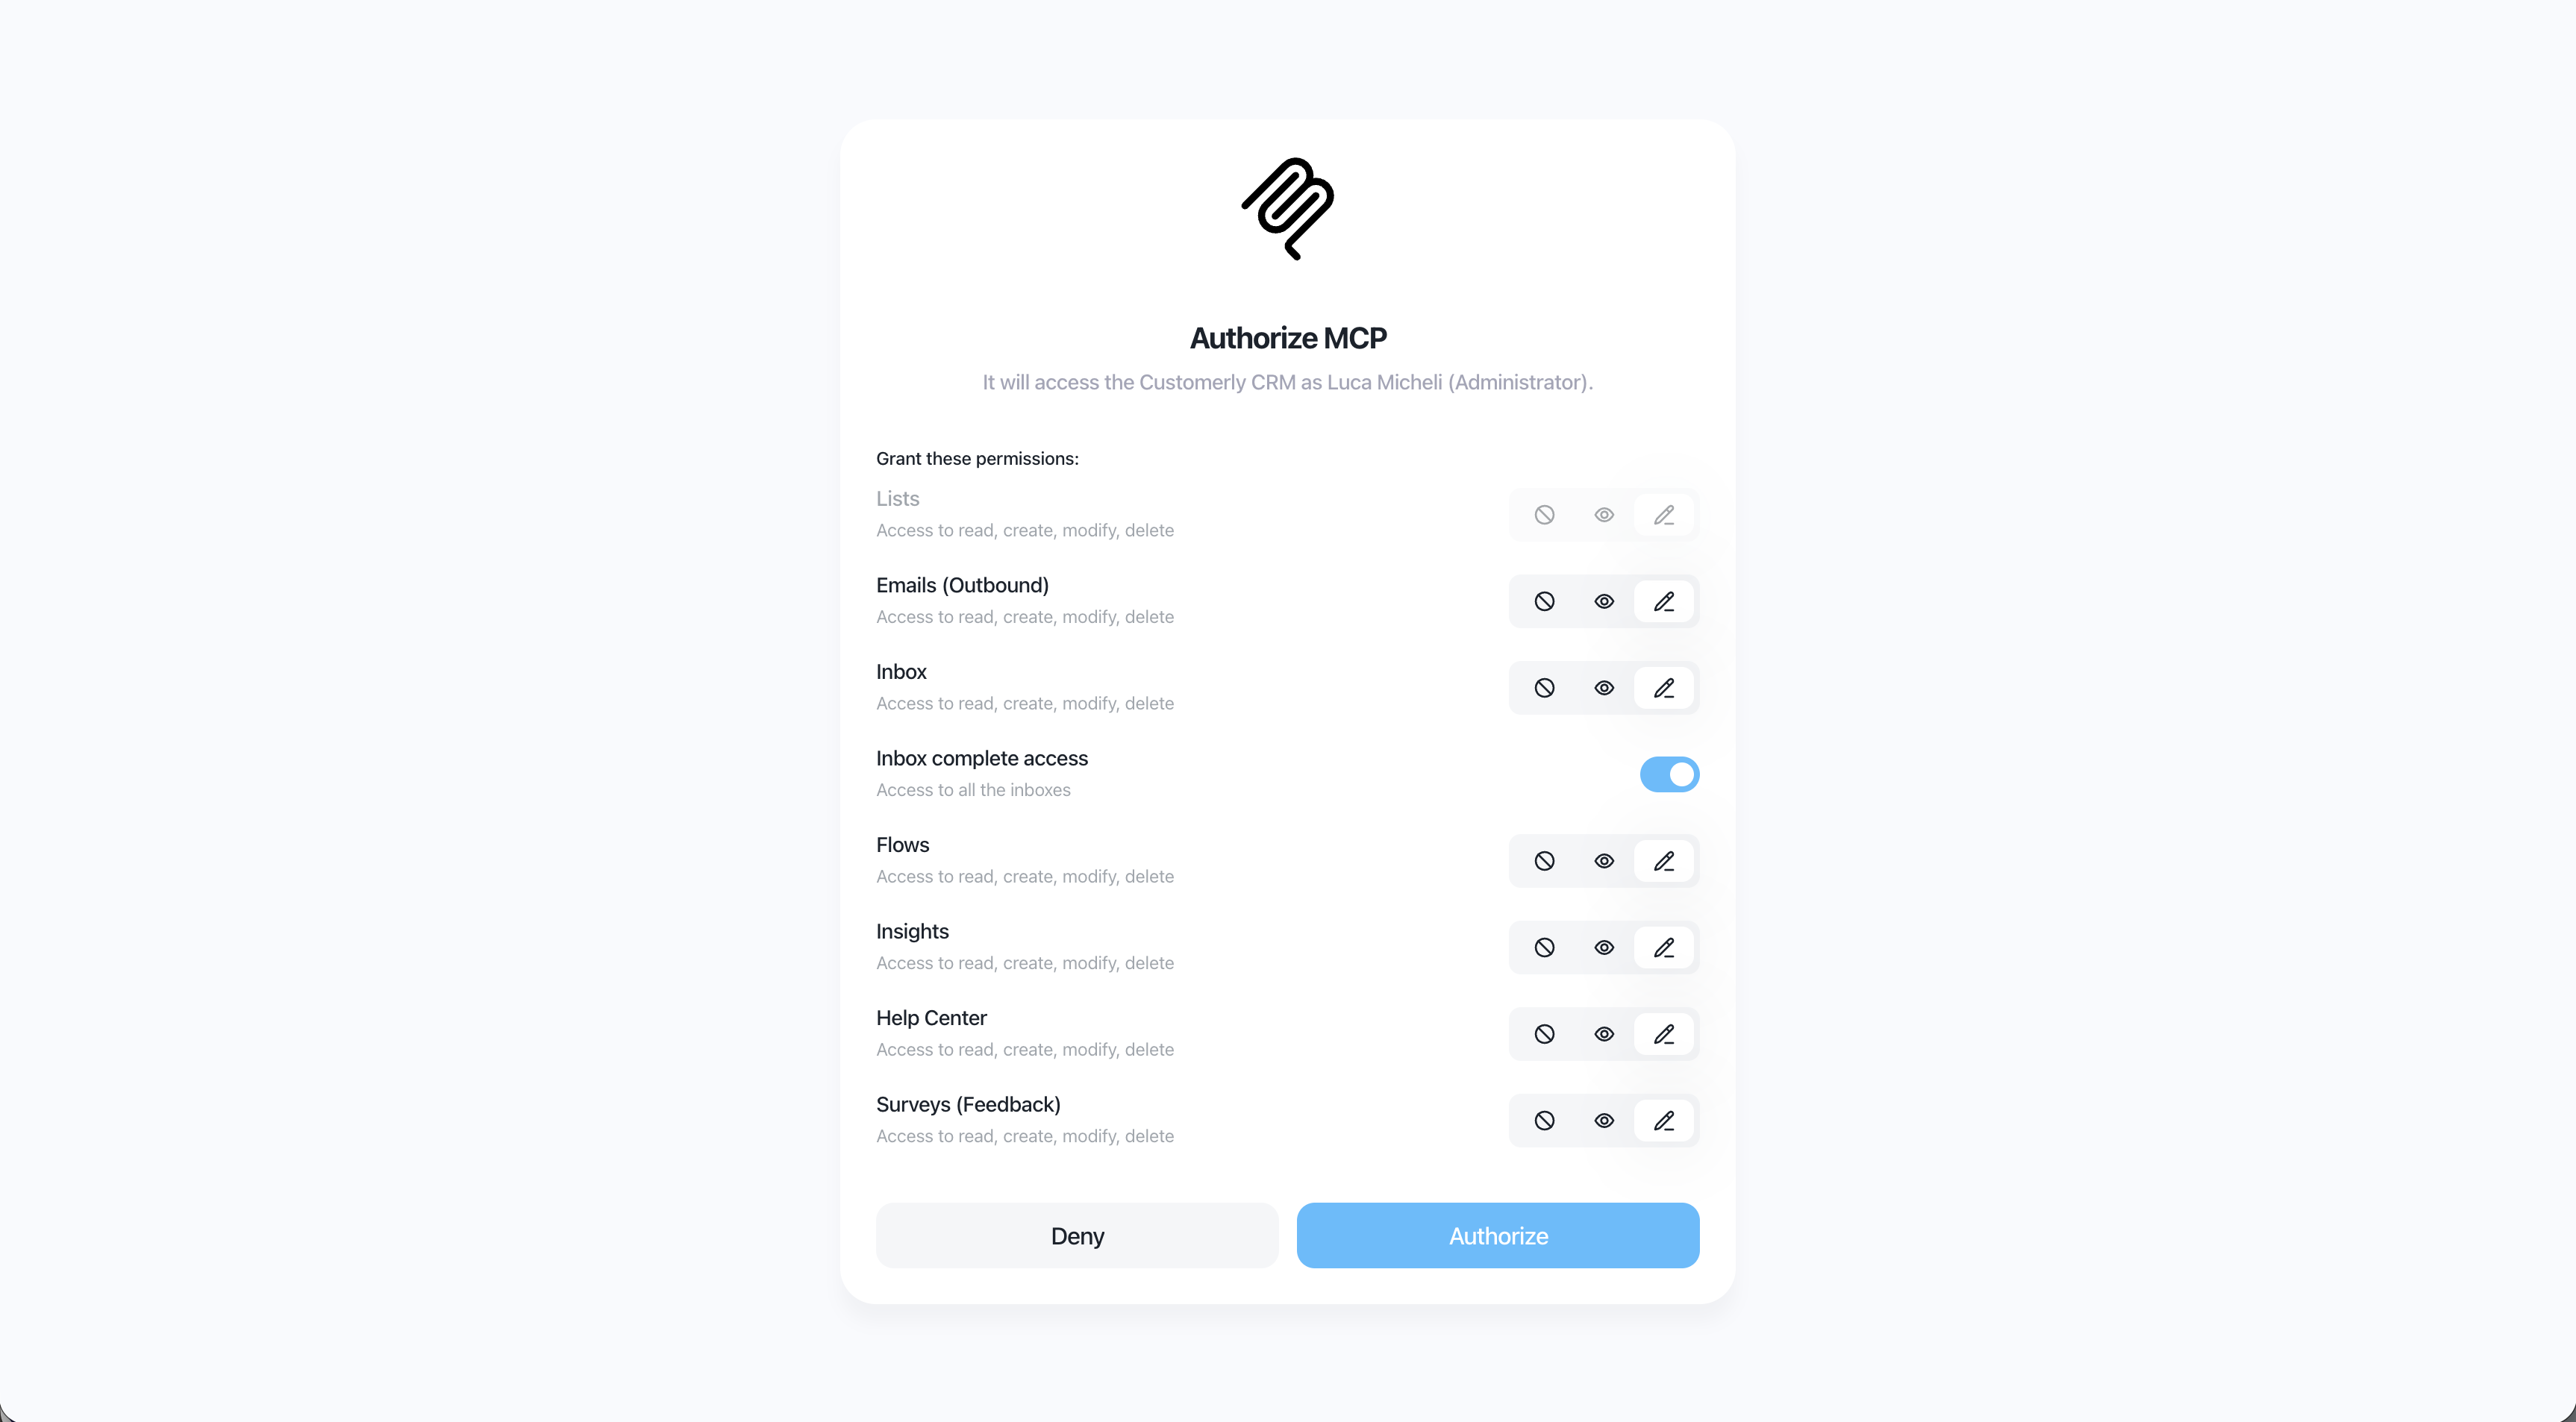
This is the important step. Customerly asks exactly what Claude is allowed to touch, resource by resource:
Lists
Emails (Outbound)
Inbox — plus Inbox complete access, which extends Claude's reach to all inboxes instead of only the ones assigned to you
Flows
Insights
Help Center
Surveys (Feedback)
For each resource you can choose one of three levels:
No access — Claude can't see this resource at all
Read only — Claude can read, but never create, modify or delete
Full access — Claude can read, create, modify and delete
The connection runs as you — the banner confirms the account and role it will act with. Claude can never do anything your own Customerly user can't do.
Our recommendation: start with read only everywhere. Once you're comfortable with how Claude behaves, upgrade the resources you actually want it to edit — typically Help Center and Inbox.
When you're happy with the selection, click Authorize.
Step 5 — Set tool approvals in Claude
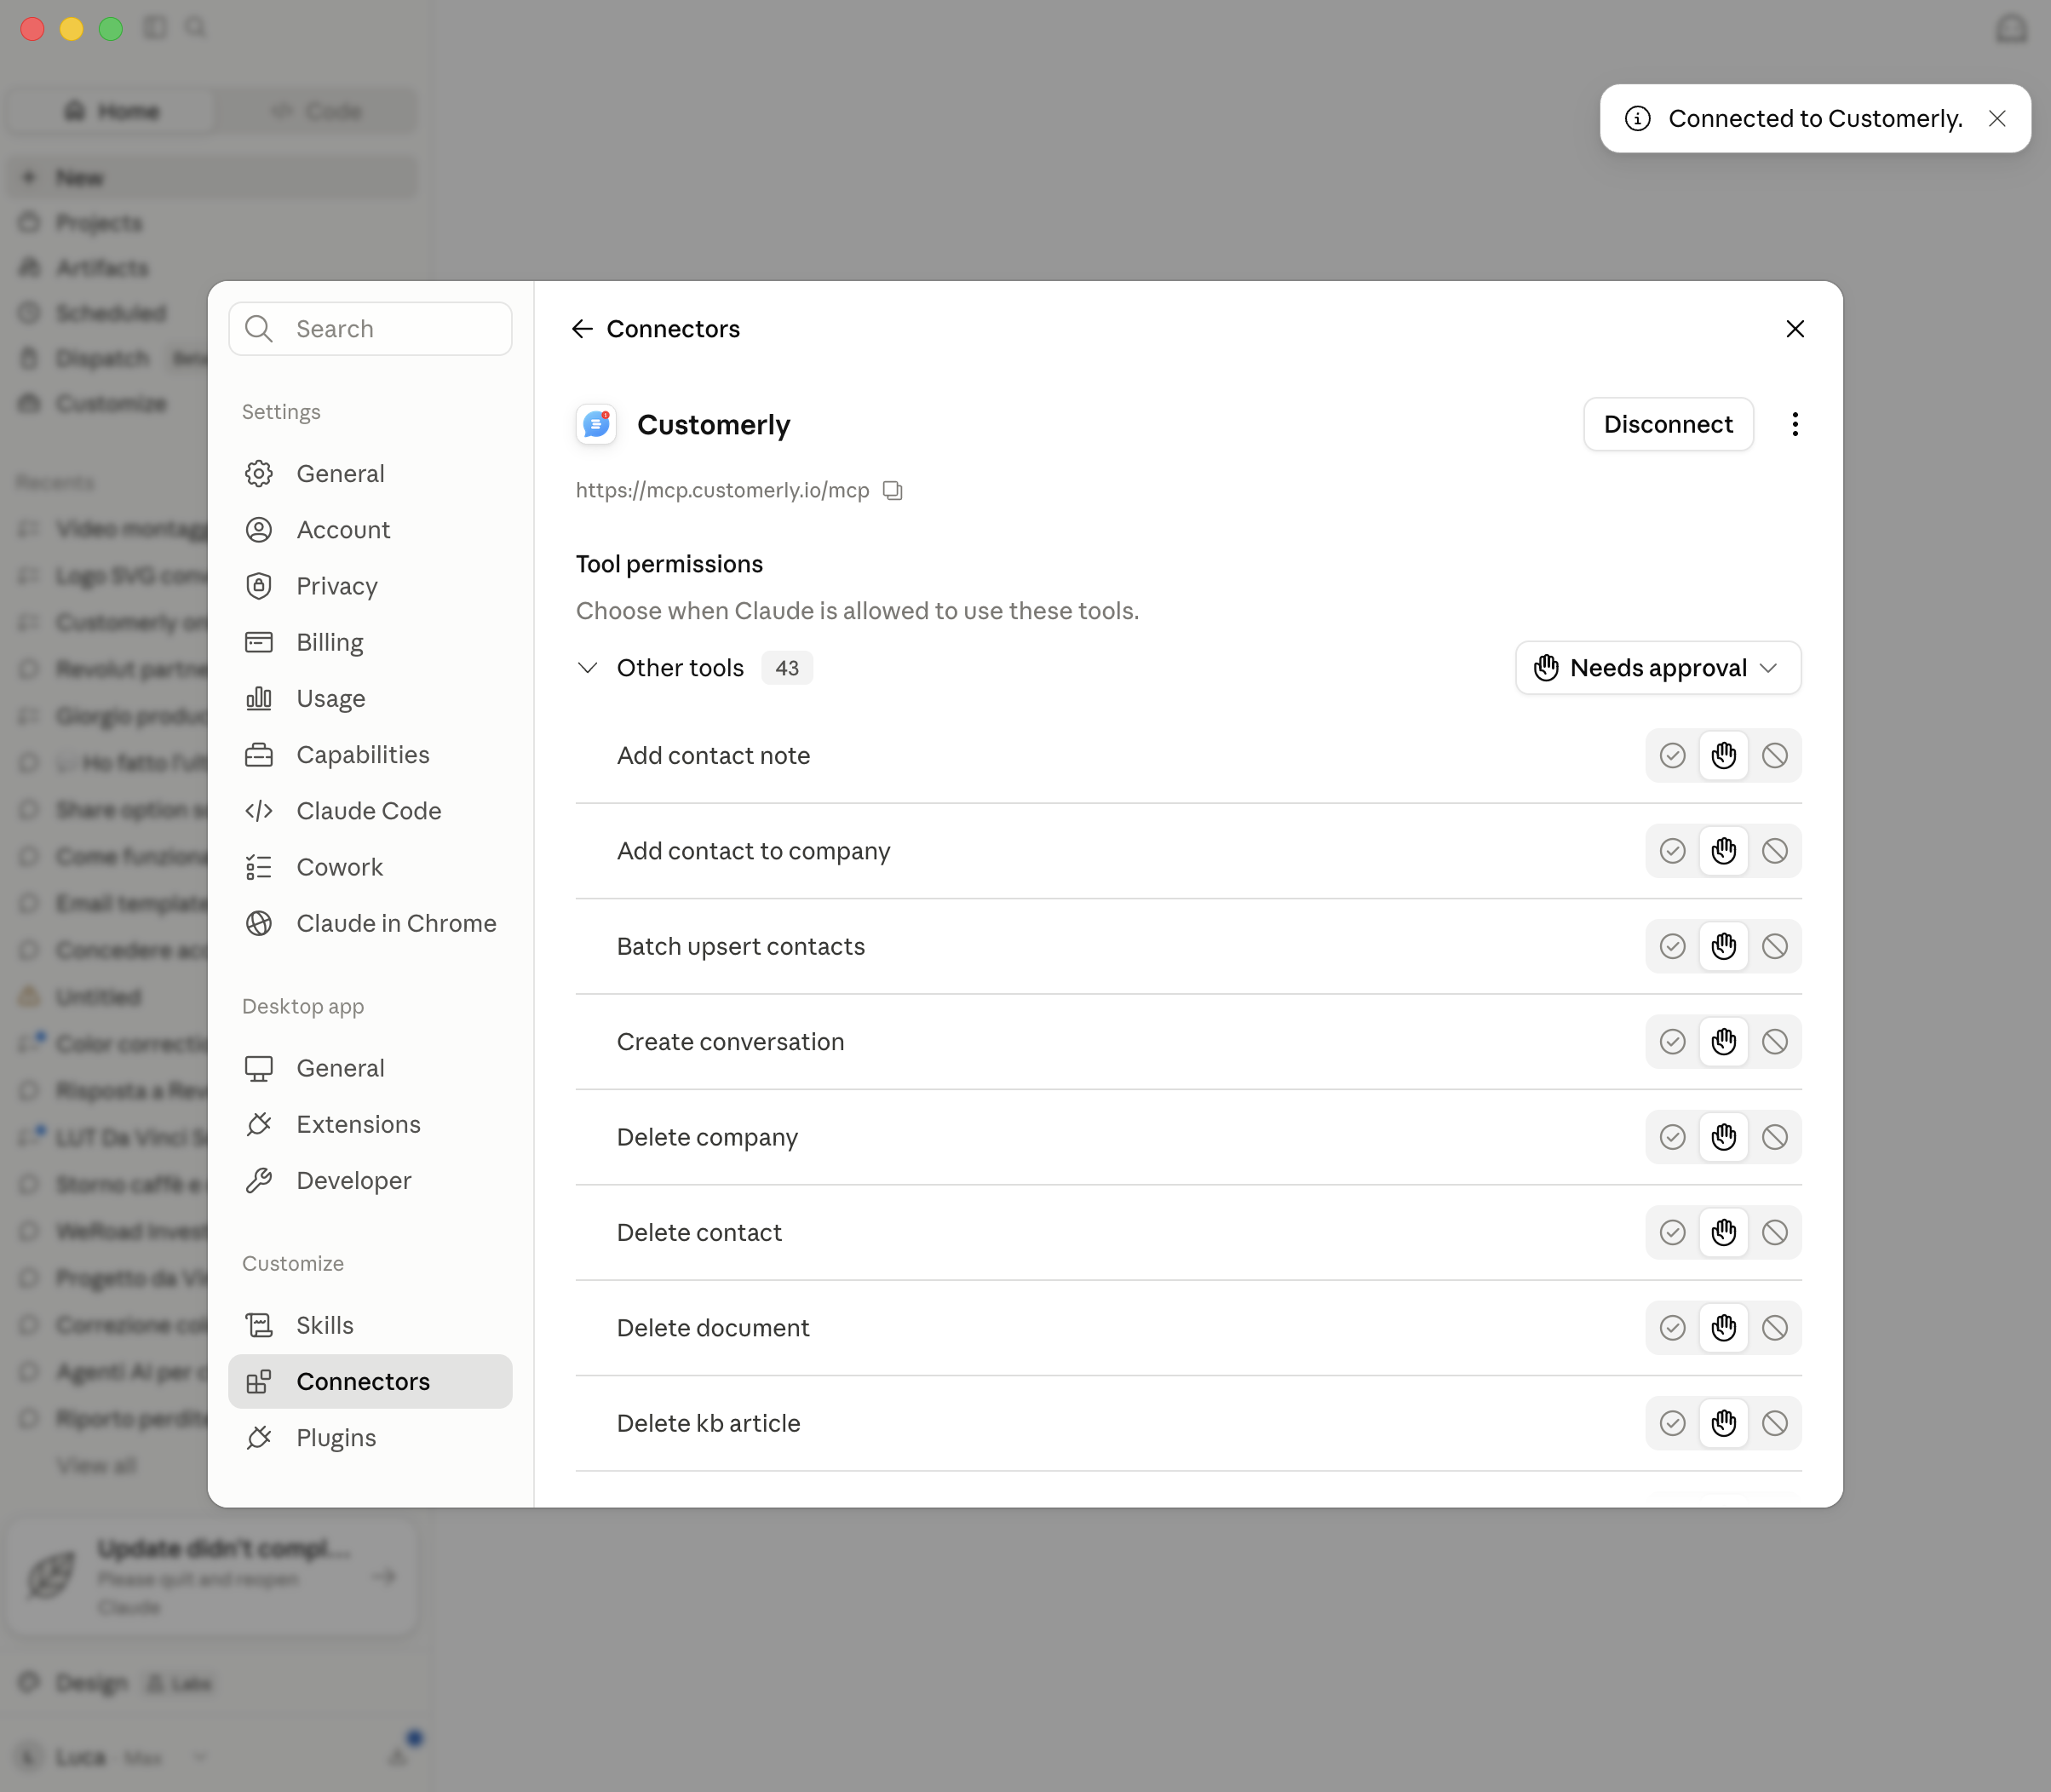
Back in Claude you'll see "Connected to Customerly." and the connector now lists the available tools.
Under Tool permissions, decide when Claude may run each tool:
Always allow — runs without asking
Needs approval — asks you before every run
Never allow — the tool is disabled
Destructive tools (Delete contact, Delete company, Delete kb article…) default to Needs approval. We strongly recommend leaving them that way, or setting them to Never allow outright.
Step 6 — Try it out
Open a new chat and ask something simple to confirm everything works:
Using Customerly, list my 5 most recent conversations.
Claude will call the Customerly tool, ask for approval if required, and return the results.
Managing or removing the connection
Change permissions: adjust tool approvals any time from Settings → Connectors → Customerly.
Change resource scopes: disconnect and reconnect, then pick different levels on the Authorize screen.
Disconnect: click Disconnect on the connector page in Claude. You can also revoke access from your Customerly workspace settings at any time.
Troubleshooting
"Connection issue — You are not connected to Customerly yet."
This is normal before you authorise. Click Connect and complete the browser flow. If it persists, check the URL is exactly https://mcp.customerly.io/mcp with no trailing slash.
The authorisation window opens but nothing happens.
Make sure you're logged into Customerly in that browser, and that pop-ups aren't blocked.
Claude says it can't find a tool.
The tool is probably set to Never allow, or the matching resource was left at No access during authorisation. Check both.
I don't see "Add custom connector".
Custom connectors require a paid Claude plan. On Team and Enterprise plans, an owner or admin may also need to enable them for the organisation.
Still stuck? Start a conversation with us from the messenger — we're happy to help.