Views let you save a custom, filtered slice of your Inbox so you don't have to rebuild the same search every time. Once created, a View appears in your left sidebar and can be reused with one click — by you alone, or by your whole team.
This guide covers how to create a View, who can manage it, how the filters work, and a few ready-to-use examples.
1. Creating a View
Open the Inbox.
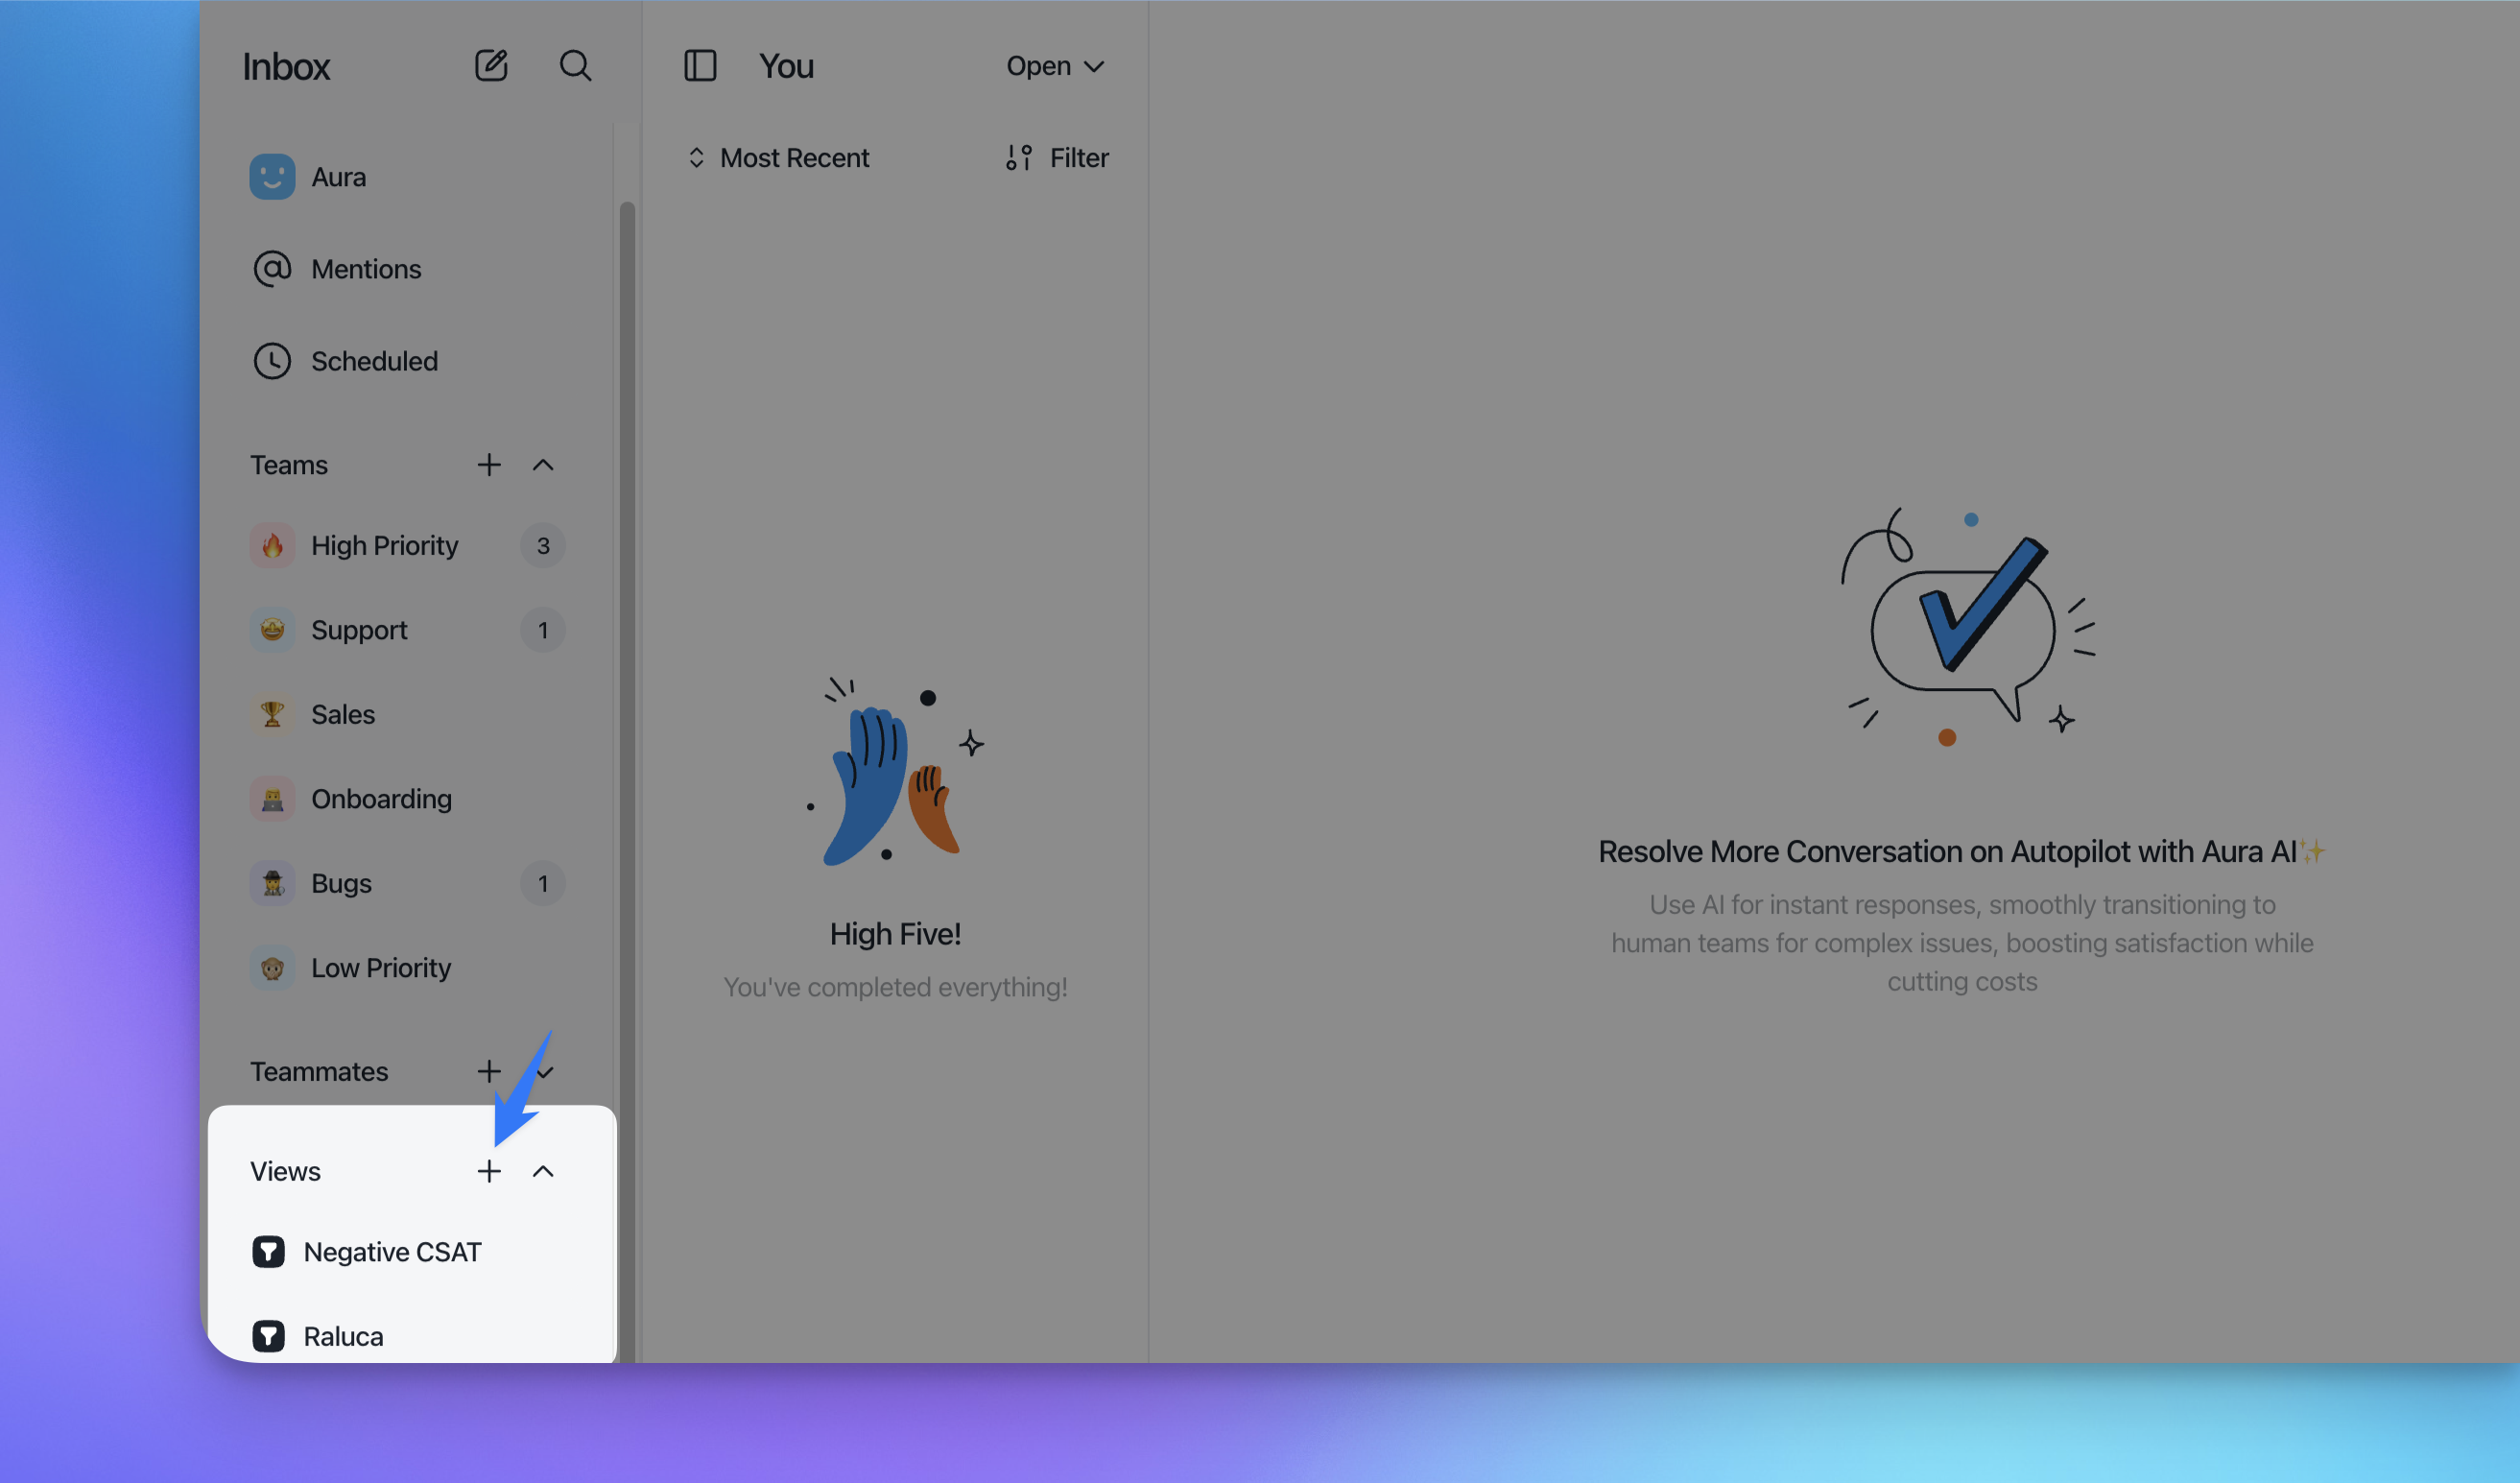
In the left sidebar, find the Views section.
Click the + icon next to "Views" (it shows as "Create View" on hover).
This opens the Edit View panel, where you'll configure the name, visibility, and filters (see below).
Click Save.
Your new View will now appear in the list underneath "Views," alongside any others you've created or that have been shared with you.
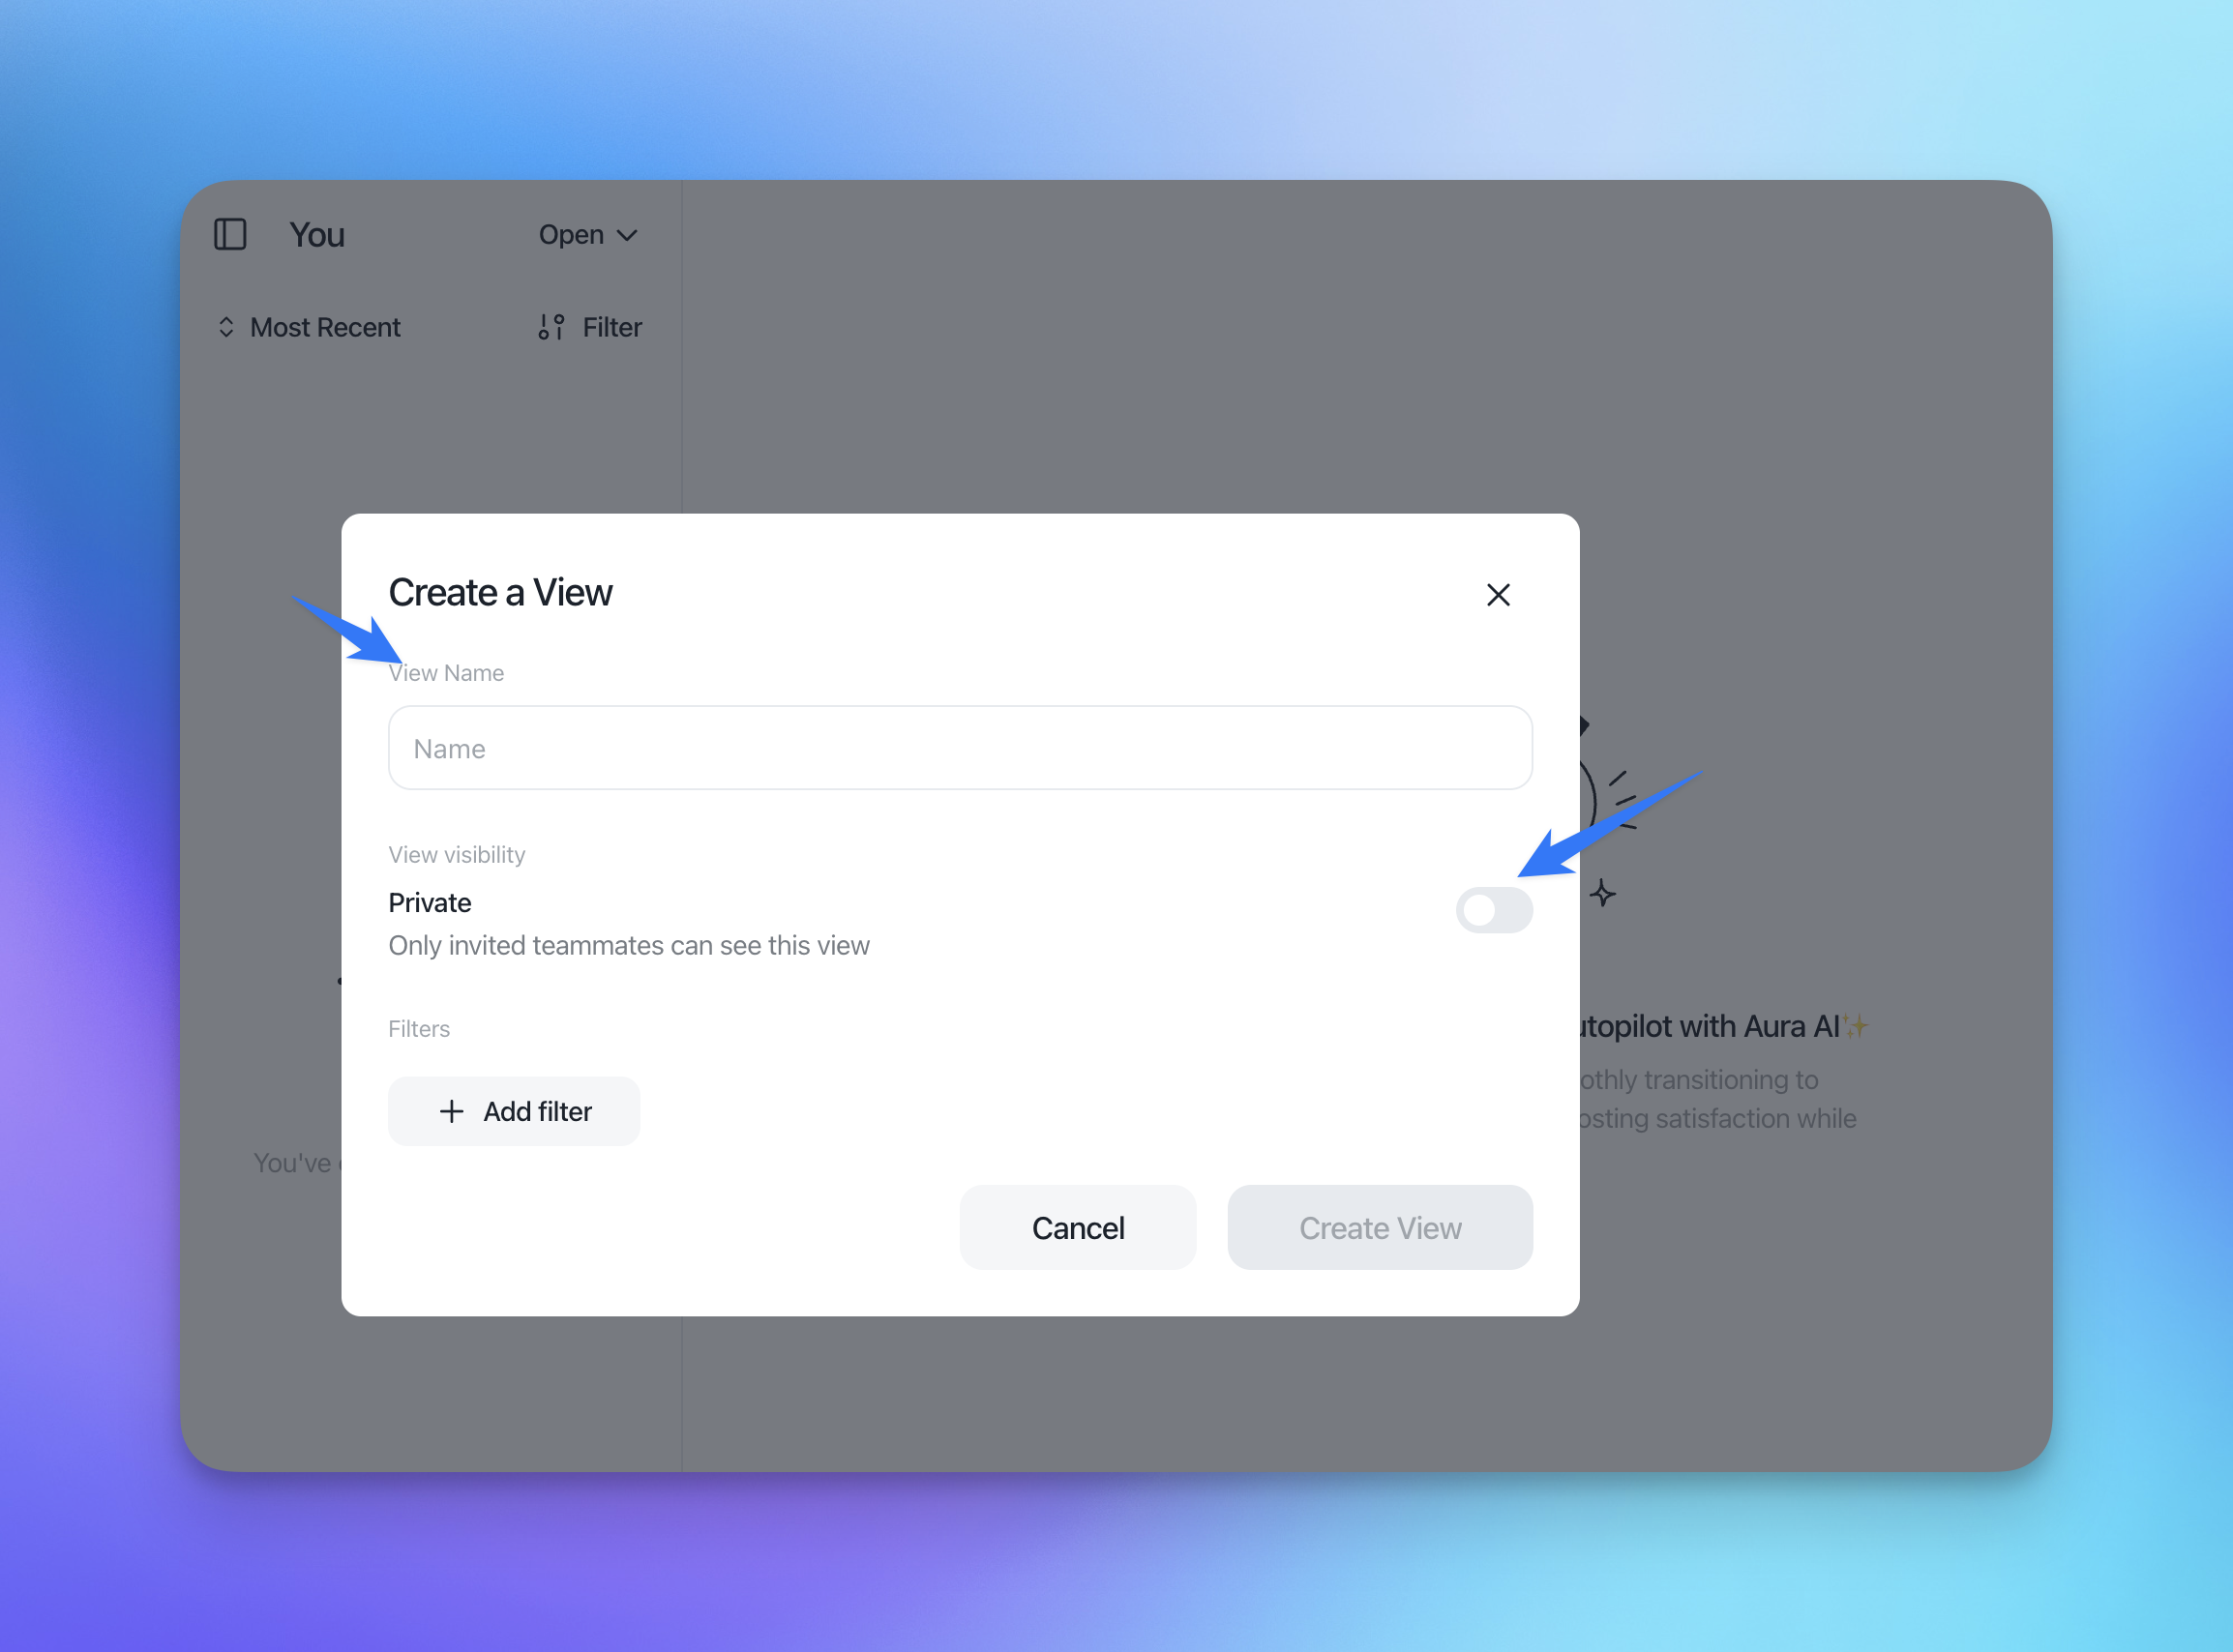
2. Naming and Visibility
Inside the Edit View panel:
View Name — give it a clear, descriptive name. Since Views are shared with colleagues (if made public), avoid vague names like "test" — favor something like "Closed – Team Support – Last 24h."
View visibility — toggle between:
Private: only you can see and use this View. This is the default.
Shared/Public: any invited teammate can see and use this View. Useful for team-wide reporting or recurring checks (e.g., a "Negative CSAT" view everyone should monitor).
3. Who Can Edit or Delete a View
Not everyone can modify every View:
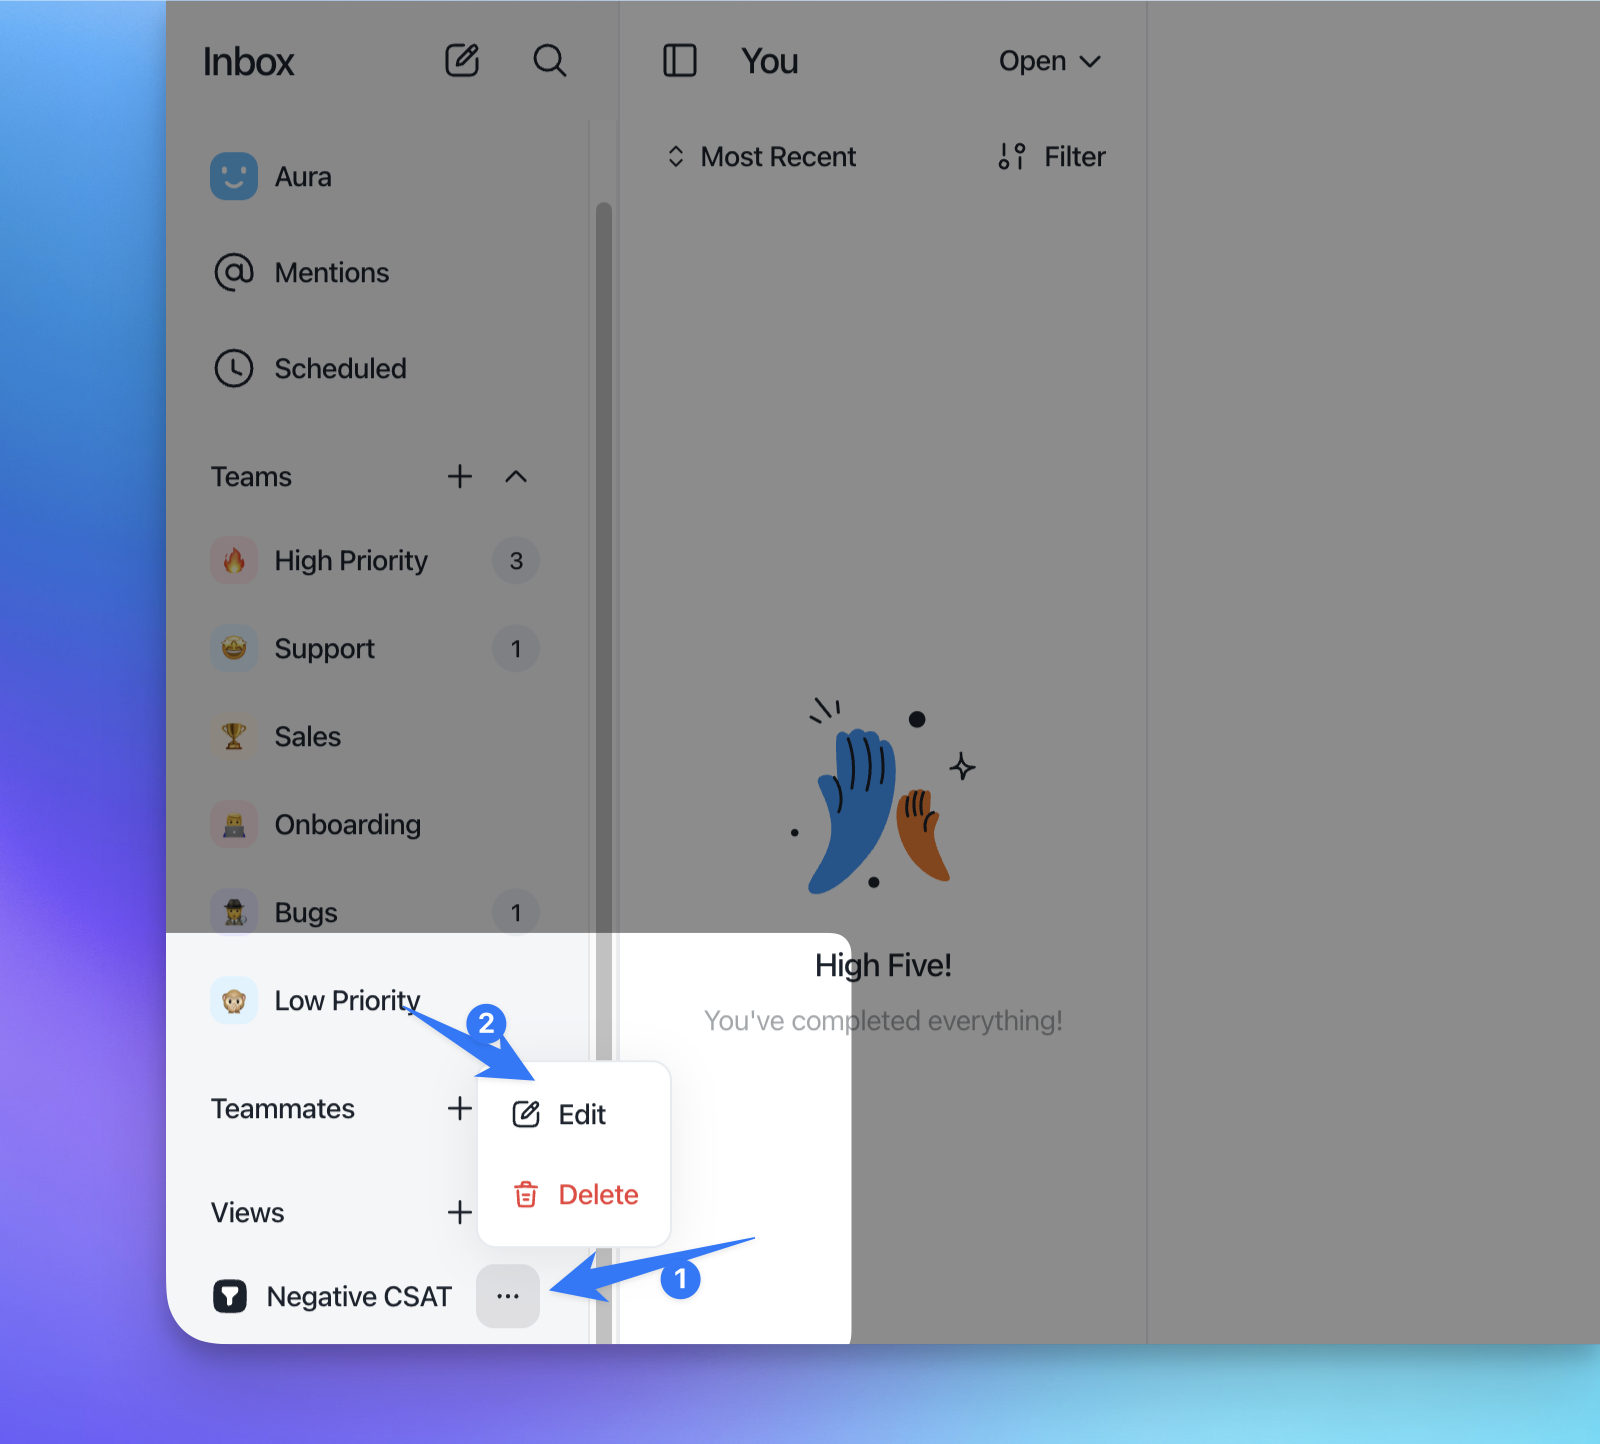
Only the creator of the View and Project Owners can edit or delete it.
Everyone else who has access to a shared View can use it (click it, see its results) but won't have edit/delete rights.
To edit or delete a View you own (or if you're a Project Owner), click the three dots (⋯) next to the View name in the sidebar, then choose Edit or Delete.
This matters for team hygiene: if you're setting up shared Views for the team, make sure they're built by someone who'll be responsible for maintaining them (or by a Project Owner), since regular teammates can't tweak a broken filter on their own.
4. Building Filters
Inside the Edit View panel, click Add filter to build your conditions. Filters are combined with AND logic — each additional filter narrows the results further.
There are two families of filters available:
A. Conversation-level filters
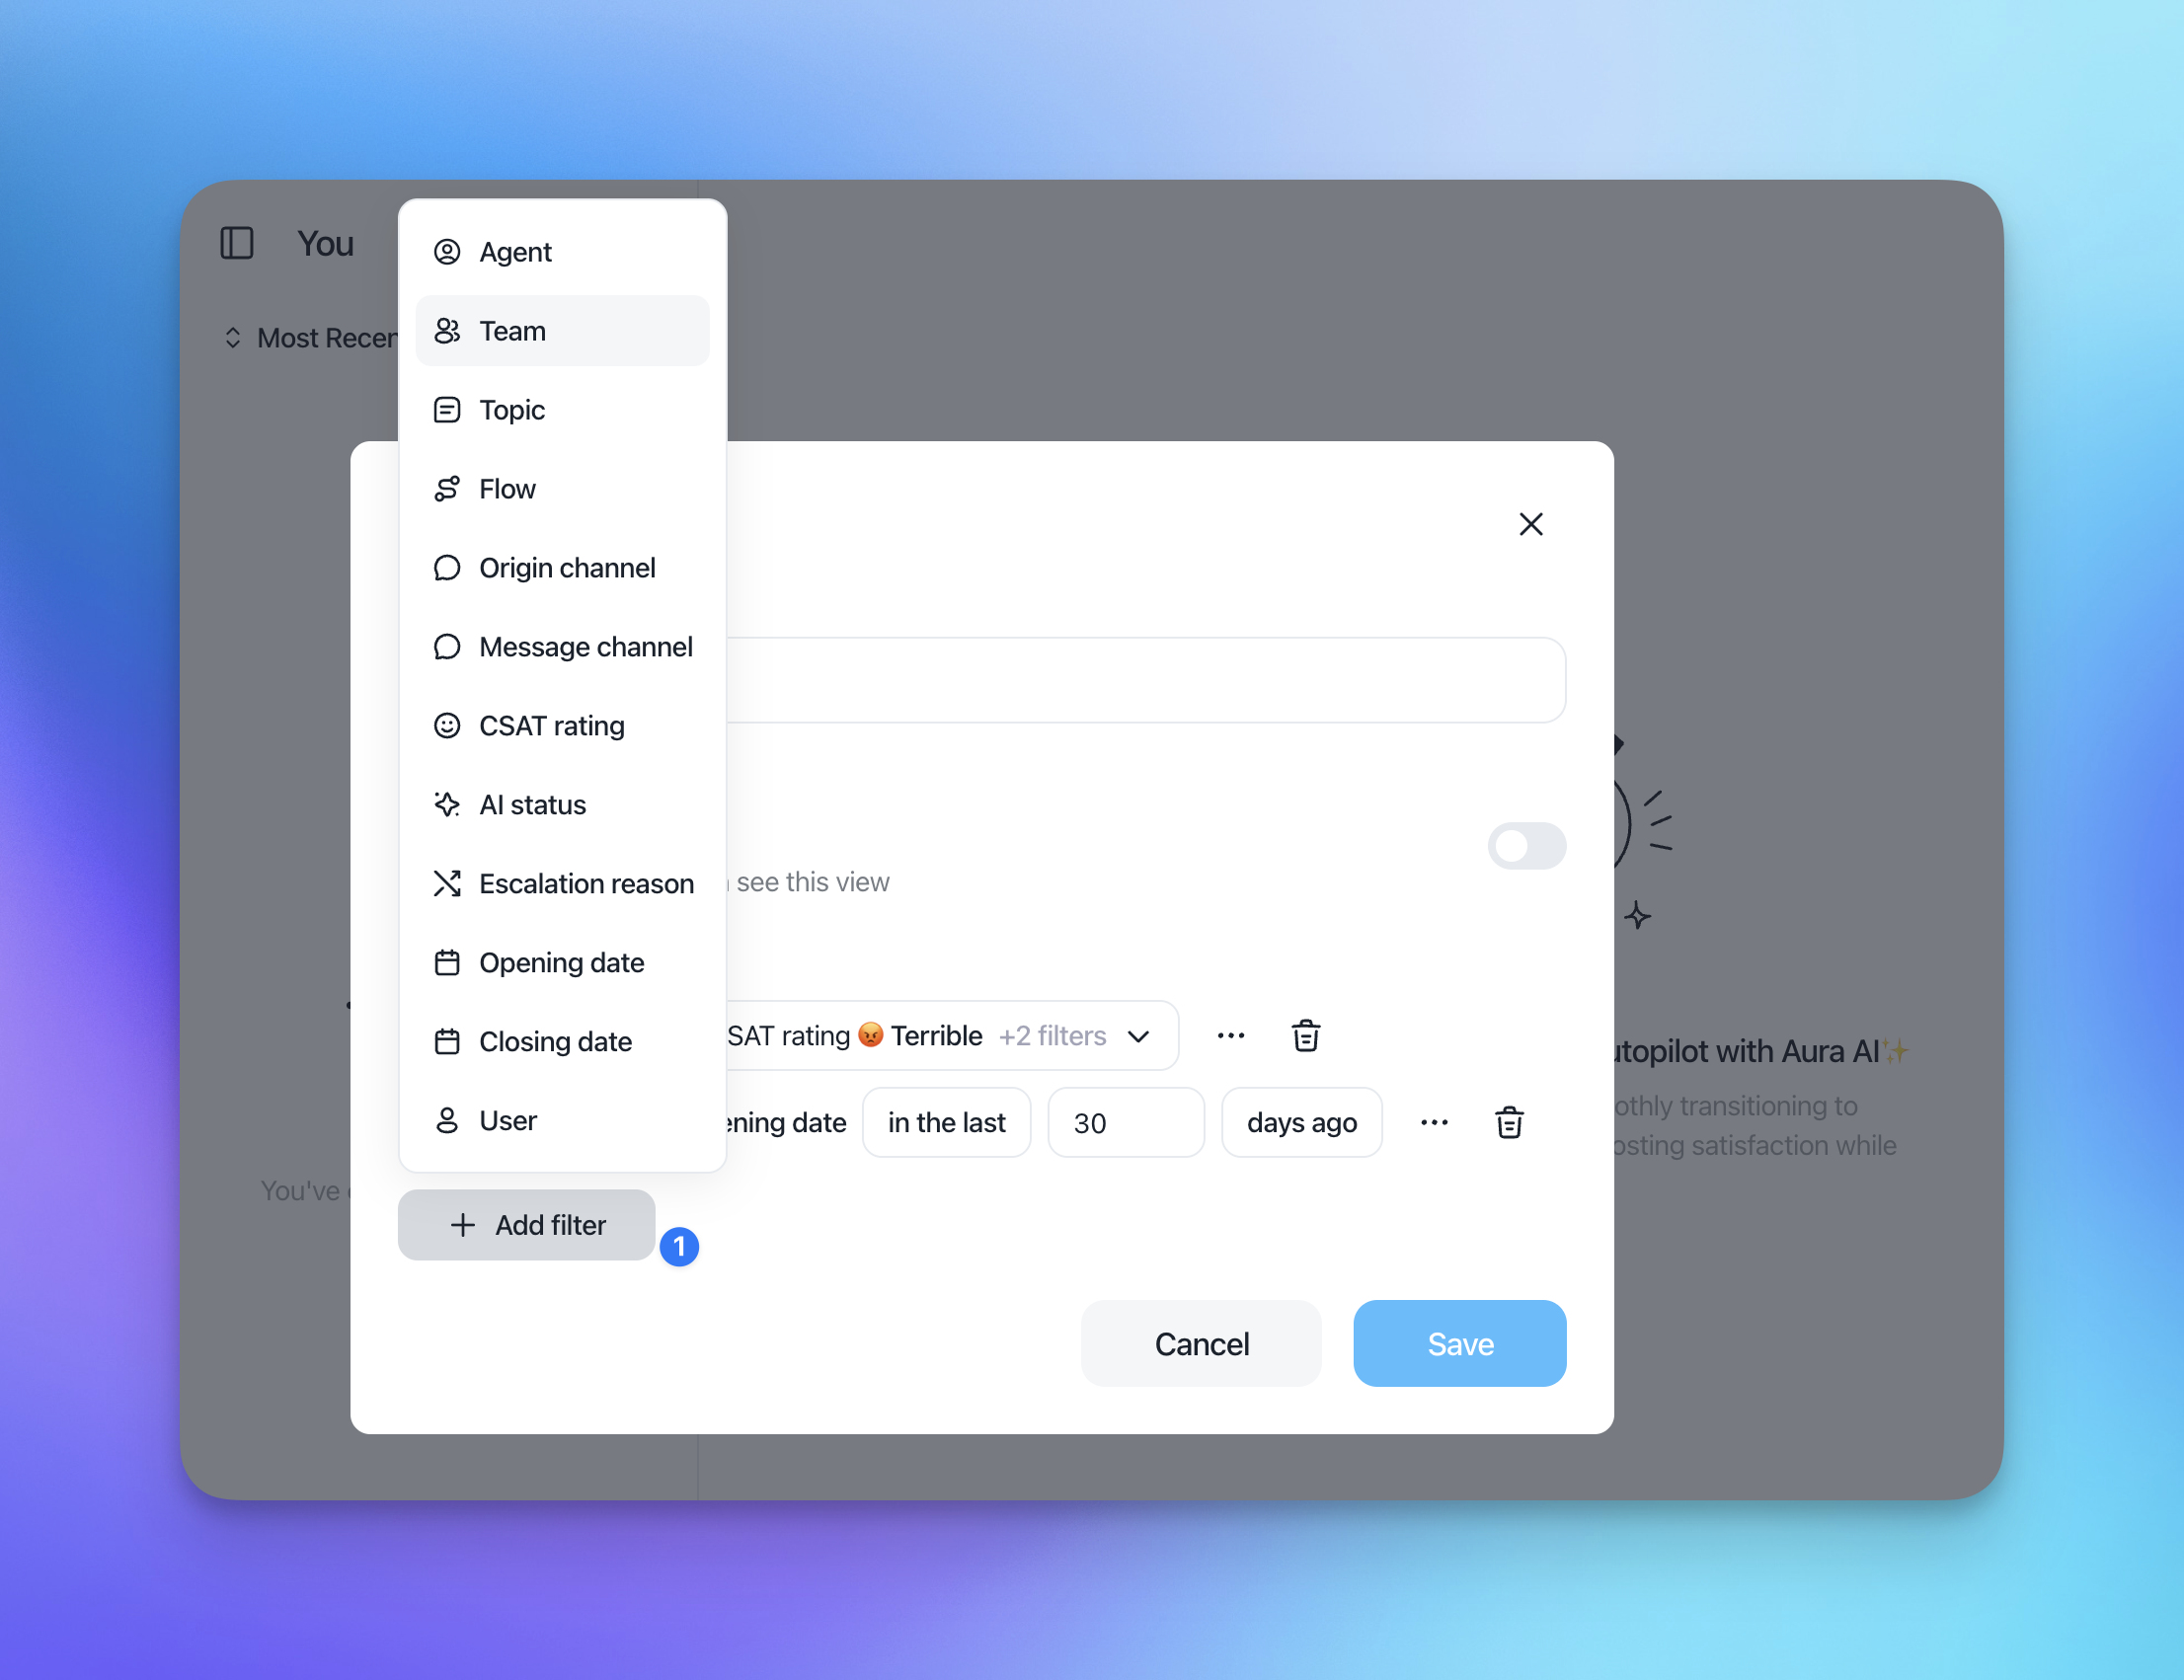
These describe attributes of the conversation itself:
Agent — the teammate assigned to (or who handled) the conversation
Team — the team the conversation was routed to
Topic — the topic/category tagged on the conversation
Flow — which automation/flow touched the conversation
Origin channel — where the conversation started (e.g., chat, email, WhatsApp)
Message channel — the channel messages are being exchanged on
CSAT rating — the customer satisfaction score left on the conversation
AI status — whether/how Aura (AI) handled the conversation
Escalation reason — why a conversation was escalated (e.g., from AI to human)
Opening date — when the conversation was opened
Closing date — when the conversation was closed
User — the contact/customer tied to the conversation
B. User-level filters
These let you filter by attributes of the contact, not the conversation:
Property — any custom or default user property (e.g., Email, Company name)
Event — an event the user has triggered
Tag — tags applied to the user
List — list membership
Campaign — campaign association
Company — the company the user belongs to
Each filter row lets you pick an operator (e.g., "is," "is not," "in the last") and a value. Use the ⋯ menu on a filter row for additional options, and the trash icon to remove a filter.
Tip: date filters like "Closing date" support relative ranges (e.g., "in the last 1 days ago"), which makes a View stay useful day after day instead of pointing at a fixed date.
5. Views vs. the Status Filter (Open / Snoozed / Closed)
This is a common point of confusion, so it's worth calling out explicitly: the Open / Snoozed / Closed toggle at the top of the Inbox is separate from the View's own filters.
A View's filters (Agent, Team, dates, etc.) define which conversations qualify. The status toggle at the top of the Inbox then controls which state of those conversations you're currently looking at.
So to see, for example, conversations closed by a specific agent in the last day, you don't need a "status" filter inside the View itself — instead:
Build the View with the Agent (or Team) filter + a Closing date filter ("in the last 1 day").
Open the View, then use the Closed toggle at the top of the Inbox to make sure you're looking at closed conversations specifically (as opposed to open or snoozed ones matching the same filters).
This two-layer system (View filters + status toggle) is what lets one View answer several slightly different questions depending on which status tab you click.
6. Example Views
Example 1 — Closed tickets by Agent or Team
Goal: See how many conversations a specific agent or team closed in a given period (e.g., for daily reporting, without counting manually).
Filter:
Agent is [Agent Name](orTeam is [Team Name])Filter:
Closing date — in the last — 1 day(s) agoAfter opening the View, click the Closed tab at the top of the Inbox to see only closed conversations matching these filters.
This is the exact use case discussed internally: instead of manually counting closed conversations per agent, this View surfaces the number directly.
Example 2 — Negative CSAT
Goal: Monitor unhappy customers to follow up or spot recurring service issues.
Filter:
CSAT rating is [1-2](or whatever your platform's negative range is)Optional:
Closing date — in the last — 7 days agoto keep it focused on recent feedbackVisibility: Shared, so the whole support team (and management) can keep an eye on it.
Example 3 — Client-related View filtered by time range
Goal: Track all activity tied to a specific client/account within a rolling window — useful for account health checks or QBRs.
Filter:
Company is [Client Name](User-level filter)Filter:
Opening date — in the last — 30 days agoOptional: add
TopicorEscalation reasonfilters to narrow further (e.g., only escalated conversations for that client)Visibility: Private or Shared, depending on whether it's for personal account management or a broader team review.